
Notes:
| Warning—Potential Damage: Do not touch cables or the printer in the area shown while actively sending or receiving a fax. |
From the home screen, touch Settings > Device > Preferences > Run Initial Setup.
Turn off the printer, wait for about 10 seconds, and then turn it back on.
From the Before You Begin screen, select Change the Settings and Continue with the Wizard.
From the Fax/Email Server Setup screen, enter the needed information.
Finish the setup.
 | CAUTION—SHOCK HAZARD: To avoid the risk of electrical shock, do not set up this product or make any electrical or cabling connections, such as the power cord, fax feature, or telephone, during a lightning storm. |
| | CAUTION—SHOCK HAZARD: To avoid the risk of electrical shock, do not use the fax feature during a lightning storm. |
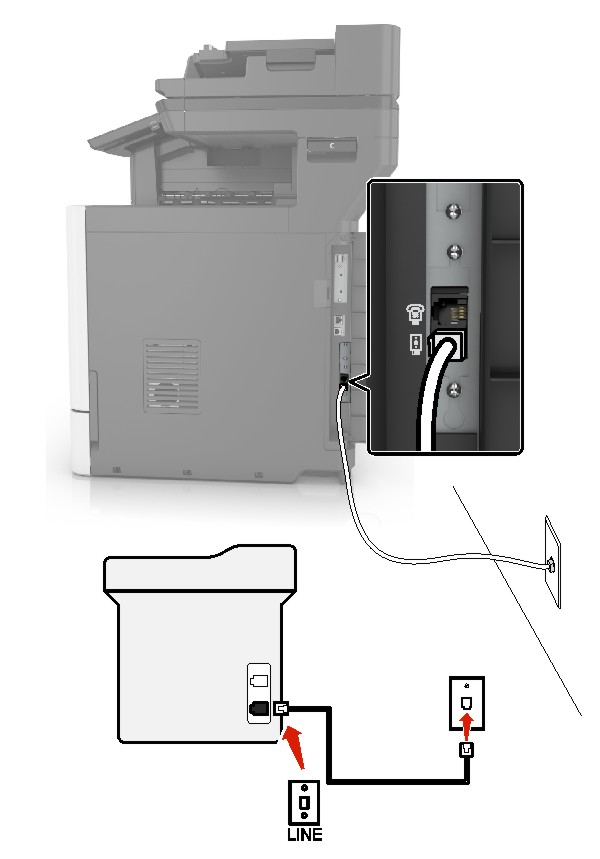
Connect one end of the telephone cable to the line port of the printer.
Connect the other end of the telephone cable to an active analog wall jack.
Notes:
| Note: If you subscribe to a distinctive ring service provided by your telephone company, then make sure that you set the correct ring pattern for the printer. Otherwise, the printer does not receive faxes even if you have set it to receive faxes automatically. |
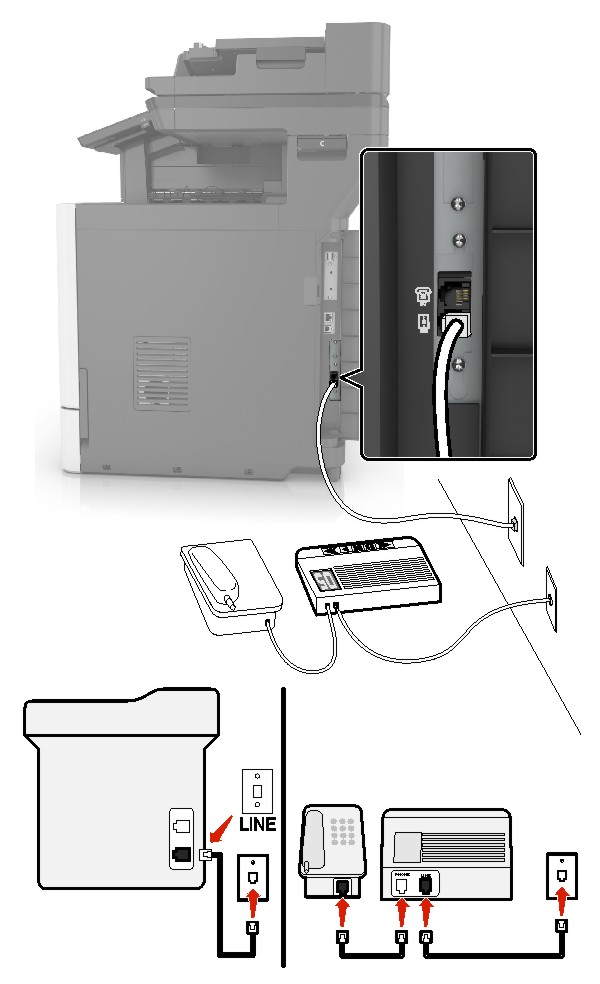
Connected to the same telephone wall jack
Connect one end of the telephone cable to the line port of the printer.
Connect the other end of the telephone cable to an active analog wall jack.
Connect the answering machine to the telephone port of the printer.
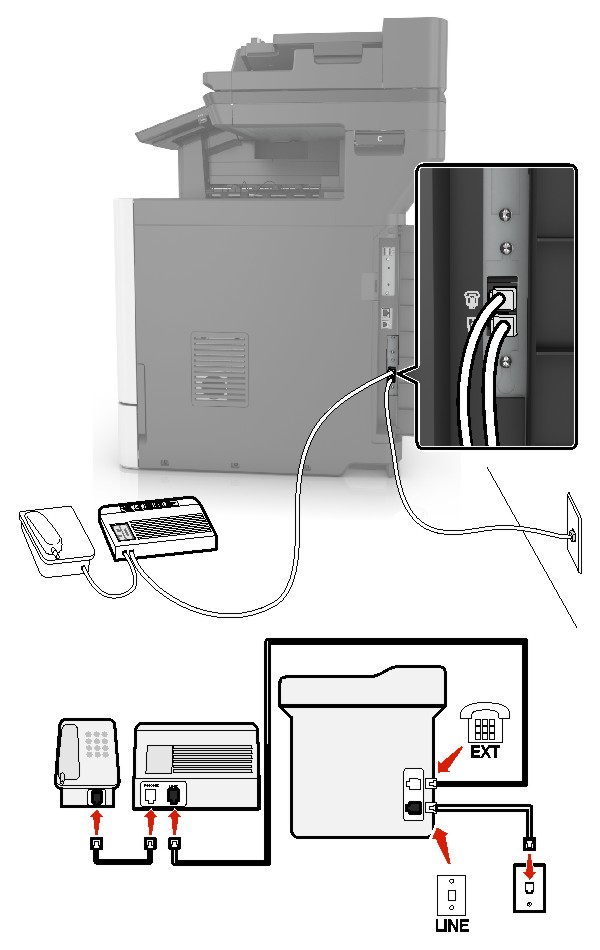
Connected to different wall jacks
Connect one end of the telephone cable to the line port of the printer.
Connect the other end of the telephone cable to an active analog wall jack.
Notes:
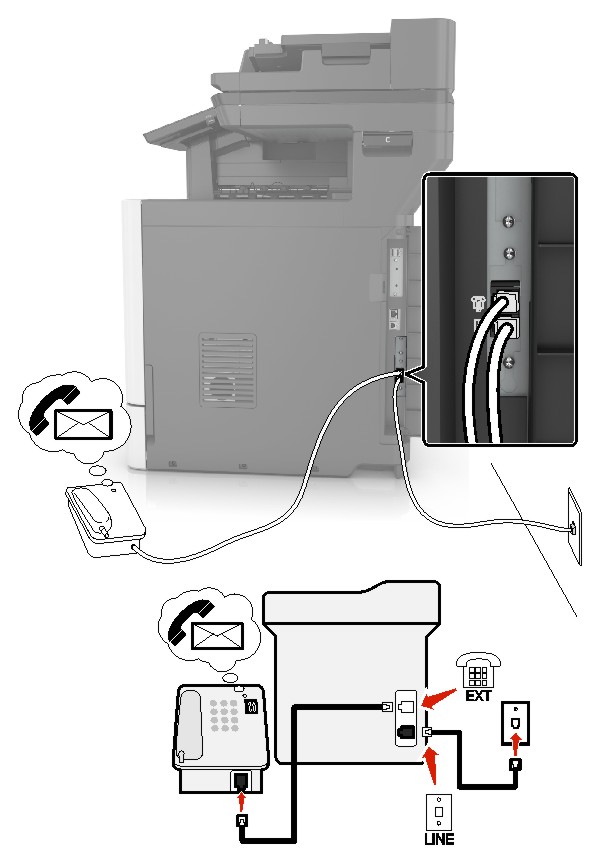
Connect one end of the telephone cable to the line port of the printer.
Connect the other end of the telephone cable to an active analog wall jack.
Connect the telephone to the telephone port of the printer.
Notes:
| | CAUTION—SHOCK HAZARD: To avoid the risk of electrical shock, do not set up this product or make any electrical or cabling connections, such as the power cord, fax feature, or telephone, during a lightning storm. |
| | CAUTION—SHOCK HAZARD: To avoid the risk of electrical shock, do not use the fax feature during a lightning storm. |

Digital subscriber line (DSL) splits your regular telephone line into two channels: voice and Internet. Telephone and fax signals travel through the voice channel, and internet signals pass through the other channel.
Install a DSL filter to minimize interference between the two channels and ensure a quality connection.
| Note: Contact your DSL provider to obtain a DSL filter. |
Connect the line port of the DSL filter to the wall jack.
Connect one end of the telephone cable to the line port of the printer. Connect the other end to the phone port on the DSL filter.
To connect a telephone to the printer, remove any installed adapter plug from the telephone port of the printer, and then connect the telephone.
| | CAUTION—SHOCK HAZARD: To avoid the risk of electrical shock, do not set up this product or make any electrical or cabling connections, such as the power cord, fax feature, or telephone, during a lightning storm. |
| | CAUTION—SHOCK HAZARD: To avoid the risk of electrical shock, do not use the fax feature during a lightning storm. |

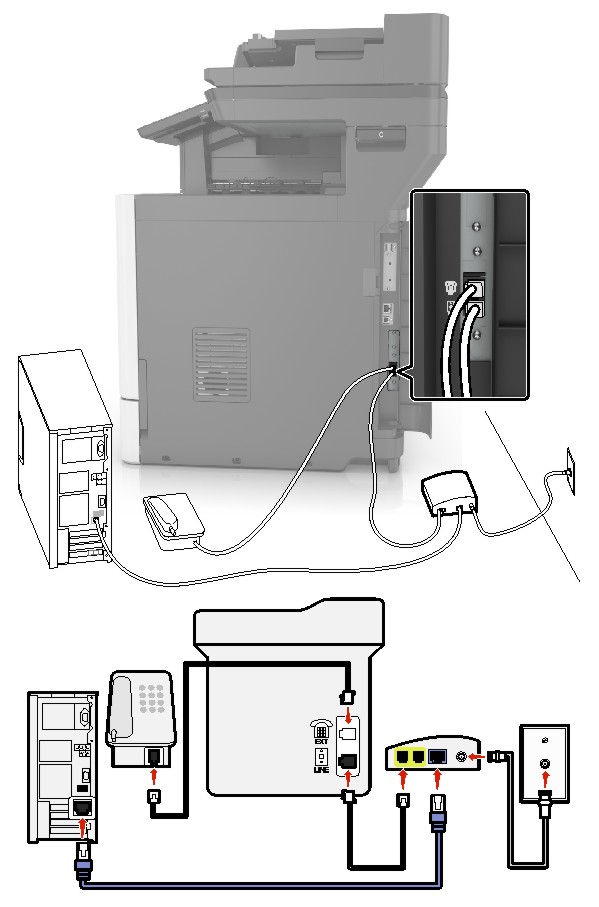
Connect one end of the telephone cable to the line port of the printer.
Connect the other end of the cable to the port labeled Phone Line 1 or Phone Port on the VoIP adapter.
| Note: The port labeled Phone Line 2 or Fax Port is not always active. VoIP providers may charge extra cost for the activation of the second phone port. |
Connect the telephone to the telephone port of the printer.
Notes:
| | CAUTION—SHOCK HAZARD: To avoid the risk of electrical shock, do not set up this product or make any electrical or cabling connections, such as the power cord, fax feature, or telephone, during a lightning storm. |
| | CAUTION—SHOCK HAZARD: To avoid the risk of electrical shock, do not use the fax feature during a lightning storm. |
Connect one end of the telephone cable to the line port of the printer.
Connect the other end of the cable to the port labeled Phone Line 1 or Phone Port on the cable modem.
Connect your analog telephone to the telephone port of the printer.
| Note: To check if the telephone port on the cable modem is active, connect an analog telephone, and then listen for a dial tone. |

Connect one end of the telephone cable to the line port of the printer.
Connect the other end of the telephone cable to an active analog telephone wall jack.
Connect your analog telephone to the telephone port of the printer.
| | CAUTION—SHOCK HAZARD: To avoid the risk of electrical shock, do not set up this product or make any electrical or cabling connections, such as the power cord, fax feature, or telephone, during a lightning storm. |
| | CAUTION—SHOCK HAZARD: To avoid the risk of electrical shock, do not use the fax feature during a lightning storm. |
The standard wall jack adopted by most countries or regions is RJ11. If the wall jack or equipment in your facility is not compatible with this type of connection, then use a telephone adapter. An adapter for your country or region may not come with your printer, and you may need to purchase it separately.
There may be an adapter plug installed in the telephone port of the printer. Do not remove the adapter plug from the telephone port of the printer if you are connecting to a serial or cascaded telephone system.

Part name | Part number |
|---|---|
Lexmark adapter plug | 40X8519 |

Connect one end of the telephone cable to the line port of the printer.
Connect the other end of the cable to the RJ11 adapter, and then connect the adapter to the wall jack.
If you want to connect another device with a non-RJ11 connector to the same wall jack, then connect it directly to the telephone adapter.
The German wall jack has two kinds of ports. The N ports are for fax machines, modems, and answering machines. The F port is for telephones. Connect the printer to any of the N ports.
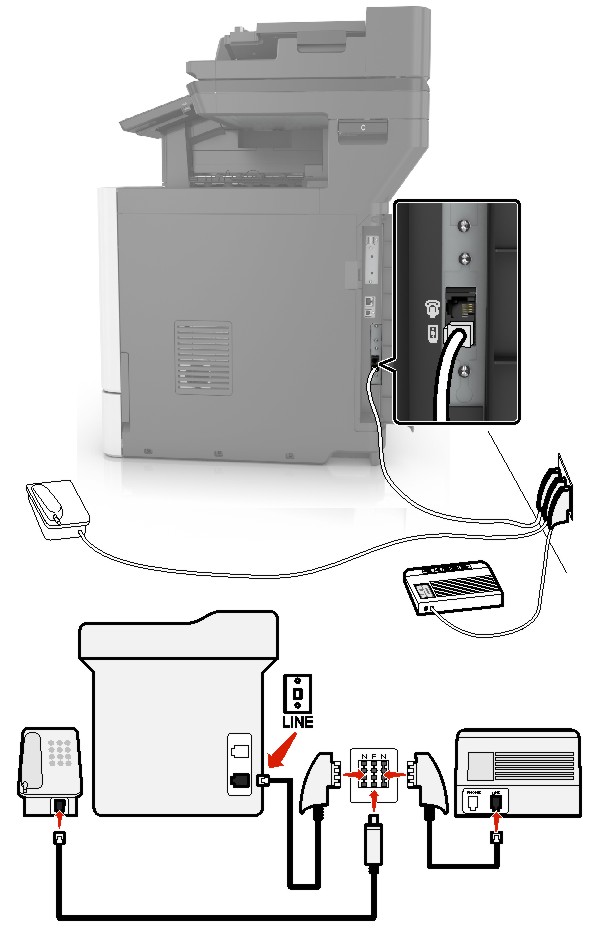
Connect one end of the telephone cable to the line port of the printer.
Connect the other end of the telephone cable to the RJ11 adapter, and then connect the adapter to an N port.
If you want to connect a telephone and answering machine to the same wall jack, then connect the devices as shown.
A distinctive ring service lets you have multiple telephone numbers on one telephone line. Each telephone number is assigned a different ring pattern.
From the home screen, touch Settings > Fax > Analog Fax Setup > Fax Receive Settings > Admin Controls > Answer On.
Select the ring pattern.
Apply the changes.