The display shows:
Printer status
Messages
Menus
Press | To | |
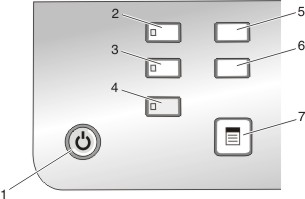
1 |
| |
2 | Access the copy default screen and make copies. Note: The mode is selected when the button light is on. | |
3 | Access the scan default screen and scan documents. Note: The mode is selected when the button light is on. | |
4 | Access the photo default screen and print photos. Note: The mode is selected when the button light is on. | |
5 | Access the settings default screen and change printer settings. Note: Other button lights are off when this button is selected. | |
6 | Adjust the brightness of a copy or photo. | |
7 | Display the Copy, Scan, or Photo Card menu, depending on which mode is selected. |
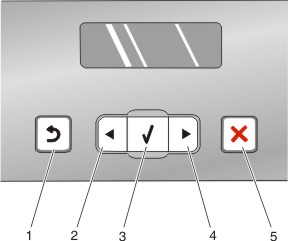
Press | To | |
1 |
| |
2 |
| |
3 |
| |
4 |
| |
5 |
|
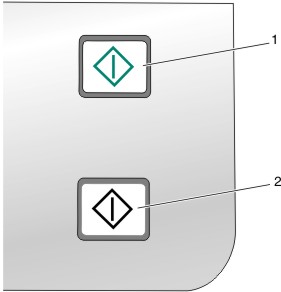
Press | To | |
1 | Start a color copy, scan, or photo print job, depending on which mode is selected. | |
2 | Start a black-and-white copy, scan or photo print job, depending on which mode is selected. |


