Install the print cartridges

  1. If you are installing new cartridges, remove the sticker and transparent tape from the back and bottom of the cartridges.

    Warning:

    Do not touch or remove the gold contact area on the back and bottom of each print cartridge.

Note:

For a photo cartridge, remove the cartridge from the storage unit first.

  1. Open the cartridge carrier covers by pressing firmly down on the carrier levers.

  2. Insert the black or photo cartridge in the left carrier. Insert the color cartridge in the right carrier.

Depending on the part numbers you use, the color of the cartridge tops may vary.

Note:

To extend the life of your color cartridge and improve printing speed, install a black or photo cartridge along with the color cartridge.

  1. Snap the cartridge carrier covers into place.

  2. Close the scanner unit.

    Note:

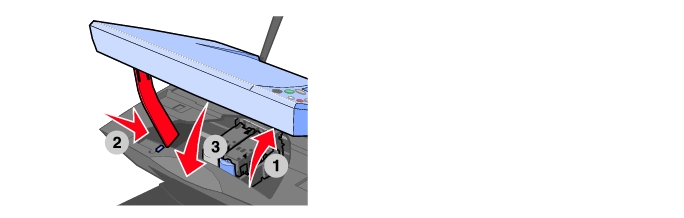
    The scanner unit must be closed to start a print job.

  3. Continue on to Specify cartridge settings in the All-In-One software.
Related topics

Print cartridges

Remove the print cartridges

Preserve the print cartridges

Back to Main Page