 Printing a document
Printing collated copies of your document
Printing more than one page on a sheet of paper
Printing an image as a multi-page poster
Printing last page first
Printing a banner
Printing repeating images
Printing a document
- Make sure you have paper loaded in the paper tray.
- With your document open, click File
 Print.
- To change the All-In-One settings, click Properties, Options, Setup, or Preferences (depending on the program or operating system), and then make changes to the settings.
- Click OK.
- From the Print dialog box, click OK or Print (depending on the program).
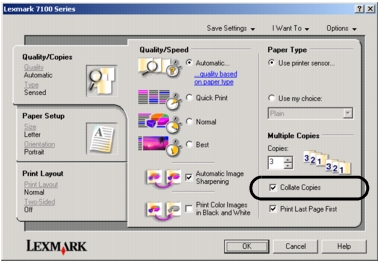
Printing collated copies of your document
When your All-In-One is attached to your computer, you can print black and white or color collated copies. To print collated copies:
- Make sure you have paper loaded in the paper tray.
- With your document open, click File Print.
- Click Properties, Options, Setup, or Preferences (depending on the program or operating system).
The Print Properties screen displays.
- From the Quality/Copies tab, select the number of copies to print.
- Select the Collate Copies check box.
- Click OK.
- Click OK or Print.
Printing more than one page on a sheet of paper
- Make sure you have paper loaded in the paper tray. For help, see Loading plain paper into the paper tray.
- With your document open, click File Print.
- Click Properties, Options, Setup, or Preferences (depending on the program or operating system).
The Print Properties screen displays along with the I Want To menu.
- From the Print Layout tab, select N-up.
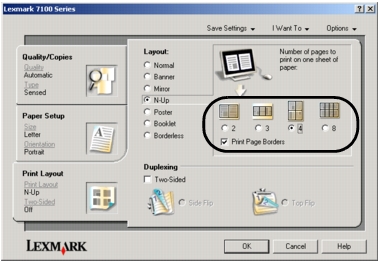
- Select the number of pages to print on each page.
- Select the Print Page Borders check box, if desired.
- Click OK.
- Click OK or Print.
Printing an image as a multi-page poster
- Make sure you have paper loaded in the paper tray. For help, see Loading plain paper into the paper tray.
- With your image open, click File Print.
- Click Properties, Options, Setup, or Preferences (depending on the program or operating system).
The Print Properties screen displays along with the I Want To menu.
- From the Print Layout tab, select Poster.
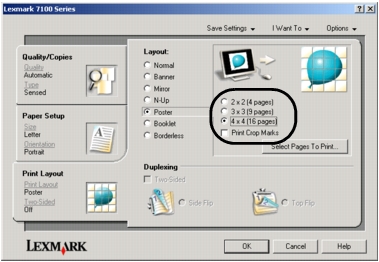
- Select the number of pages to print to create your poster (2 x 2, 3 x 3, or 4 x 4).
- Select Print Crop Marks, if desired.
- Click OK.
- Click OK or Print.
Printing last page first
- Make sure you have paper loaded in the paper tray. For help, see Loading plain paper into the paper tray.
- With your document open, click File Print.
- Click Properties, Options, Setup, or Preferences (depending on the program or operating system).
- From the Quality/Copies tab, select the Print Last Page First check box.
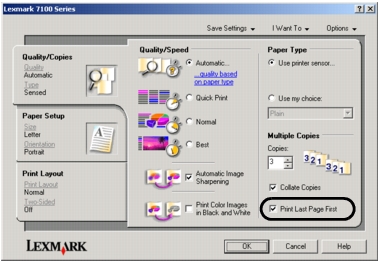
- Click OK.
- Click OK or Print.
Printing a banner
- Raise the paper exit tray.
- Remove all paper from the paper tray.
- Tear off only the number of pages needed for your banner (up to 20 sheets).
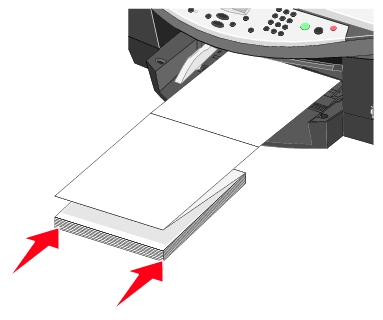
- Load only the first page of banner paper into the paper tray with the leading edge of the banner going into the printer.
- Adjust the paper guides.
- Lower the paper exit tray.
- With your document open, click File Print.
- Click Properties.
- From the Print Layout tab, select Banner.
- Select Letter Banner or A4 Banner from the Banner Paper Size dialog box.
Note: If you do not select the banner size, the banner paper will jam.
- Click OK.
- Click OK or Print.
Printing repeating images
You can print the same image multiple times, as few as two per page and as many as sixteen per page, on one sheet of paper:
- Make sure you have letter size or A4 paper loaded in the paper tray. For help, see Loading plain paper into the paper tray.
- Double-click the Lexmark Productivity Suite icon.
- Click Copy.
The Scanning & Copying page appears on your computer screen.
- From the Productivity Tools menu, click Repeat an image several times on one page.
- Follow the instructions on your screen, and then click Print Now.