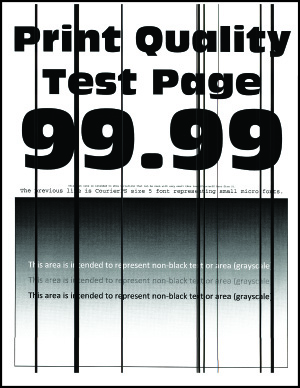
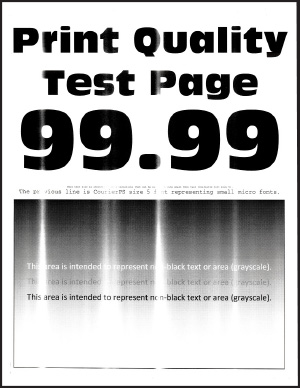
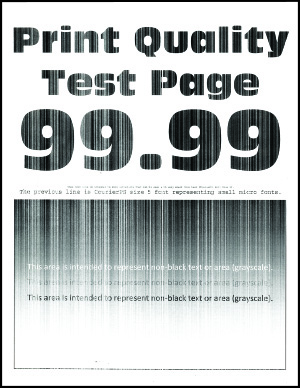
Printing problems

Print quality is poor

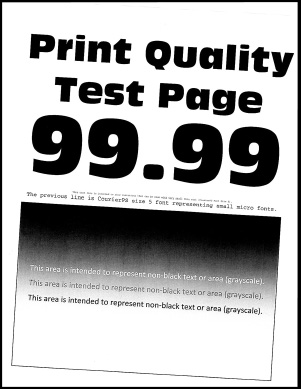
Blank or white pages

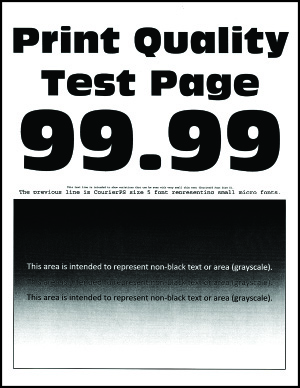
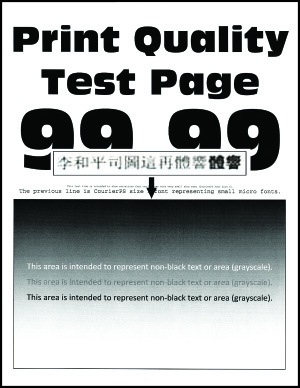
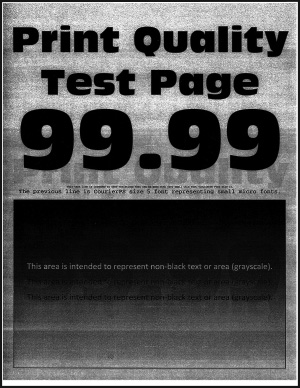
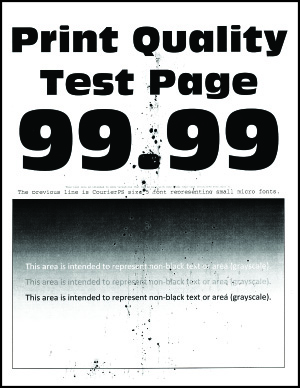
Note:  Before solving the problem, print the Print Quality Test Pages. From the control panel, navigate to Settings > Troubleshooting > Print Quality Test Pages . For non-touch-screen printer models, press the select button to navigate through the settings.

Action

Yes

No

Step 1

  1. Check if the printer is using a genuine and supported Lexmark toner cartridge.

    Note:  If the cartridge is not supported, then install a supported one.

  2. Print the document.


Is the printer printing blank or white pages?

Go to step 2.

The problem is solved.

Step 2

  1. Remove any packing material that is left on the imaging unit.

    1. Remove the toner cartridge, and then remove the imaging unit.

      Warning—Potential Damage:  Do not expose the imaging unit to direct light for more than 10 minutes. Extended exposure to light may cause print quality problems.

      Warning—Potential Damage:  Do not touch the photoconductor drum under the imaging unit. Doing so may affect the quality of future print jobs.

    2. Check the imaging unit for signs of damage, and replace if necessary.

      Note:  Make sure that the photoconductor drum contact is not bent or out of place.

    3. Firmly shake the imaging unit to redistribute the toner.

    4. Insert the imaging unit, and then insert the toner cartridge.

  2. Print the document.


Is the printer printing blank or white pages?

Go to step 3.

The problem is solved.

Step 3

Check the status of the toner cartridge, and replace if necessary.

  1. From the control panel, navigate to:

    Status/Supplies > Supplies

  2. Print the document.


Is the printer printing blank or white pages?

Contact customer support .

The problem is solved.


Dark print

Note:  Before solving the problem, print the Print Quality Test Pages. From the control panel, navigate to Settings > Troubleshooting > Print Quality Test Pages . For non-touch-screen printer models, press the select button to navigate through the settings.

Action

Yes

No

Step 1

  1. Check if the printer is using a genuine and supported Lexmark toner cartridge.

    Note:  If the cartridge is not supported, then install a supported one.

  2. Print the document.


Is the print dark?

Go to step 2.

The problem is solved.

Step 2

  1. Turn off the printer, wait for about 10 seconds, and then turn on the printer.

  2. Reduce toner darkness. From the control panel, navigate to:

    Settings > Print > Quality

  3. Print the document.


Is the print dark?

Go to step 3.

The problem is solved.

Step 3

  1. Depending on your operating system, specify the paper type from the Printing Preferences or Print dialog.

    Notes:

    • Make sure that the setting matches the paper loaded.
    • You can also change the setting on the printer control panel.
  2. Print the document.


Is the print dark?

Go to step 4.

The problem is solved.

Step 4

Check if the paper has texture or rough finishes.


Are you printing on textured or rough paper?

Go to step 5.

Go to step 6.

Step 5

  1. Replace textured paper with plain paper.

  2. Print the document.


Is the print dark?

Go to step 6.

The problem is solved.

Step 6

  1. Load paper from a fresh package.

    Note:  Paper absorbs moisture due to high humidity. Store paper in its original wrapper until you are ready to use it.

  2. Print the document.


Is the print dark?

Go to step 7.

The problem is solved.

Step 7

  1. Remove, and then insert the imaging unit.

    Warning—Potential Damage:  Do not expose the imaging unit to direct light for more than 10 minutes. Extended exposure to light may cause print quality problems.

    Warning—Potential Damage:  Do not touch the photoconductor drum under the imaging unit. Doing so may affect the quality of future print jobs.

  2. Print the document.


Is the print dark?

Go to step 8.

The problem is solved.

Step 8

  1. Replace the imaging unit.

  2. Print the document.


Is the print dark?

Contact customer support .

The problem is solved.


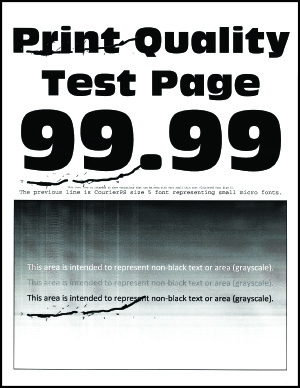
Fine lines are not printed correctly

Note:  Before solving the problem, print the Print Quality Test Pages. From the control panel, navigate to Settings > Troubleshooting > Print Quality Test Pages . For non-touch-screen printer models, press the select button to navigate through the settings.

Action

Yes

No

Step 1

  1. Check if the printer is using a genuine and supported Lexmark toner cartridge.

    Note:  If the cartridge is not supported, then install a supported one.

  2. Print the document.


Are fine lines not printed correctly?

Go to step 2.

The problem is solved.

Step 2

  1. Adjust the print quality settings.

    1. From the control panel, navigate to:

      Settings > Print > Quality > Pixel Boost > Fonts

    2. Adjust Toner Darkness to 7. From the control panel, navigate to:

      Settings > Print > Quality

  2. Print the document.


Are fine lines not printed correctly?

Contact customer support .

The problem is solved.


Folded or wrinkled paper

Note:  Before solving the problem, print the Print Quality Test Pages. From the control panel, navigate to Settings > Troubleshooting > Print Quality Test Pages . For non-touch-screen printer models, press the select button to navigate through the settings.

Action

Yes

No

Step 1

  1. Check if the printer is using a genuine and supported Lexmark toner cartridge.

    Note:  If the cartridge is not supported, then install a supported one.

  2. Print the document.


Is the paper folded or wrinkled?

Go to step 2.

The problem is solved.

Step 2

  1. Load paper from a fresh package.

    Note:  Paper absorbs moisture due to high humidity. Store paper in its original wrapper until you are ready to use it.

  2. Print the document.


Is the paper folded or wrinkled?

Go to step 3.

The problem is solved.

Step 3

  1. Depending on your operating system, specify the paper type from the Printing Preferences or Print dialog.

    Notes:

    • Make sure that the setting matches the paper loaded.
    • You can also change the setting from the printer control panel.
  2. Print the document.


Is the paper folded or wrinkled?

Contact customer support .

The problem is solved.


Gray background

Note:  Before solving the problem, print the Print Quality Test Pages. From the control panel, navigate to Settings > Troubleshooting > Print Quality Test Pages . For non-touch-screen printer models, press the select button to navigate through the settings.

Action

Yes

No

Step 1

  1. Turn off the printer, wait for 10 seconds, and then turn on the printer.

  2. Increase toner darkness.

    From the control panel, navigate to:

    Settings > Print > Quality

  3. Print the document.


Does gray background appear on prints?

Go to step 2.

The problem is solved.

Step 2

  1. Check if the printer is using a genuine and supported Lexmark toner cartridge.

    Note:  If the toner cartridge is not supported, then install a supported one.

  2. Print the document.


Does gray background appear on prints?

Go to step 3.

The problem is solved.

Step 3

  1. Depending on your operating system, specify the paper type from the Printing Preferences or Print dialog.

    Notes:

    • Make sure that the setting matches the paper loaded.
    • You can also change the setting from the printer control panel.
  2. Print the document.


Does gray background appear on prints?

Go to step 4.

The problem is solved.

Step 4

Check the status of the toner cartridge, and replace if necessary.

  1. From the control panel, navigate to:

    Status/Supplies > Supplies

  2. Print the document.


Does gray background appear on prints?

Go to step 5.

The problem is solved.

Step 5

  1. Remove the imaging unit.

    Warning—Potential Damage:  Do not expose the imaging unit to direct light for more than 10 minutes. Extended exposure to light may cause print quality problems.

    Warning—Potential Damage:  Do not touch the photoconductor drum under the imaging unit. Doing so may affect the quality of future print jobs.

  2. Remove any packing material that is stuck on the imaging unit.

    Note:  Make sure to remove any obstruction between the charge roller and photoconductor drum.

  3. Insert the imaging unit.

  4. Print the document.


Does gray background appear on prints?

Go to step 6.

The problem is solved.

Step 6

  1. Replace the imaging unit.

  2. Print the document.


Does gray background appear on prints?

Contact customer support .

The problem is solved.


Horizontal light bands

Note:  Before solving the problem, print the Print Quality Test Pages. From the control panel, navigate to Settings > Troubleshooting > Print Quality Test Pages . For non-touch-screen printer models, press the select button to navigate through the settings.

Action

Yes

No

  1. Check if the printer is using a genuine and supported Lexmark toner cartridge.

    Note:  If the cartridge is not supported, then install a supported one.

  2. Print the document.


Do horizontal light bands appear on prints?

Contact customer support .

The problem is solved.


Incorrect margins

Action

Yes

No

Step 1

  1. Adjust the paper guides to the correct position for the paper loaded.

  2. Print the document.


Are the margins correct?

The problem is solved.

Go to step 2.

Step 2

  1. Depending on your operating system, specify the paper size from the Printing Preferences or Print dialog.

    Notes:

    • Make sure that the setting matches the paper loaded.
    • You can also change the setting from the printer control panel.
  2. Print the document.


Are the margins correct?

The problem is solved.

Contact customer support .


Light print

Note:  Before solving the problem, print the Print Quality Test Pages. From the control panel, navigate to Settings > Troubleshooting > Print Quality Test Pages . For non-touch-screen printer models, press the select button to navigate through the settings.

Action

Yes

No

Step 1

  1. Check if the printer is using a genuine and supported Lexmark toner cartridge.

    Note:  If the cartridge is not supported, then install a supported one.

  2. Print the document.


Is the print light?

Go to step 2.

The problem is solved.

Step 2

  1. Turn off the printer, wait for about 10 seconds, and then turn on the printer.

  2. Increase toner darkness. From the control panel, navigate to:

    Settings > Print > Quality

  3. Print the document.


Is the print light?

Go to step 3.

The problem is solved.

Step 3

  1. Depending on your operating system, specify the paper type from the Printing Preferences or Print dialog.

    Notes:

    • Make sure that the setting matches the paper loaded.
    • You can also change the setting on the printer control panel.
  2. Print the document.


Is the print light?

Go to step 4.

The problem is solved.

Step 4

Check the status of the toner cartridge, and replace if necessary.

  1. From the control panel, navigate to:

    Status/Supplies > Supplies

  2. Print the document.


Is the print light?

Go to step 5.

The problem is solved.

Step 5

  1. Remove the toner cartridge, and then remove the imaging unit.

    Warning—Potential Damage:  Do not expose the imaging unit to direct light for more than 10 minutes. Extended exposure to light can cause print quality problems.

    Warning—Potential Damage:  Do not touch the photoconductor drum under the imaging unit. Doing so may affect the quality of future print jobs.

  2. Push either side of the transfer roller, located below the imaging unit, to check if it depresses and bounces back into place.

    hot surface caution icon  CAUTION—HOT SURFACE:  The inside of the printer might be hot. To reduce the risk of injury from a hot component, allow the surface to cool before touching it.

  3. If the transfer roller does not depress and bounce back into place, then remove and insert it.

    1. Pull up one end of the transfer roller and push it down until it clicks into place.

    2. If necessary, repeat the step on the other end.

  4. Firmly shake the imaging unit to redistribute the toner, and then insert it.

  5. Insert the toner cartridge.

  6. Turn off the printer, wait for 10 seconds, and then turn on the printer.

  7. Print the document.


Is the print light?

Go to step 6.

The problem is solved.

Step 6

  1. If the issue happens after installing a new maintenance kit, then check whether the transfer roller included with the kit is installed.

    Note:  If necessary, replace the transfer roller.

  2. Print the document.


Is the print light?

Go to step 7.

The problem is solved.

Step 7

Check the status of the imaging unit. From the control panel, navigate to:

Status/Supplies > Supplies


Is the imaging unit near End of Life?

Go to step 8.

Contact customer support .

Step 8

  1. Replace the imaging unit.

  2. Print the document.


Is the print light?

Contact customer support .

The problem is solved.


Mottled print and dots

Note:  Before solving the problem, print the Print Quality Test Pages. From the control panel, navigate to Settings > Troubleshooting > Print Quality Test Pages . For non-touch-screen printer models, press the select button to navigate through the settings.
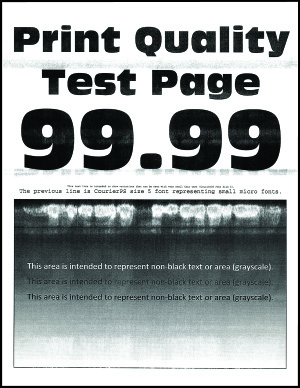
Action

Yes

No

Step 1

  1. Check if the printer is using a genuine and supported Lexmark toner cartridge.

    Note:  If the toner cartridge is not supported, then install a supported one.

  2. Print the document.


Is the print mottled?

Go to step 2.

The problem is solved.

Step 2

Check the printer for leaked toner contamination.


Is the printer free of leaked toner?

Go to step 4.

Go to step 3.

Step 3

  1. Replace the toner cartridge.

  2. Print the document.


Is the print mottled?

Go to step 4.

The problem is solved.

Step 4

Check the status of the imaging unit. From the control panel, navigate to:

Status/Supplies > Supplies


Is the imaging unit near end of life?

Go to step 5.

Contact customer support .

Step 5

  1. Replace the imaging unit.

  2. Print the document.


Is the print mottled?

Contact customer support .

The problem is solved.


Paper curl

Note:  Before solving the problem, print the Print Quality Test Pages. From the control panel, navigate to Settings > Troubleshooting > Print Quality Test Pages . For non-touch-screen printer models, press the select button to navigate through the settings.
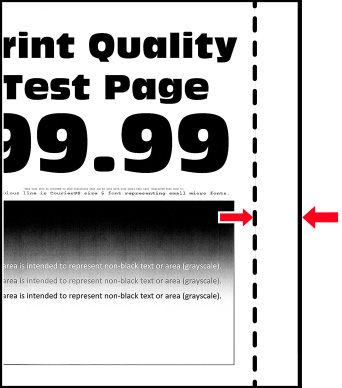
Action

Yes

No

Step 1

  1. Check if the printer is using a genuine and supported Lexmark toner cartridge.

    Note:  If the cartridge is not supported, then install a supported one.

  2. Print the document.


Is the paper curled?

Go to step 2.

The problem is solved.

Step 2

  1. Adjust the guides in the tray to the correct position for the paper loaded.

  2. Print the document.


Is the paper curled?

Go to step 3.

The problem is solved.

Step 3

  1. Depending on your operating system, specify the paper size and paper type from the Printing Preferences or Print dialog.

    Notes:

    • Make sure that the settings match the paper loaded.
    • You can also change the settings from the printer control panel.
  2. Print the document.


Is the paper curled?

Go to step 4.

The problem is solved.

Step 4

  1. Remove paper from the tray, and then turn over the paper.

  2. Print the document.


Is the paper curled?

Go to step 5.

The problem is solved.

Step 5

  1. Load paper from a fresh package.

    Note:  Paper absorbs moisture due to high humidity. Store paper in its original wrapper until you are ready to use it.

  2. Print the document.


Is the paper curled?

Go to step 6.

The problem is solved.

Step 6

  1. Check if the paper loaded is supported.

    Note:  If paper is not supported, then load a supported paper.

  2. Print the document.


Is the paper curled?

Contact customer support .

The problem is solved.


Print crooked or skewed

Note:  Before solving the problem, print the Print Quality Test Pages. From the control panel, navigate to Settings > Troubleshooting > Print Quality Test Pages . For non-touch-screen printer models, press the select button to navigate through the settings.
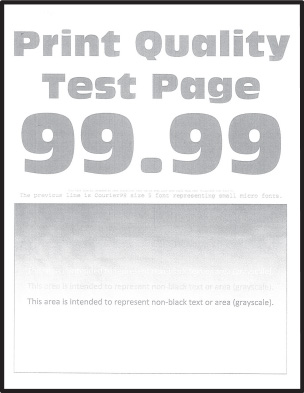
Action

Yes

No

Step 1

  1. Adjust the guides in the tray to the correct position for the paper loaded.

  2. Print the document.


Is the print crooked or skewed?

Go to step 2.

The problem is solved.

Step 2

  1. Check if the paper loaded is supported.

    Note:  If paper is not supported, then load a supported paper.

  2. Print the document.


Is the print crooked or skewed?

Go to step 3.

The problem is solved.

Step 3

  1. Check the pick tire in the tray for signs of damage and contamination, and replace if necessary.

  2. Print the document.


Is the print crooked or skewed?

Contact customer support .

The problem is solved.


Repeating defects

Note:  Before solving the problem, print the Print Quality Test Pages. From the control panel, navigate to Settings > Troubleshooting > Print Quality Test Pages . For non-touch-screen printer models, press the select button to navigate through the settings.

Action

Yes

No

Step 1

Using the Print Quality Test Pages, check if the distance between the repeating defects is equal to any of the following:

  • 97 mm (3.82 in.)

  • 47 mm (1.85 in.)

  • 38 mm (1.5 in.)


Does the distance between the repeating defects match any of the measurements?

Go to step 2.

Take note of the distance, and then contact customer support .

Step 2

  1. Replace the imaging unit.

  2. Print the document.


Do the repeating defects appear?

Contact customer support .

The problem is solved.


Solid black pages

A print that is mostly black
Note:  Before solving the problem, print the Print Quality Test Pages. From the control panel, navigate to Settings > Troubleshooting > Print Quality Test Pages . For non-touch-screen printer models, press the select button to navigate through the settings.

Action

Yes

No

Step 1

  1. Check if the printer is using a genuine and supported Lexmark toner cartridge.

    Note:  If the toner cartridge is not supported, then install a supported one.

  2. Print the document.


Is the printer printing solid black pages?

Go to step 2.

The problem is solved.

Step 2

  1. Remove, and then insert the imaging unit.

    Warning—Potential Damage:  Do not expose the imaging unit to direct light for more than 10 minutes. Extended exposure to light may cause print quality problems.

    Warning—Potential Damage:  Do not touch the photoconductor drum under the imaging unit. Doing so may affect the quality of future print jobs.

  2. Print the document.


Is the printer printing solid black pages?

Go to step 3.

The problem is solved.

Step 3

  1. Remove the imaging unit.

    Warning—Potential Damage:  Do not expose the imaging unit to direct light for more than 10 minutes. Extended exposure to light may cause print quality problems.

    Warning—Potential Damage:  Do not touch the photoconductor drum under the imaging unit. Doing so may affect the quality of future print jobs.

  2. Remove any packing material that is stuck on the imaging unit.

    Note:  Make sure to remove any obstruction between the charge roller and photoconductor drum.

  3. Insert the imaging unit.

  4. Print the document.


Is the printer printing solid black pages?

Go to step 4.

The problem is solved.

Step 4

Check the imaging unit for signs of damage.


Is the imaging unit free from damage?

Contact customer support .

Go to step 5.

Step 5

  1. Replace the imaging unit.

  2. Print the document.


Is the printer printing solid black pages?

Contact customer support .

The problem is solved.


Text or images cut off

Note:  Before solving the problem, print the Print Quality Test Pages. From the control panel, navigate to Settings > Troubleshooting > Print Quality Test Pages . For non-touch-screen printer models, press the select button to navigate through the settings.

Action

Yes

No

Step 1

  1. Check if the printer is using a genuine and supported Lexmark toner cartridge.

    Note:  If the toner cartridge is not supported, then install a supported one.

  2. Print the document.


Are text or images cut off?

Go to step 2.

The problem is solved.

Step 2

  1. Remove, and then insert the imaging unit.

    Warning—Potential Damage:  Do not expose the imaging unit to direct light for more than 10 minutes. Extended exposure to light may cause print quality problems.

    Warning—Potential Damage:  Do not touch the photoconductor drum under the imaging unit. Doing so may affect the quality of future print jobs.

  2. Print the document.


Are text or images cut off?

Go to step 3.

The problem is solved.

Step 3

  1. Remove the imaging unit.

    Warning—Potential Damage:  Do not expose the imaging unit to direct light for more than 10 minutes. Extended exposure to light may cause print quality problems.

    Warning—Potential Damage:  Do not touch the photoconductor drum under the imaging unit. Doing so may affect the quality of future print jobs.

  2. Remove any packing material that is stuck on the imaging unit.

    Note:  Make sure to remove any obstruction between the charge roller and photoconductor drum.

  3. Insert the imaging unit.

  4. Print the document.


Are text or images cut off?

Go to step 4.

The problem is solved.

Step 4

  1. Replace the imaging unit.

  2. Print the document.


Are text or images cut off?

Contact customer support .

The problem is solved.


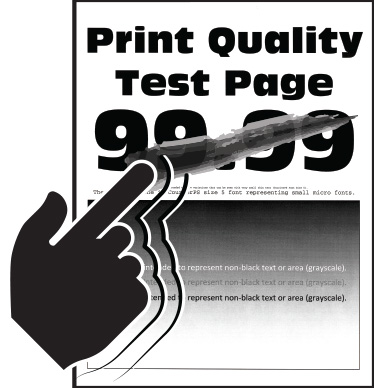
Toner easily rubs off

Note:  Before solving the problem, print the Print Quality Test Pages. From the control panel, navigate to Settings > Troubleshooting > Print Quality Test Pages . For non-touch-screen printer models, press the select button to navigate through the settings.

Action

Yes

No

Step 1

  1. Check if the printer is using a genuine and supported Lexmark toner cartridge.

    Note:  If the toner cartridge is not supported, then install a supported one.

  2. Print the document.


Does the toner easily rub off?

Go to step 2.

The problem is solved.

Step 2

  1. Depending on your operating system, specify the paper type from the Printing Preferences or Print dialog.

    Notes:

    • Make sure that the setting matches the paper loaded.
    • You can also change the setting on the printer control panel.
  2. Print the document.


Does the toner easily rub off?

Contact customer support .

The problem is solved.


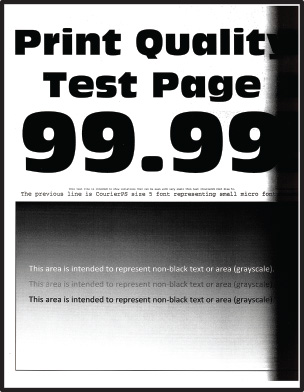
Vertical dark bands

Note:  Before solving the problem, print the Print Quality Test Pages. From the control panel, navigate to Settings > Troubleshooting > Print Quality Test Pages . For non-touch-screen printer models, press the select button to navigate through the settings.

Action

Yes

No

Step 1

  1. Check if the printer is using a genuine and supported Lexmark toner cartridge.

    Note:  If the toner cartridge is not supported, then install a supported one.

  2. Print the document.


Do vertical dark bands appear on prints?

Go to step 2.

The problem is solved.

Step 2

  1. Remove the toner cartridge, and then remove the imaging unit.

    Warning—Potential Damage:  Do not expose the imaging unit to direct light for more than 10 minutes. Extended exposure to light may cause print quality problems.

    Warning—Potential Damage:  Do not touch the photoconductor drum under the imaging unit. Doing so may affect the quality of future print jobs.

  2. Insert the imaging unit, and then insert the cartridge.

  3. Print the document.


Do vertical dark bands appear on prints?

Go to step 3.

The problem is solved.

Step 3

  1. Remove the imaging unit.

    Warning—Potential Damage:  Do not expose the imaging unit to direct light for more than 10 minutes. Extended exposure to light may cause print quality problems.

    Warning—Potential Damage:  Do not touch the photoconductor drum under the imaging unit. Doing so may affect the quality of future print jobs.

  2. Remove any packing material that is stuck on the imaging unit.

    Note:  Make sure to remove any obstruction between the charge roller and photoconductor drum.

  3. Insert the imaging unit.

  4. Print the document.


Do vertical dark bands appear on prints?

Go to step 4.

The problem is solved.

Step 4

  1. Check if a bright light enters the right side of the printer, and move the printer if necessary.

  2. Print the document.


Do vertical dark bands appear on prints?

Contact customer support .

The problem is solved.


Vertical dark lines or streaks

Note:  Before solving the problem, print the Print Quality Test Pages. From the control panel, navigate to Settings > Troubleshooting > Print Quality Test Pages . For non-touch-screen printer models, press the select button to navigate through the settings.

Action

Yes

No

Step 1

  1. Check if the printer is using a genuine and supported Lexmark toner cartridge.

    Note:  If the toner cartridge is not supported, then install a supported one.

  2. Print the document.


Do vertical dark lines or streaks appear on prints?

Go to step 2.

The problem is solved.

Step 2

  1. Remove, and then reinstall the imaging unit.

    Warning—Potential Damage:  Do not expose the imaging unit to direct light for more than 10 minutes. Extended exposure to light can cause print quality problems.

    Warning—Potential Damage:  Do not touch the photoconductor drum under the imaging unit. Doing so may affect the quality of future print jobs.

  2. Print the document.


Do vertical dark lines or streaks appear on prints?

Go to step 3.

The problem is solved.

Step 3

  1. Replace the imaging unit.

  2. Print the document.


Do vertical dark lines or streaks appear on prints?

Contact customer support .

The problem is solved.


Vertical dark streaks with print missing

Note:  Before solving the problem, print the Print Quality Test Pages. From the control panel, navigate to Settings > Troubleshooting > Print Quality Test Pages . For non-touch-screen printer models, press the select button to navigate through the settings.

Action

Yes

No

Step 1

  1. Remove the imaging unit.

    Warning—Potential Damage:  Do not expose the imaging unit to direct light for more than 10 minutes. Extended exposure to light may cause print quality problems.

    Warning—Potential Damage:  Do not touch the photoconductor drum under the imaging unit. Doing so may affect the quality of future print jobs.

  2. Remove any packing material that is stuck on the imaging unit.

    Note:  Make sure to remove any obstruction between the charge roller and photoconductor drum.

  3. Insert the imaging unit.

  4. Print the document.


Do vertical dark streaks with missing images appear on prints?

Go to step 2.

The problem is solved.

Step 2

  1. Check if the printer is using a genuine and supported Lexmark toner cartridge.

    Note:  If the toner cartridge is not supported, then install a supported one.

  2. Print the document.


Do vertical dark streaks with missing images appear on prints?

Contact customer support .

The problem is solved.


Vertical light bands

Note:  Before solving the problem, print the Print Quality Test Pages. From the control panel, navigate to Settings > Troubleshooting > Print Quality Test Pages . For non-touch-screen printer models, press the select button to navigate through the settings.

Action

Yes

No

  1. Check if the printer is using a genuine and supported Lexmark toner cartridge.

    Note:  If the cartridge is not supported, then install a supported one.

  2. Print the document.


Do vertical light bands appear on prints?

Contact customer support .

The problem is solved.


Vertical white lines

Note:  Before solving the problem, print the Print Quality Test Pages. From the control panel, navigate to Settings > Troubleshooting > Print Quality Test Pages . For non-touch-screen printer models, press the select button to navigate through the settings.

Action

Yes

No

Step 1

  1. Check if the printer is using a genuine and supported Lexmark toner cartridge.

    Note:  If the cartridge is not supported, then install a supported one.

  2. Print the document.


Do vertical white lines appear on prints?

Go to step 2.

The problem is solved.

Step 2

  1. Depending on your operating system, specify the paper type from the Printing Preferences or Print dialog.

    Notes:

    • Make sure that the setting matches the paper loaded.
    • You can also change the setting on the printer control panel.
  2. Print the document.


Do vertical white lines appear on prints?

Contact customer support .

The problem is solved.


Slow printing

Action

Yes

No

Step 1

  1. Make sure that the printer is not in Eco-Mode and Quiet Mode.

  2. Print the document.


Is the printer still printing slow?

Go to step 2.

The problem is solved.

Step 2

  1. Depending on your operating system, specify the paper type from the Printing Preferences or Print dialog.

    Notes:

    • Make sure that the setting matches the paper loaded in the tray.
    • You can also change the setting from the Paper menu on the printer control panel.
  2. Print the document.


Is the printer still printing slow?

Go to step 3.

The problem is solved.

Step 3

  1. Reduce the number of pages to print.

  2. Print the document.


Is the printer still printing slow?

Go to step 4.

The problem is solved.

Step 4

  1. Connect the printer cable securely to the printer and the computer, print server, option, or other network device.

  2. Print the document.


Is the printer still printing slow?

Go to step 5.

The problem is solved.

Step 5

  1. From the Quality menu on the control panel, set Print Resolution to 600 dpi.

  2. Print the document.


Is the printer still printing slow?

Go to step 6.

The problem is solved.

Step 6

  1. Make sure that the printer is not overheating.

    Notes:

  2. Print the document.


Is the printer still printing slow?

Go to step 7.

The problem is solved.

Step 7

  1. Add more printer memory.

  2. Print the document.


Is the printer still printing slow?

Contact customer support .

The problem is solved.


Print jobs do not print

Action

Yes

No

Step 1

  1. From the document you are trying to print, open the Print dialog, and then check if you have selected the correct printer.

  2. Print the document.


Is the document printed?

The problem is solved.

Go to step 2.

Step 2

  1. Check if the printer is on.

  2. Resolve any error messages that appear on the display.

  3. Print the document.


Is the document printed?

The problem is solved.

Go to step 3.

Step 3

  1. Check if the ports are working and if the cables are securely connected to the computer and the printer.

    For more information, see the setup documentation that came with the printer.

  2. Print the document.


Is the document printed?

The problem is solved.

Go to step 4.

Step 4

  1. Turn off the printer, wait for about 10 seconds, and then turn on the printer.

  2. Print the document.


Is the document printed?

The problem is solved.

Go to step 5.

Step 5

  1. Remove, and then reinstall the print driver.

  2. Print the document.


Is the document printed?

The problem is solved.

Contact customer support .


The printer is not responding

Action

Yes

No

Step 1

Check if the power cord is connected to the electrical outlet.

standard caution icon  CAUTION—POTENTIAL INJURY:  To avoid the risk of fire or electrical shock, connect the power cord to an appropriately rated and properly grounded electrical outlet that is near the product and easily accessible.


Is the printer responding?

The problem is solved.

Go to step 2.

Step 2

Check if the electrical outlet is turned off by a switch or breaker.


Is the electrical outlet turned off by a switch or breaker?

Turn on the switch or reset the breaker.

Go to step 3.

Step 3

Check if the printer is on.


Is the printer on?

Go to step 4.

Turn on the printer.

Step 4

Check if the printer is in Sleep or Hibernate mode.


Is the printer in Sleep or Hibernate mode?

Press the power button to wake the printer.

Go to step 5.

Step 5

Check if the cables connecting the printer and the computer are inserted to the correct ports.


Are the cables inserted to the correct ports?

Go to step 6.

Insert the cables to the correct ports.

Step 6

Turn off the printer, install the hardware options, and then turn on the printer.

For more information, see the documentation that came with the option.


Is the printer responding?

The problem is solved.

Go to step 7.

Step 7

Install the correct print driver.


Is the printer responding?

The problem is solved.

Go to step 8.

Step 8

Turn off the printer, wait for about 10 seconds, and then turn on the printer.


Is the printer responding?

The problem is solved.

Contact customer support .


Adjusting toner darkness

  1. From the control panel, navigate to:

    the home button > Settings > the select button > Print > the select button > Quality > the select button > Toner Darkness > the select button

  2. Adjust the setting.

  3. Apply the changes.

Job prints from the wrong tray or on the wrong paper

Action

Yes

No

Step 1

  1. Check if you are printing on the correct paper.

  2. Print the document.


Is the document printed on the correct paper?

Go to step 2.

Load the correct paper size and paper type.

Step 2

  1. Depending on your operating system, specify the paper size and paper type from the Printing Preferences or Print dialog.

    Note:  You can also change the settings on the printer control panel. Navigate to:

    the home button > Settings > the select button > Paper > the select button > Tray Configuration > the select button > Paper Size/Type > the select button

  2. Make sure that the settings match the paper loaded.

  3. Print the document.


Is the document printed on the correct paper?

The problem is solved.

Go to step 3.

Step 3

  1. Check if the trays are linked.

    For more information, see Linking trays .

  2. Print the document.


Is the document printed from the correct tray?

The problem is solved.

Contact customer support .