トナーカートリッジを交換する
ドア B を開きます。
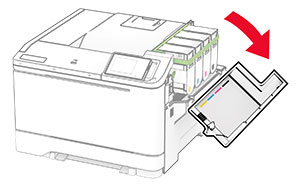
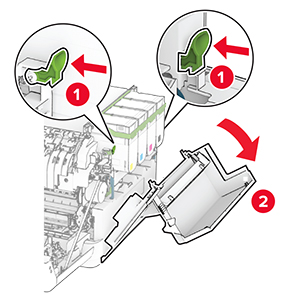
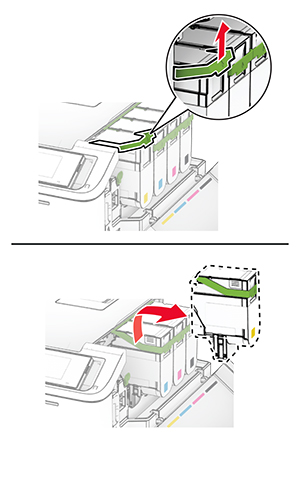
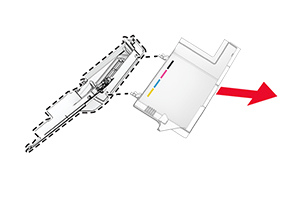
使用済みトナーカートリッジを取り外します。

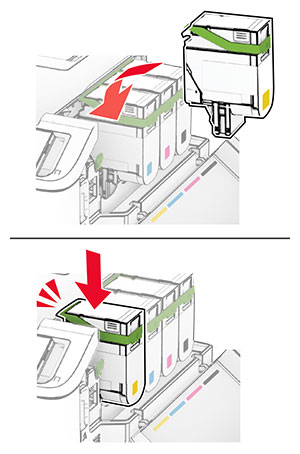
新しいトナーカートリッジを包装から取り出します。
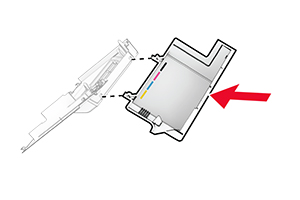
新しいトナーカートリッジを、所定の位置にカチッと音がするまで挿入します。
ドアを閉じます。
ドア B を開きます。
使用済みトナーカートリッジを取り外します。
新しいトナーカートリッジを包装から取り出します。
新しいトナーカートリッジを、所定の位置にカチッと音がするまで挿入します。
ドアを閉じます。
ドア Bfを開きます。
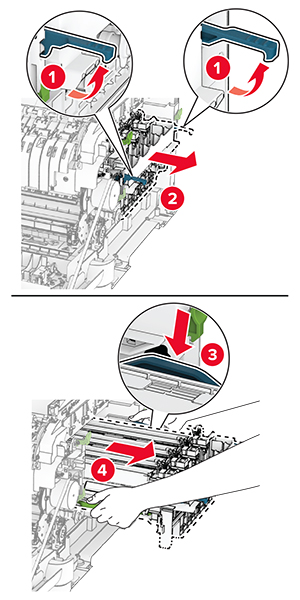
ドア A を開きます。
 注意—表面高温: プリンタの内部が高温になっている場合があります。高温のコンポーネントによる負傷の危険を減らすために、コンポーネントの表面が冷えるのを待ってから触れてください。
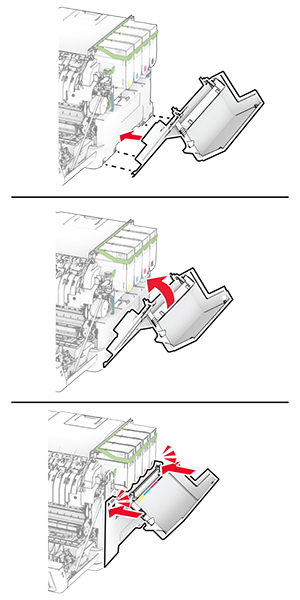
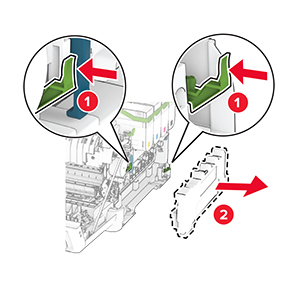
右側カバーを取り外します。
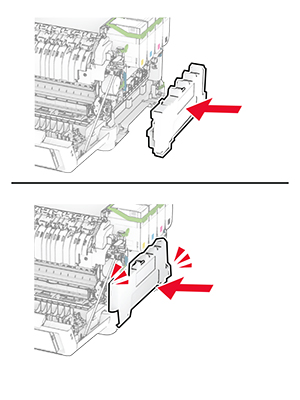
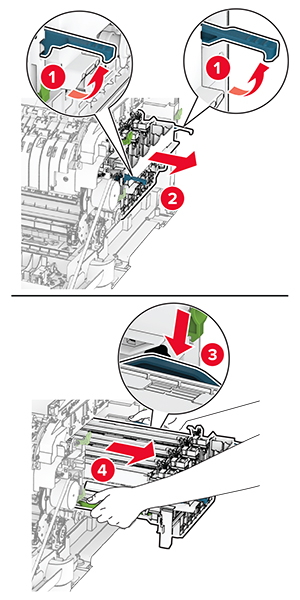
廃トナーボトルを取り外します。

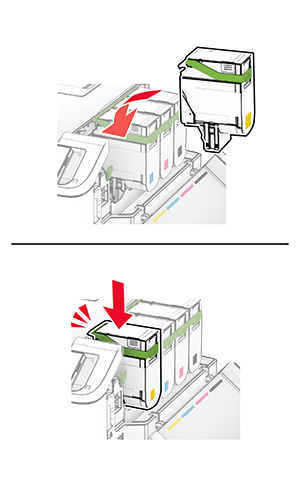
トナーカートリッジを取り外します。
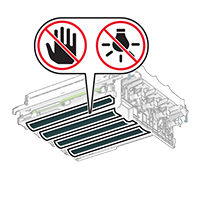
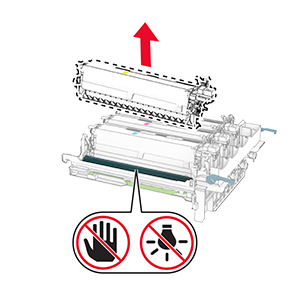
使用済みイメージングキットを取り外します。
新しいイメージングキットを包装から取り出します。
ブラックイメージングキット | ブラックおよびカラーのイメージングキット |
|---|---|
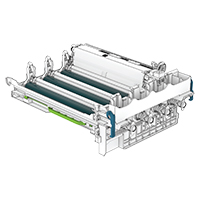 | 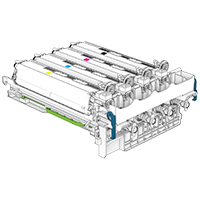 |
メモ:
梱包材を取り除きます。
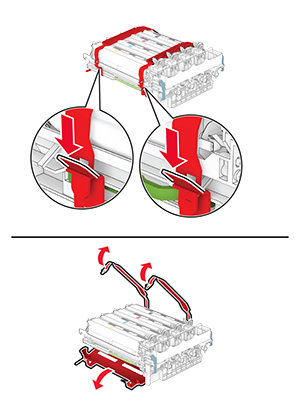
新しいイメージングキットを挿入し、しっかりと装着します。
トナーカートリッジは、カチッと音がするまで所定の位置に挿入します。
廃トナーボトルは、カチッと音がするまで所定の位置に挿入します。
右側カバーを取り付けるときは、カチッと音がすることを確認します。
ドア A を閉じてからドア B を閉じます。
ドア Bfを開きます。
ドア A を開きます。
注意—表面高温: プリンタの内部が高温になっている場合があります。高温のコンポーネントによる負傷の危険を減らすために、コンポーネントの表面が冷えるのを待ってから触れてください。右側カバーを取り外します。
使用済の廃トナーボトルを取り外します。
新しい廃トナーボトルの梱包を取り外します。
新しい廃トナーボトルを、カチッと音がするまで所定の位置に挿入します。
右側カバーを取り付けるときは、カチッと音がすることを確認します。
ドア A を閉じてからドア B を閉じます。
ドア Bfを開きます。
ドア A を開きます。
注意—表面高温: プリンタの内部が高温になっている場合があります。高温のコンポーネントによる負傷の危険を減らすために、コンポーネントの表面が冷えるのを待ってから触れてください。右側カバーを取り外します。
廃トナーボトルを取り外します。
トナーカートリッジを取り外します。
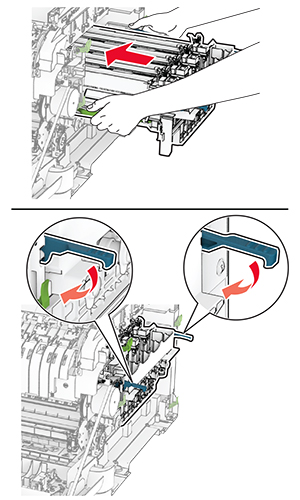
イメージングキットを取り外します。
使用中の現像体ユニットを取り外します。
梱包材を取り除きます。
新しい現像体ユニットを挿入します。
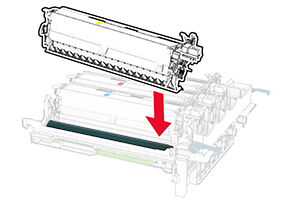
イメージングキットがしっかりと装着されるまで挿入します。
トナーカートリッジは、カチッと音がするまで所定の位置に挿入します。
廃トナーボトルは、カチッと音がするまで所定の位置に挿入します。
右側カバーを取り付けるときは、カチッと音がすることを確認します。
ドア A を閉じてからドア B を閉じます。
プリンタの電源を切ります。
電源コードをコンセントから抜き、次にプリンタから抜きます。
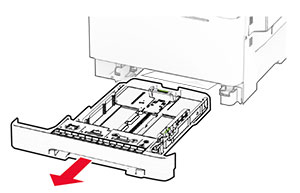
トレイを取り外します。
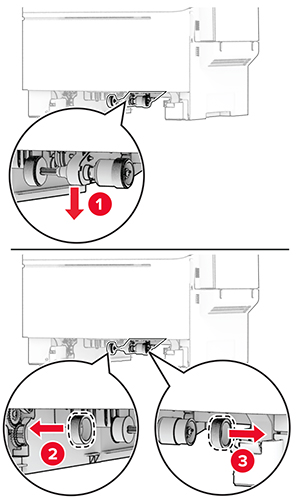
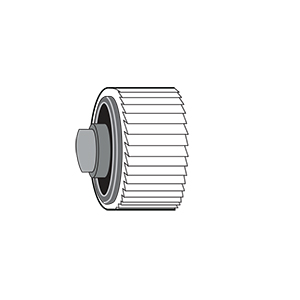
使用済みのピックタイヤを取り外します。
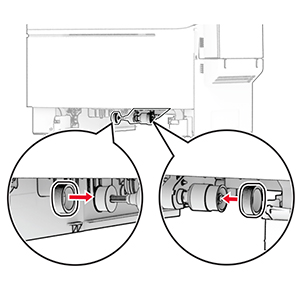
新しいピックタイヤをパッケージから取り出します。
新しいピックタイヤを挿入します。
トレイを挿入します。
電源コードをプリンタに接続してから、電源コンセントに接続します。
 注意—傷害の恐れあり: 火災や感電の危険を避けるため、電源コードを接続するコンセントが、製品の設置場所の近くにあること、アクセスしやすいこと、正しく接地されていること、適切な定格であることを確認してください。
プリンタの電源を入れます。
ドア Bfを開きます。
ドア A を開きます。
注意—表面高温: プリンタの内部が高温になっている場合があります。高温のコンポーネントによる負傷の危険を減らすために、コンポーネントの表面が冷えるのを待ってから触れてください。使用中の右側カバーを取り外します。
その右側カバーからドア B を取り外します。
新しい右側カバーを開梱します。
ドア B を新しい右側カバーに取り付けます。
取り付けると、カチッと音がします。
ドア A を閉じてからドア B を閉じます。
 注意—感電危険: 感電を避けるため、プリンタのセットアップ後にコントローラボードにアクセスする際や、オプションのハードウェアまたはメモリデバイスを取り付ける際には、作業を進める前にプリンタの電源を切り、電源コードを抜きます。他のデバイスがプリンタに接続されている場合は、他のデバイスの電源も切り、プリンタに接続しているケーブルを抜きます。
プリンタの電源を切ります。
電源コードをコンセントから抜き、次にプリンタから抜きます。
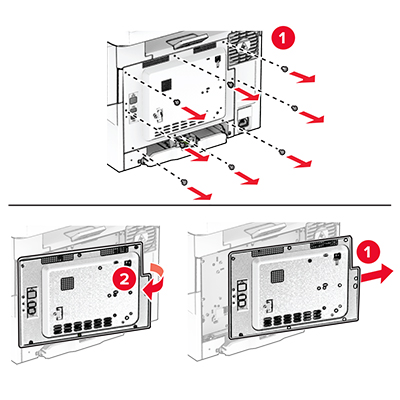
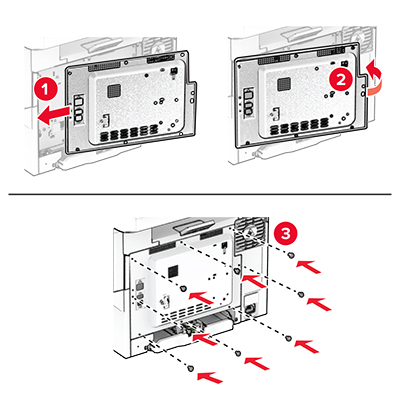
マイナスドライバを使用して、コントローラボードシールドを取り外します。
ドア Bfを開きます。
使用済みのワイヤレスプリントサーバーを取り外します。
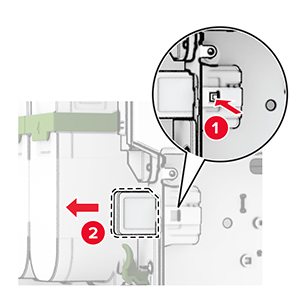
新しいワイヤレスプリントサーバーを包装から取り出します。
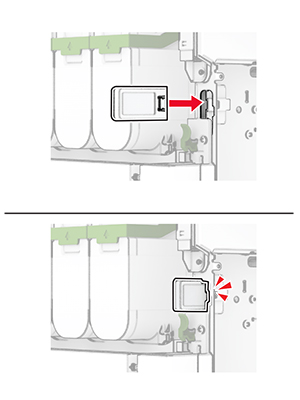
新しいワイヤレスプリントサーバーを、カチッと音がするまで所定の位置に挿入します。
ドア B を閉じます。
コントローラボードシールドを取り付け、ねじで留めます。
電源コードをプリンタに接続してから、電源コンセントに接続します。
注意—傷害の恐れあり: 火災や感電の危険を避けるため、電源コードを接続するコンセントが、製品の設置場所の近くにあること、アクセスしやすいこと、正しく接地されていること、適切な定格であることを確認してください。プリンタの電源を入れます。
ホーム画面で、設定 > デバイス > メンテナンス > 構成設定メニュー > 消耗品使用量とカウンタの順にタッチします。
リセットするカウンタを選択します。