Printing problems

Confidential and other held documents do not print

Action

Yes

No

Step 1

  1. From the control panel, check if the documents appear in the Held Jobs list.

    Note: If the documents are not listed, then print the documents using the Print and Hold options.

  2. Print the documents.


Are the documents printed?

The problem is solved.

Go to step 2.

Step 2

The print job may contain a formatting error or invalid data.

  • Delete the print job, and then send it again.

  • For PDF files, generate a new file, and then print the documents.


Are the documents printed?

The problem is solved.

Go to step 3.

Step 3

If you are printing from the Internet, then the printer may be reading the multiple job titles as duplicates.

For Windows users
  1. Open the Printing Preferences dialog.

  2. From the Print and Hold section, select Keep duplicate documents.

  3. Enter a PIN.

  4. Resend the print job.

For Macintosh users
  1. Save and name each job differently.

  2. Send the job individually.


Are the documents printed?

The problem is solved.

Go to step 4.

Step 4

  1. Delete some held jobs to free up printer memory.

  2. Resend the print job.


Are the documents printed?

The problem is solved.

Go to step 5.

Step 5

  1. Add printer memory.

  2. Resend the print job.


Are the documents printed?

The problem is solved.

Contact customer support.


Slow printing

Action

Yes

No

Step 1

  1. Make sure that the printer is not in Eco-Mode and Quiet Mode.

  2. Print the document.


Is the printer printing slow?

Go to step 2.

The problem is solved.

Step 2

  1. Depending on your operating system, specify the paper type from the Printing Preferences or Print dialog.

    Notes:

    • Make sure that the setting matches the paper loaded in the tray.
    • You can also change the setting on the printer control panel.
  2. Print the document.


Is the printer printing slow?

Go to step 3.

The problem is solved.

Step 3

  1. Reduce the number of pages to print.

  2. Print the document.


Is the printer printing slow?

Go to step 4.

The problem is solved.

Step 4

  1. Remove held jobs.

  2. Print the document.


Is the printer printing slow?

Go to step 5.

The problem is solved.

Step 5

  1. Connect the printer cable securely to the printer and the computer, print server, option, or other network device.

  2. Print the document.


Is the printer printing slow?

Go to step 6.

The problem is solved.

Step 6

  1. From the Quality menu on the control panel, set the Print Resolution to 4800CQ.

  2. Print the document.


Is the printer printing slow?

Go to step 7.

The problem is solved.

Step 7

  1. Make sure that the printer is not overheating.

    Notes:

  2. Print the document.


Is the printer printing slow?

Go to step 8.

The problem is solved.

Step 8

  1. Add more printer memory.

  2. Print the document.


Is the printer printing slow?

Contact customer support.

The problem is solved.


Print jobs do not print

Action

Yes

No

Step 1

  1. From the document you are trying to print, open the Print dialog, and then check if you have selected the correct printer.

  2. Resend the print job.


Is the document printed?

The problem is solved.

Go to step 2.

Step 2

  1. Check if the printer is on.

  2. Resolve any error messages that appear on the display.

  3. Resend the print job.


Is the document printed?

The problem is solved.

Go to step 3.

Step 3

  1. Check if the ports are working and if the cables are securely connected to the computer and the printer.

    For more information, see the setup documentation that came with the printer.

  2. Resend the print job.


Is the document printed?

The problem is solved.

Go to step 4.

Step 4

  1. Turn off the printer, wait for about 10 seconds, and then turn it back on.

  2. Resend the print job.


Is the document printed?

The problem is solved.

Go to step 5.

Step 5

  1. Remove, and then reinstall the printer software.

    Note: The printer software is available at http://support.lexmark.com.

  2. Resend the print job.


Is the document printed?

The problem is solved.

Contact customer support.


Print quality is poor

Blank or white pages

Note: Before solving the problem, print the quality sample pages to determine the missing color. From the home screen, touch Settings > Troubleshooting > Basic Print Quality Pages.

Action

Yes

No

Step 1

  1. Remove, and then reinstall the imaging unit or imaging kit.

    Warning—Potential Damage: Do not expose the imaging unit or imaging kit to direct light for more than 10 minutes. Extended exposure to light may cause print quality problems.

    Warning—Potential Damage: To avoid damage, do not touch the underside of the imaging unit or imaging kit.

  2. Print a document.


Is the printer still printing blank or white pages?

Go to step 2.

The problem is solved.

Step 2

  1. Replace the imaging unit or imaging kit.

    Warning—Potential Damage: Do not expose the imaging unit or imaging kit to direct light for more than 10 minutes. Extended exposure to light may cause print quality problems.

    Warning—Potential Damage: To avoid damage, do not touch the underside of the imaging unit or imaging kit.

  2. Print a document.


Is the printer still printing blank or white pages?

Contact customer support.

The problem is solved.


Dark print

Action

Yes

No

Step 1

  1. From the Quality menu on the control panel, select Color Adjust.

  2. Resend the print job.


Is the print still too dark?

Go to step 2.

The problem is solved.

Step 2

  1. Depending on your operating system, reduce the toner darkness from the Printing Preferences or Print dialog.

    Note: You can also change the settings on the printer control panel.

  2. Resend the print job.


Is the print still too dark?

Go to step 3.

The problem is solved.

Step 3

  1. Depending on your operating system, specify the paper type, texture, and weight from the Printing Preferences or Print dialog.

    Notes:

    • Make sure that the settings match the paper loaded in the tray.
    • You can also change the settings on the printer control panel.
  2. Resend the print job.


Is the print still too dark?

Go to step 4.

The problem is solved.

Step 4

Make sure that the paper has no texture or rough finishes.


Are you printing on textured or rough paper?

Change the texture settings to match the paper you are printing on.

Go to step 5.

Step 5

  1. Load paper from a fresh package.

    Note: Paper absorbs moisture due to high humidity. Store paper in its original wrapper until you are ready to use it.

  2. Resend the print job.


Is the print still too dark?

Go to step 6.

The problem is solved.

Step 6

Replace the imaging unit or imaging kit, and then resend the print job.


Is the print still too dark?

Contact customer support.

The problem is solved.


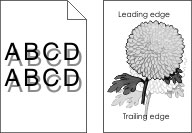
Ghost images

Action

Yes

No

Step 1

  1. Load the tray with the correct paper type and weight.

  2. Resend the print job.


Do ghost images still appear on prints?

Go to step 2.

The problem is solved.

Step 2

  1. Depending on your operating system, specify the paper type and weight from the Printing Preferences or Print dialog.

    Notes:

    • Make sure that the settings match the paper loaded in the tray.
    • You can also change the settings on the printer control panel.
  2. Resend the print job.


Do ghost images still appear on prints?

Go to step 3.

The problem is solved.

Step 3

  1. From the Quality menu on the control panel, select Color Adjust.

  2. Resend the print job.


Do ghost images still appear on prints?

Contact customer support.

The problem is solved.


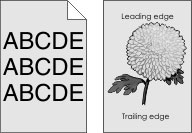
Gray background

Action

Yes

No

Step 1

  1. From the home screen, touch Settings > Print > Quality.

  2. Adjust the toner darkness.

  3. Print the document.


Does gray background still appear on prints?

Go to step 2.

The problem is solved.

Step 2

  1. From the home screen, touch Settings > Print > Quality > Advanced Imaging > Color Adjust.

  2. Start the process.

  3. Print the document.


Does gray background still appear on prints?

Go to step 3.

The problem is solved.

Step 3

  1. Remove, and then reinstall the imaging unit or imaging kit.

    Warning—Potential Damage: Do not expose the imaging unit or imaging kit to direct light for more than 10 minutes. Extended exposure to light may cause print quality problems.

    Warning—Potential Damage: To avoid damage, do not touch the underside of the imaging unit or imaging kit.

  2. Print the document.


Does gray background still appear on prints?

Contact customer support.

The problem is solved.


Horizontal dark lines

Note: If horizontal dark lines keep appearing on your prints, then see the “Repeating defects” topic.

Action

Yes

No

Step 1

  1. Depending on your operating system, specify the tray or feeder from the Printing Preferences or Print dialog.

  2. Resend the print job.


Do horizontal dark lines still appear on prints?

Go to step 2.

The problem is solved.

Step 2

  1. Depending on your operating system, specify the paper type and weight from the Printing Preferences or from Print dialog.

    Notes:

    • Make sure that the settings match the paper loaded in the tray.
    • You can also change the settings on the printer control panel.
  2. Resend the print job.


Do horizontal dark lines still appear on prints?

Go to step 3.

The problem is solved.

Step 3

  1. Load paper from a fresh package.

    Note: Paper absorbs moisture due to high humidity. Store paper in its original wrapper until you use it.

  2. Resend the print job.


Do horizontal dark lines still appear on prints?

Go to step 4.

The problem is solved.

Step 4

  1. Remove, and then reinstall the imaging unit or imaging kit.

    Warning—Potential Damage: Do not expose the imaging unit or imaging kit to direct light for more than 10 minutes. Extended exposure to light may cause print quality problems.

    Warning—Potential Damage: To avoid damage, do not touch the underside of the imaging unit or imaging kit.

  2. Resend the print job.


Do horizontal dark lines still appear on prints?

Go to step 5.

The problem is solved.

Step 5

Replace the imaging unit or imaging kit, and then resend the print job.


Do horizontal dark lines still appear on prints?

Contact customer support.

The problem is solved.


Horizontal white lines

A page with horizontal voids
Note: If horizontal dark lines keep appearing on your prints, then see the “Repeating defects” topic.

Action

Yes

No

Step 1

  1. Depending on your operating system, specify the paper type and weight from the Printing Preferences or Print dialog.

    Notes:

    • Make sure that the settings match the paper loaded in the tray.
    • You can also change the settings on the printer control panel.
  2. Resend the print job.


Do horizontal white lines still appear on prints?

Go to step 2.

The problem is solved.

Step 2

  1. Load the specified tray or feeder with the recommended paper type.

  2. Resend the print job.


Do horizontal white lines still appear on prints?

Go to step 3.

The problem is solved.

Step 3

  1. Remove, and then reinstall the imaging unit or imaging kit.

    Warning—Potential Damage: Do not expose the imaging unit or imaging kit to direct light for more than 10 minutes. Extended exposure to light can cause print quality problems.

    Warning—Potential Damage: To avoid damage, do not touch the underside of the imaging unit or imaging kit.

  2. Resend the print job.


Do horizontal white lines still appear on prints?

Go to step 4.

The problem is solved.

Step 4

Replace the imaging unit or imaging kit, and then resend the print job.


Do horizontal white lines still appear on prints?

Contact customer support.

The problem is solved.


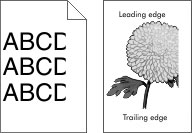
Incorrect margins

Action

Yes

No

Step 1

  1. Squeeze and slide the paper guides to the correct position for the size of the paper you are loading.

  2. Resend the print job.


Are the margins correct?

The problem is solved.

Go to step 2.

Step 2

  1. From the Paper menu on the control panel, check if the printer is detecting the correct paper size.

  2. Resend the print job.


Are the margins correct?

The problem is solved.

Go to step 3.

Step 3

  1. Depending on your operating system, specify the paper size from the Printing Preferences or Print dialog.

    Notes:

    • Make sure that the settings match the paper loaded in the tray.
    • You can also change the settings on the printer control panel.
  2. Resend the print job.


Are the margins correct?

The problem is solved.

Contact customer support.


Jagged or uneven characters

Page containing fuzzy text

Action

Yes

No

  1. Check if the printer supports the fonts that are installed on your computer.

    1. From the control panel, touch:

      Settings > Reports > Print > Print Fonts

    2. Select PCL Fonts or PS Fonts.

  2. If the font is not supported, then install a supported font. For more information, contact your administrator.

  3. Resend the print job.


Do prints still contain jagged or uneven characters?

Contact customer support.

The problem is solved.


Light print

A page with printed characters that are too light

Action

Yes

No

Step 1

  1. From the Quality menu on the control panel, select Color Adjust.

  2. Resend the print job.


Is the print still too light?

Go to step 2.

The problem is solved.

Step 2

  1. Depending on your operating system, increase the toner darkness from the Printing Preferences or Print dialog.

    Note: You can also change the settings on the printer control panel.

  2. Resend the print job.


Is the print still too light?

Go to step 3.

The problem is solved.

Step 3

  1. Depending on your operating system, specify the paper type, texture, and weight from the Printing Preferences or Print dialog.

    Notes:

    • Make sure that the settings match the paper loaded in the tray.
    • You can also change the settings on the printer control panel.
  2. Resend the print job.


Is the print still too light?

Go to step 4.

The problem is solved.

Step 4

Make sure that the paper has no texture or rough finishes.


Are you printing on textured or rough paper?

Change the texture settings to match the paper you are printing on.

Go to step 5.

Step 5

  1. Load paper from a fresh package.

    Note: Paper absorbs moisture due to high humidity. Store paper in its original wrapper until you are ready to use it.

  2. Resend the print job.


Is the print still too light?

Go to step 6.

The problem is solved.

Step 6

Replace the imaging unit or imaging kit, and then resend the print job.

Warning—Potential Damage: Do not expose the imaging unit or imaging kit to direct light for more than 10 minutes. Extended exposure to light can cause print quality problems.

Warning—Potential Damage: To avoid damage, do not touch the underside of the imaging unit or imaging kit.


Is the print still too light?

Contact customer support.

The problem is solved.


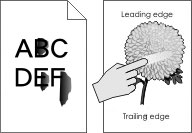
Mottled print and dots

Action

Yes

No

Step 1

Check the printer for leaked toner contamination.


Is the printer free of leaked toner?

Go to step 2.

Contact customer support.

Step 2

  1. From the home screen, touch Settings > Device > Preferences.

  2. Check if the paper type and size settings match the paper type and size set in the tray.


Do the settings match?

Go to step 4.

Go to step 3.

Step 3

  1. Change the paper size and type in the Paper menu or adjust the size settings in the tray.

  2. Print the document.


Is the print still mottled?

Go to step 4.

The problem is solved.

Step 4

  1. Replace the textured or rough paper loaded in the tray with plain paper.

  2. Print the document.


Is the print still mottled?

Go to step 5.

The problem is solved.

Step 5

  1. Replace the imaging unit or imaging kit.

    Warning—Potential Damage: Do not expose the imaging unit or imaging kit to direct light for more than 10 minutes. Extended exposure to light can cause print quality problems.

    Warning—Potential Damage: To avoid damage, do not touch the underside of the imaging unit or imaging kit.

  2. Print the document.


Is the print still mottled?

Contact customer support.

The problem is solved.


Print crooked or skewed

A print with skewed characters

Action

Yes

No

Step 1

  1. Remove the tray.

  2. Remove the paper, and then load paper from a fresh package.

    Note: Paper absorbs moisture due to high humidity. Store paper in its original wrapper until you are ready to use it.

  3. Squeeze and slide the paper guides to the correct position for the size of the paper you are loading.

  4. Insert the tray.

  5. Resend the print job.


Is the print still crooked or skewed?

Go to step 2.

The problem is solved.

Step 2

  1. Check if you are printing on a supported paper.

  2. Resend the print job.


Is the print still crooked or skewed?

Contact customer support.

The problem is solved.


Repeating defects

Note: Before solving the problem, print the Maintenance Defect Ruler from the Troubleshooting section of the Settings menu.

Action

Yes

No

Step 1

  1. Print the quality sample pages.

    From the home screen, touch Settings > Troubleshooting > Basic Print Quality Samples.

  2. Determine how many colors have defects.


Is only one color affected?

Go to step 2.

Go to step 3.

Step 2

  1. Using the Maintenance Defect Ruler, measure the distance between the repeating defects on the affected color page.

  2. Replace the supply item that matches the measurement on the affected color page.

    Photoconductor unit
    • 125.70 mm (4.95 in.)

    • 35.40 mm (1.39 in.)

    Developer unit

    42 mm (1.65 in.)

  3. Print the quality sample pages.


Do the defects still appear?

Take note of the distance, and then contact customer support or your service representative.

The problem is solved.

Step 3

  1. Using the Maintenance Defect Ruler, measure the distance between the repeating defects on the affected color page.

  2. Replace the supply item that matches the measurement on the affected color page.

    Transfer roller

    78.50 mm (3.09 in.)

    Transfer module
    • 47.10 mm (1.86 in.)

    • 90 mm (3.54 in.)

    Fuser
    • 96.60 mm (3.80 in.)

    • 127.60 mm (5.02 in.)

  3. Print the quality sample pages.


Do the defects still appear?

Take note of the distance, and then contact customer support or your service representative.

The problem is solved.


Solid color or black images

A print that is mostly black

Action

Yes

No

Step 1

  1. Remove, and then reinstall the imaging unit or imaging kit.

    Warning—Potential Damage: Do not expose the imaging unit or imaging kit to direct light for more than 10 minutes. Extended exposure to light may cause print quality problems.

    Warning—Potential Damage: To avoid damage, do not touch the underside of the imaging unit or imaging kit.

  2. Resend the print job.


Is the printer still printing solid color or black images?

Go to step 2.

The problem is solved.

Step 2

Replace the imaging unit or imaging kit, and then resend the print job.


Is the printer still printing solid color or black images?

Contact customer support.

The problem is solved.


Text or images cut off

A clipped page and a page with a clipped image

Action

Yes

No

Step 1

  1. Move the paper guides in the tray to the correct position for the paper loaded.

  2. Resend the print job.


Is the page or image still clipped?

Go to step 2.

The problem is solved.

Step 2

  1. Depending on your operating system, specify the paper size from the Printing Preferences or Print dialog.

    Notes:

    • Make sure that the settings match the paper loaded in the tray.
    • You can also change the settings on the printer control panel.
  2. Resend the print job.


Is the page or image still clipped?

Go to step 3.

The problem is solved.

Step 3

  1. Remove, and then reinstall the imaging unit or imaging kit.

    Warning—Potential Damage: Do not expose the imaging unit or imaging kit to direct light for more than 10 minutes. Extended exposure to light may cause print quality problems.

    Warning—Potential Damage: To avoid damage, do not touch the underside of the imaging unit or imaging kit.

  2. Resend the print job.


Is the page or image still clipped?

Contact customer support.

The problem is solved.


Toner easily rubs off

Action

Yes

No

  1. Depending on your operating system, specify the paper type, texture, and weight from the Printing Preferences or Print dialog.

    Notes:

    • Make sure that the settings match the paper loaded in the tray.
    • You can also change the settings on the printer control panel.
  2. Resend the print job.

Does the toner still rub off?

Contact customer support.

The problem is solved.


Uneven print density

A print with uneven density

Action

Yes

No

Replace the imaging unit or imaging kit, and then resend the print job.

Warning—Potential Damage: Do not expose the imaging unit or imaging kit to direct light for more than 10 minutes. Extended exposure to light can cause print quality problems.

Warning—Potential Damage: To avoid damage, do not touch the underside of the imaging unit or imaging kit.


Is the print density uneven?

Contact customer support.

The problem is solved.


Vertical dark lines or streaks

A page with streaked horizontal lines

Action

Yes

No

Step 1

  1. Depending on your operating system, specify the paper type, texture, and weight from the Printing Preferences or Print dialog.

    Notes:

    • Make sure that the settings match the paper loaded in the tray.
    • You can also change the settings on the printer control panel.
  2. Resend the print job.


Do vertical dark lines or streaks still appear on prints?

Go to step 2.

The problem is solved.

Step 2

  1. Load paper from a fresh package.

    Note: Paper absorbs moisture due to high humidity. Store paper in its original wrapper until you use it.

  2. Resend the print job.


Do vertical dark lines or streaks still appear on prints?

Go to step 3.

The problem is solved.

Step 3

  1. Remove, and then reinstall the imaging unit or imaging kit.

    Warning—Potential Damage: Do not expose the imaging unit or imaging kit to direct light for more than 10 minutes. Extended exposure to light can cause print quality problems.

    Warning—Potential Damage: To avoid damage, do not touch the underside of the imaging unit or imaging kit.

  2. Resend the print job.


Do vertical dark lines or streaks still appear on prints?

Go to step 4.

The problem is solved.

Step 4

Replace the imaging unit or imaging kit, and then resend the print job.


Do vertical dark lines or streaks still appear on prints?

Contact customer support.

The problem is solved.


Vertical white lines

Action

Yes

No

Step 1

  1. Depending on your operating system, specify the paper type and weight from the Printing Preferences or Print dialog.

    Notes:

    • Make sure that the settings match the paper loaded in the tray.
    • You can also change the settings on the printer control panel.
  2. Resend the print job.


Do vertical white lines still appear on prints?

Go to step 2.

The problem is solved.

Step 2

Check if you are using the recommended paper type.

  1. Load the specified tray or feeder with the recommended paper type.

  2. Resend the print job.


Do vertical white lines still appear on prints?

Go to step 3.

The problem is solved.

Step 3

  1. Remove, and then reinstall the imaging unit or imaging kit.

    Warning—Potential Damage: Do not expose the imaging unit or imaging kit to direct light for more than 10 minutes. Extended exposure to light may cause print quality problems.

    Warning—Potential Damage: To avoid damage, do not touch the underside of the imaging unit or imaging kit.

  2. Resend the print job.


Do vertical white lines still appear on prints?

Go to step 4.

The problem is solved.

Step 4

Replace the imaging unit or imaging kit, and then resend the print job.


Do vertical white lines still appear on prints?

Contact customer support.

The problem is solved.


The printer is not responding

Action

Yes

No

Step 1

Connect the power cord to the electrical outlet.

standard caution icon CAUTION—POTENTIAL INJURY: To avoid the risk of fire or electrical shock, connect the power cord to an appropriately rated and properly grounded electrical outlet that is near the product and easily accessible.


Is the printer responding?

The problem is solved.

Go to step 2.

Step 2

Check if the electrical outlet is turned off by a switch or breaker.


Is the electrical outlet turned off by a switch or breaker?

Turn on the switch or reset the breaker.

Go to step 3.

Step 3

Check if the printer is on.


Is the printer on?

Go to step 4.

Turn on the printer.

Step 4

Check if the printer is in sleep or hibernate mode.


Is the printer in sleep or hibernate mode?

Press the power button to wake the printer.

Go to step 5.

Step 5

Check if the cables connecting the printer and the computer are inserted in the correct ports.


Are the cables inserted in the correct ports?

Go to step 6.

Make sure to match the following:

  • The USB cable with the USB port on the printer

  • The Ethernet cable with the Ethernet port on the printer

Step 6

Turn off the printer, reinstall the hardware options, and then turn it back on.

For more information, see the documentation that came with the option.


Is the printer responding?

The problem is solved

Go to step 7.

Step 7

Install the correct print driver.


Is the printer responding?

The problem is solved

Go to step 8.

Step 8

Turn off the printer, wait for about 10 seconds, and then turn it back on.


Is the printer responding?

The problem is solved.

Contact customer support.


Job prints from the wrong tray or on the wrong paper

Action

Yes

No

Step 1

  1. Check if you are printing on a supported paper.

  2. Print the document.


Is the document printed from the correct tray or on the correct paper?

The problem is solved.

Go to step 2.

Step 2

  1. Depending on your operating system, specify the paper size from the Printing Preferences or Print dialog.

    Notes:

    • Make sure that the settings match the paper loaded in the tray.
    • You can also change the settings on the printer control panel.
  2. Print the document.


Is the document printed from the correct tray or on the correct paper?

The problem is solved.

Go to step 3.

Step 3

  1. Check if the trays are not linked.

  2. Print the document.


Is the document printed from the correct tray or on the correct paper?

The problem is solved.

Contact customer support.