更换碳粉盒
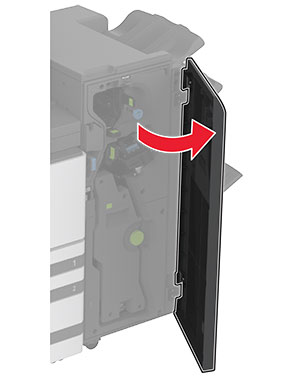
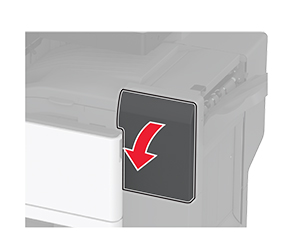
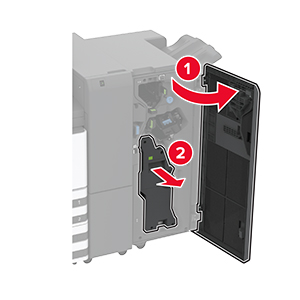
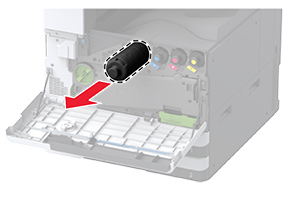
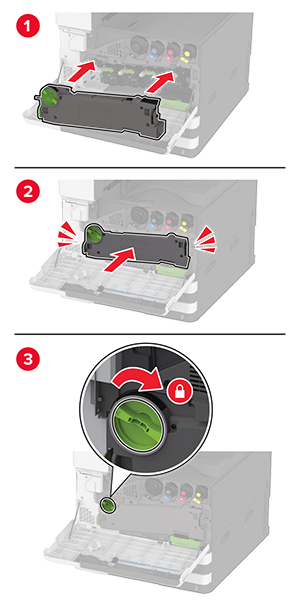
打开前部盖门。
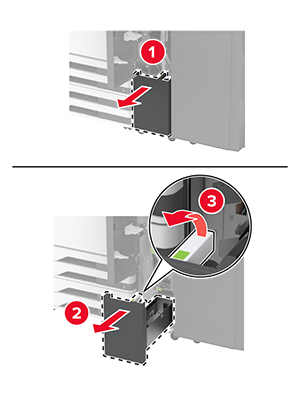
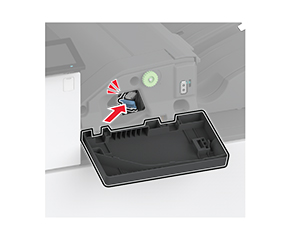
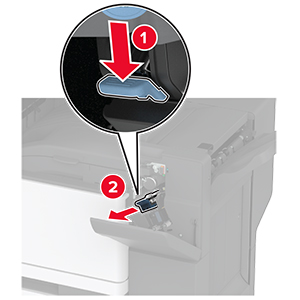
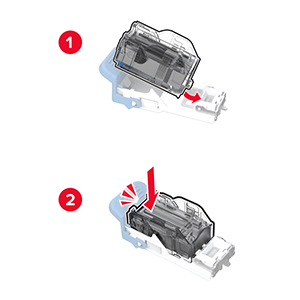
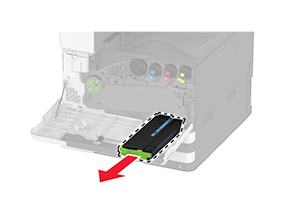
移除旧的碳粉盒。
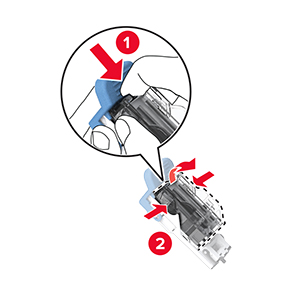
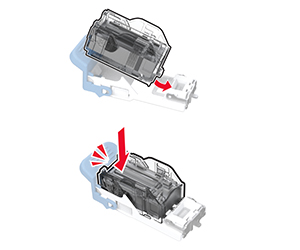
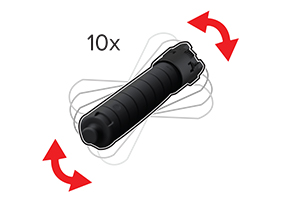
拆开新碳粉盒的包装。
摇晃碳粉盒以使碳粉重新分布。
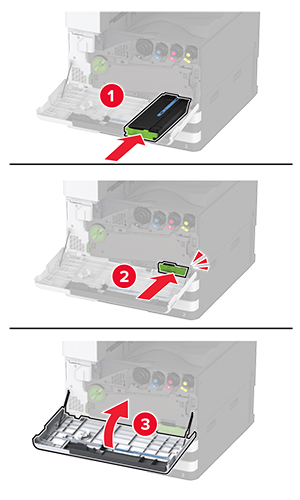
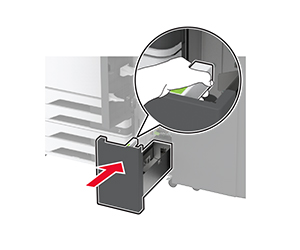
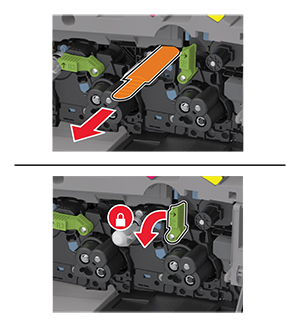
插入新的碳粉盒。

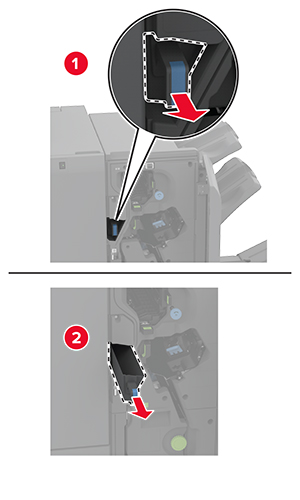
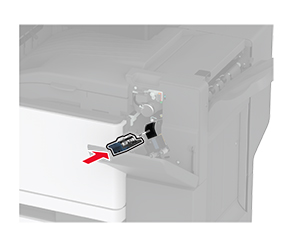
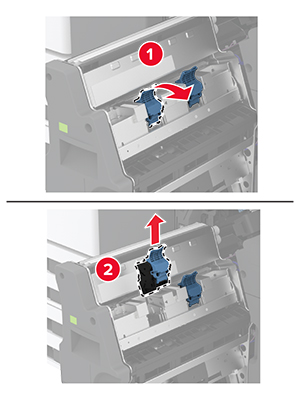
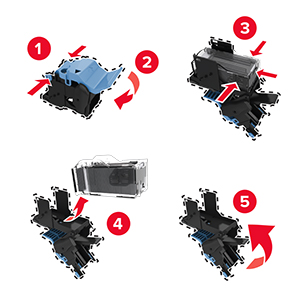
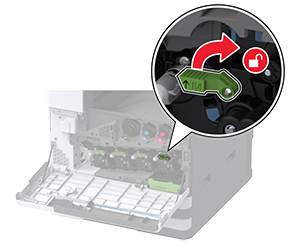
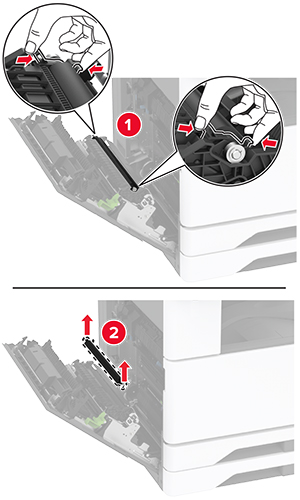
移除废碳粉转移箱。
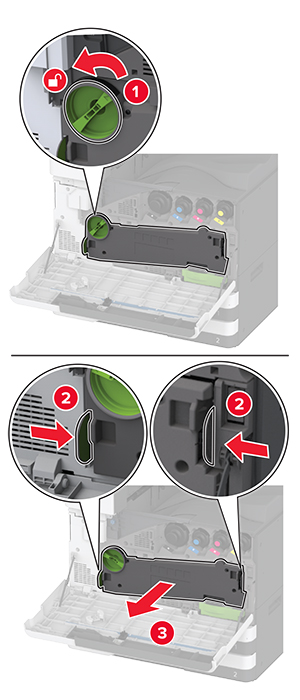 注意: 为避免碳粉泄漏,请将该部件直立放置。
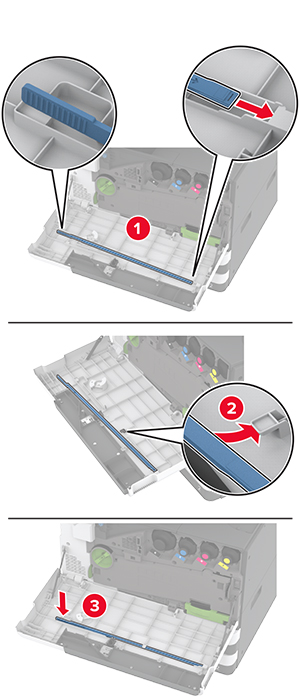
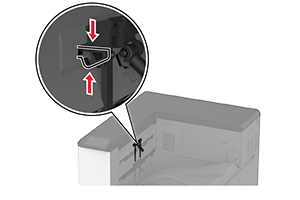
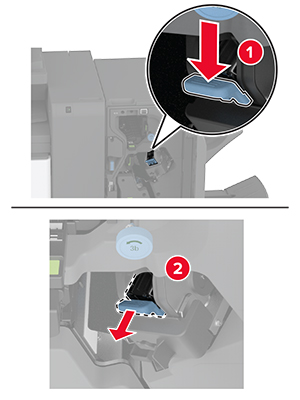
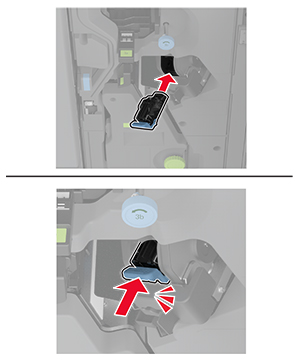
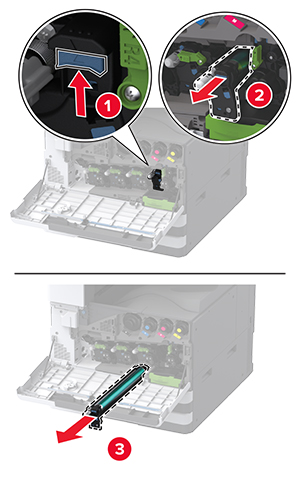
移除打印头刷片,然后清洁打印头镜片。
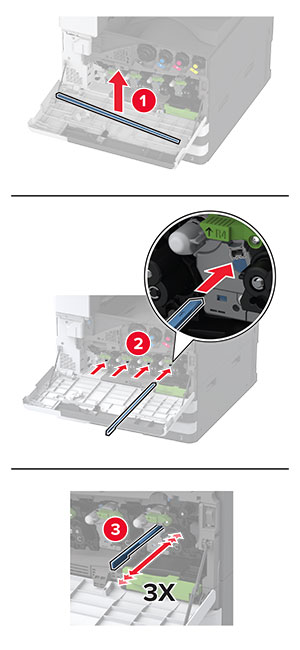
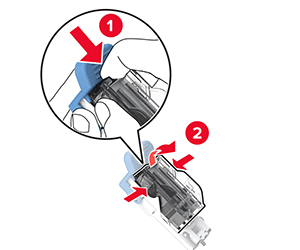
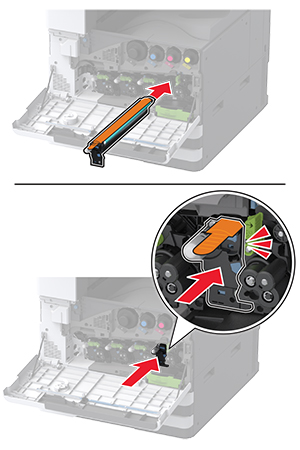
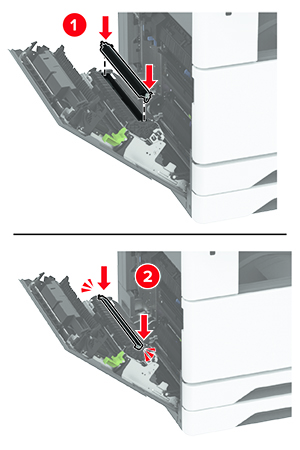
将打印头刷片放回原位。
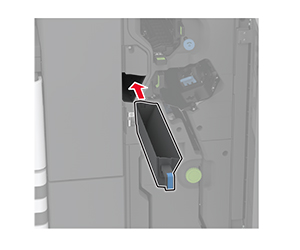
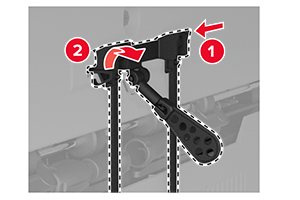
插入废碳粉转移箱直至其卡入到位,然后将其锁定。
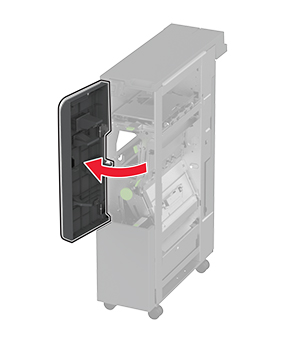
关闭盖门。
打开前部盖门。
移除旧的碳粉盒。
拆开新碳粉盒的包装。
摇晃碳粉盒以使碳粉重新分布。
插入新的碳粉盒。
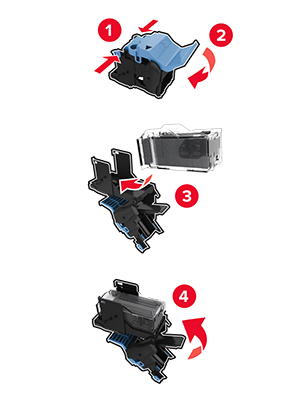
移除废碳粉转移箱。
移除打印头刷片,然后清洁打印头镜片。
将打印头刷片放回原位。
插入废碳粉转移箱直至其卡入到位,然后将其锁定。
关闭盖门。
打开前部盖门。
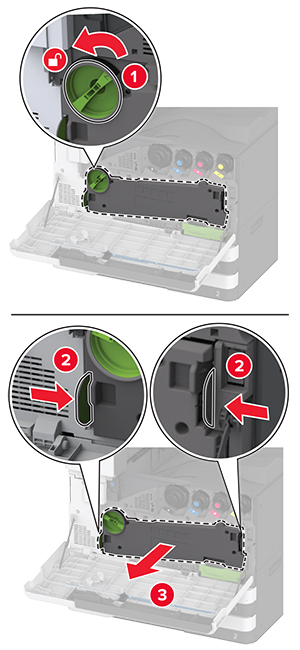
移除废碳粉转移箱。
解锁旧的感光鼓。
移除旧的感光鼓。
拆开新感光鼓的包装。
插入新的感光鼓直至其卡入到位。
移除包装材料,然后锁定新的感光鼓。
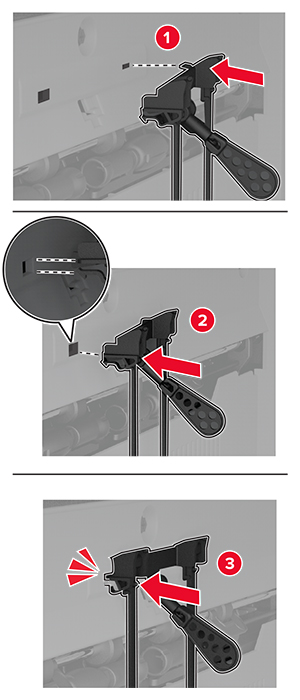
移除打印头刷片,然后清洁打印头镜片。
将打印头刷片放回原位。
插入废碳粉转移箱直至其卡入到位,然后将其锁定。
关闭盖门。
关闭打印机电源。
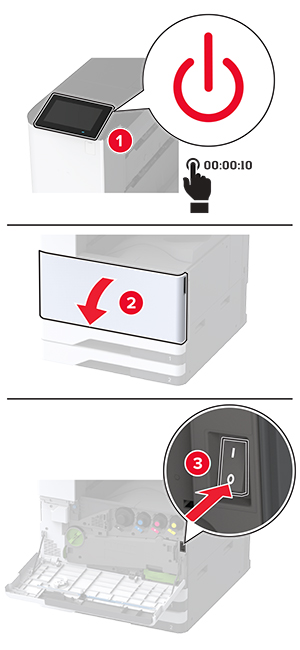
打开盖门 A。
 小心—发热表面: 打印机内部可能很烫。为避免被发热组件烫伤的危险,在接触组件之前,请等待表面冷却。
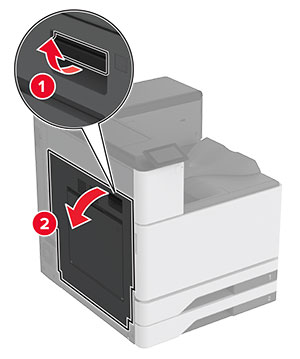
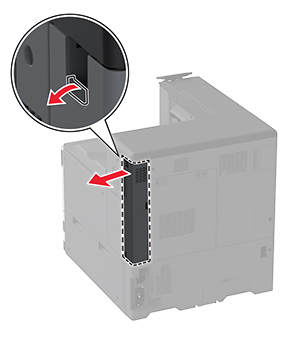
解锁定影器。
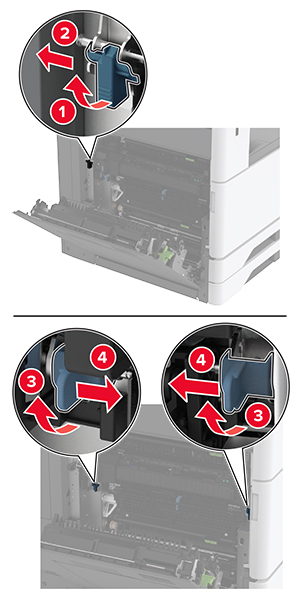
移除旧的定影器。
拆开新定影器的包装。
插入新的定影器直至其卡入到位,然后将其锁定。
关闭盖门 A。
打开打印机电源。
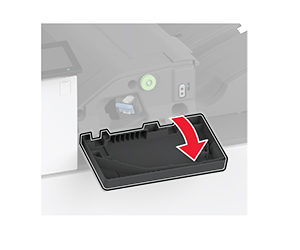
打开前部盖门。
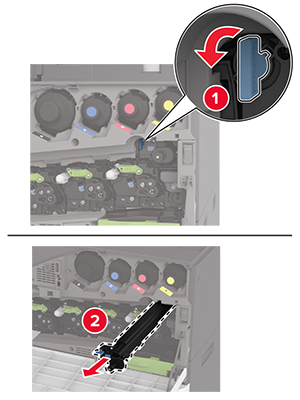
移除废碳粉转移箱。
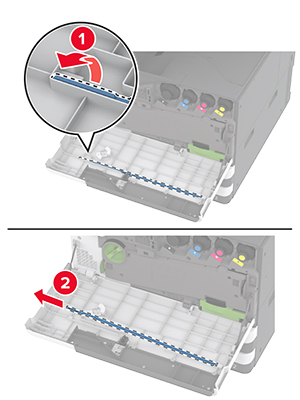
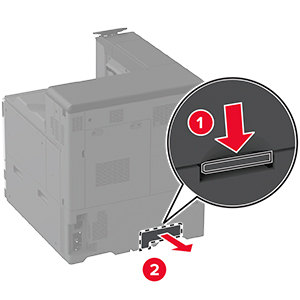
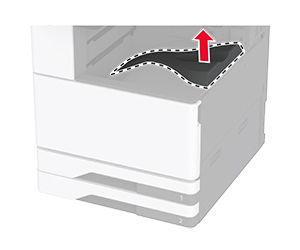
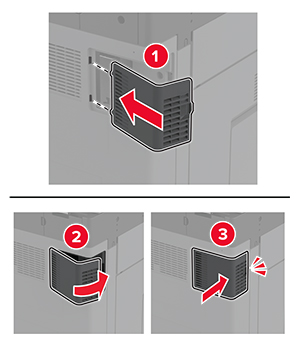
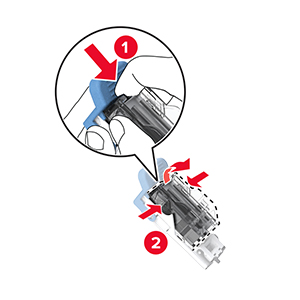
移除旧的转印模块清洁件。
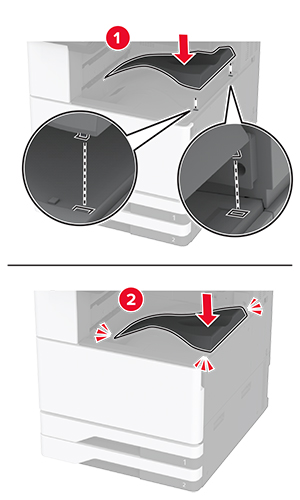
拆开新转印模块清洁件的包装。
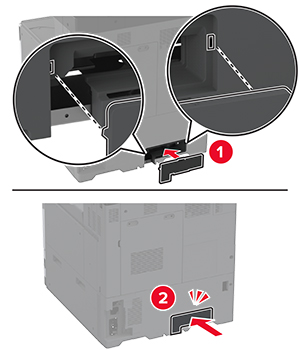
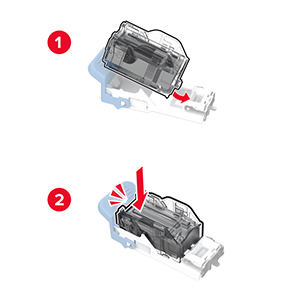
插入新的转印模块清洁件。
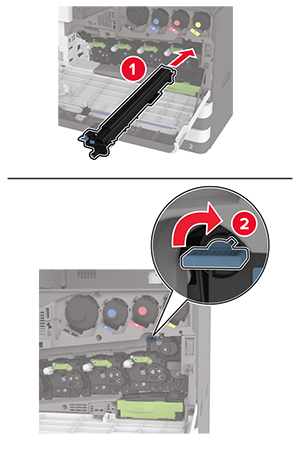
插入废碳粉转移箱直至其卡入到位,然后将其锁定。
关闭前部盖门。
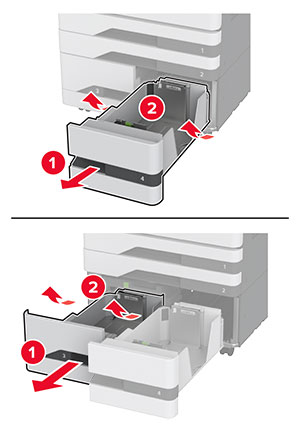
关闭打印机电源。
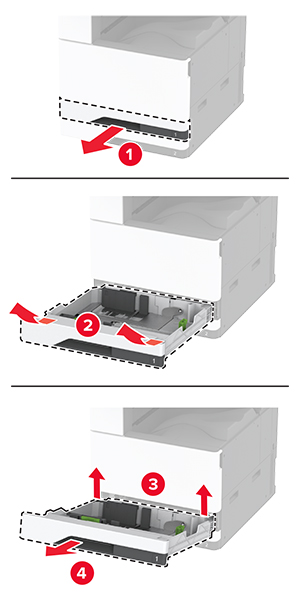
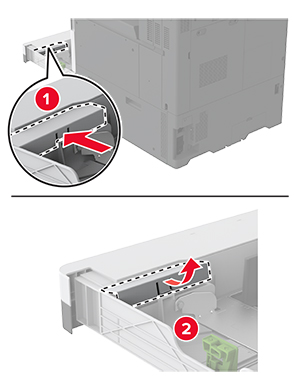
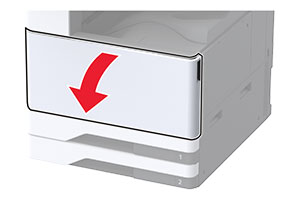
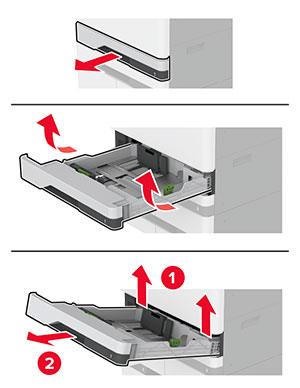
移除标准进纸匣。
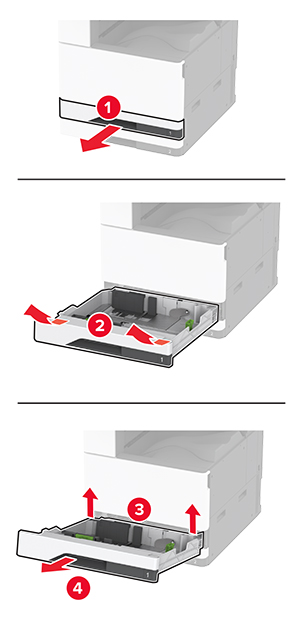
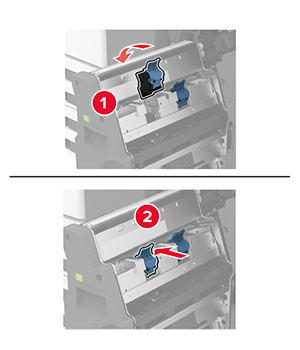
移除旧的进纸匣辊组件。
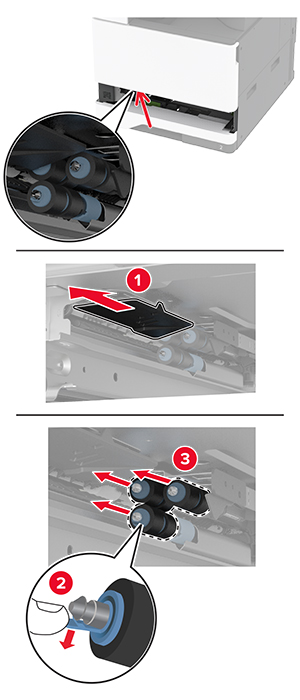
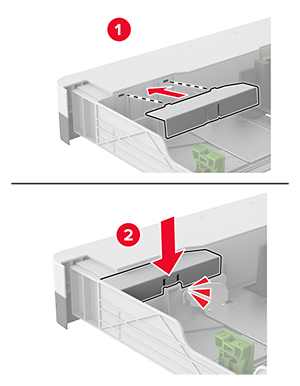
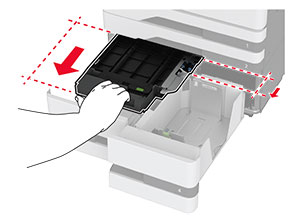
拆开新进纸匣辊组件的包装。
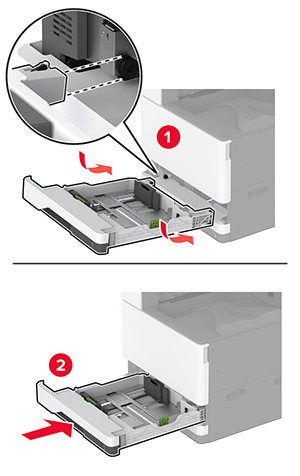
插入新的进纸匣辊组件直至其卡入到位。
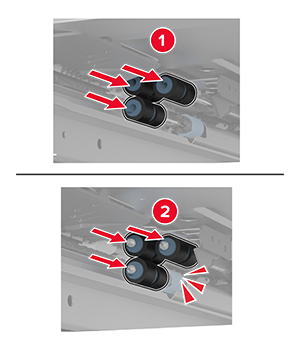
插入进纸匣。
打开打印机电源。
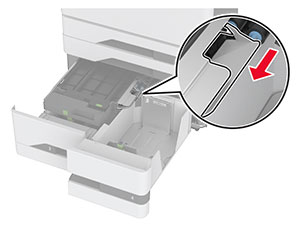
关闭打印机电源。
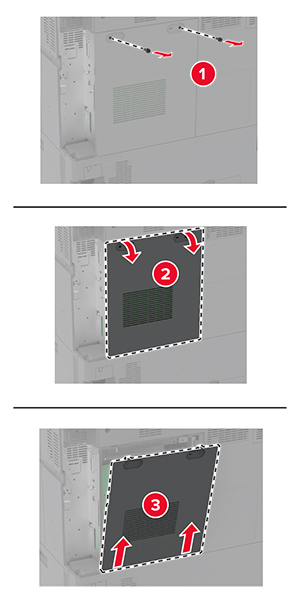
将进纸匣滑到左边。

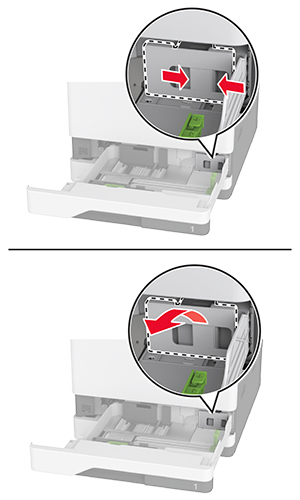
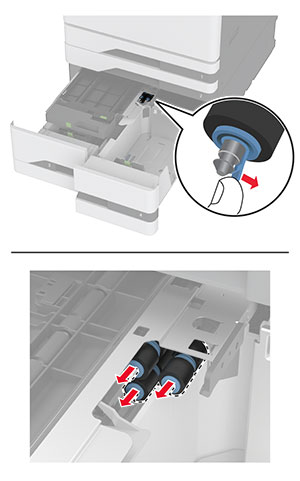
打开盖门 J,然后打开辊组件盖板。
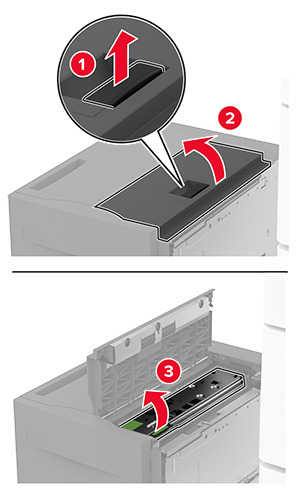
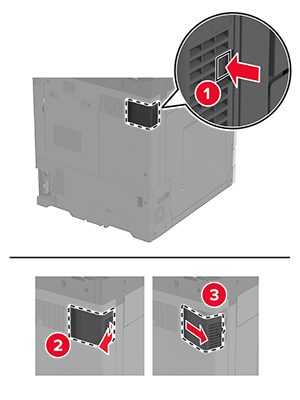
找到并移除旧的辊组件。
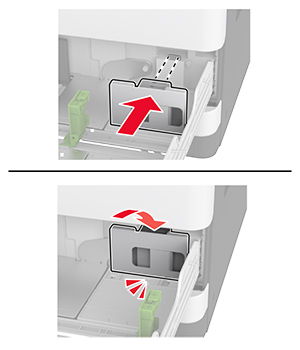
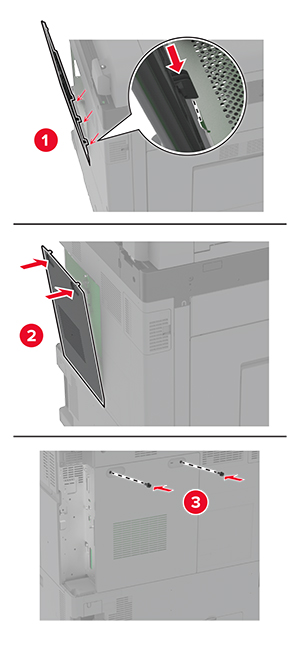
拆开新辊组件的包装。
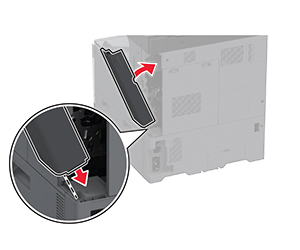
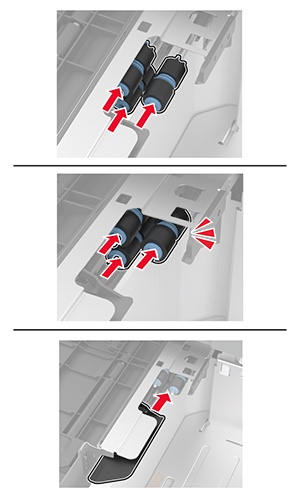
插入新的辊组件。
关闭辊组件盖板,然后关闭盖门 J。
将进纸匣滑回原位。
打开打印机电源。
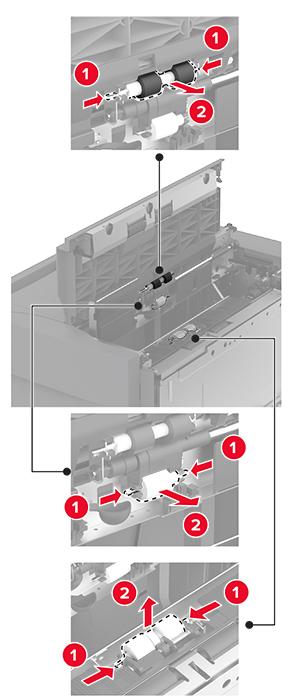
关闭打印机电源。
拉出进纸匣 4,然后拉出进纸匣 3。
拉出手柄 C,然后打开内部盖板。
打开辊组件盖板。
移除旧的进纸匣辊组件。
拆开新进纸匣辊组件的包装。
插入新的进纸匣辊组件直至其卡入到位。
关闭辊组件盖板。
关闭内部盖板,然后插入手柄 C。
插入进纸匣 3 和 4。
打开打印机电源。
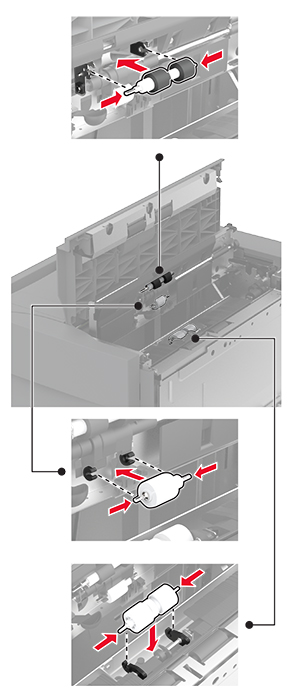
关闭打印机电源。
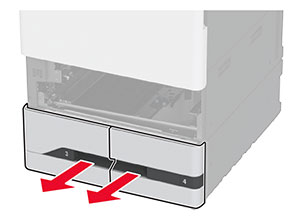
移除进纸匣 1,然后移除进纸匣 2。
拉出进纸匣 3 和 4。
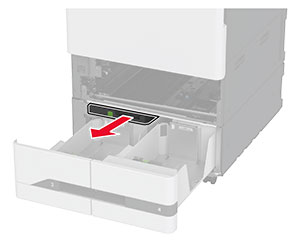
拉出手柄 C。
移除旧的进纸匣辊组件。
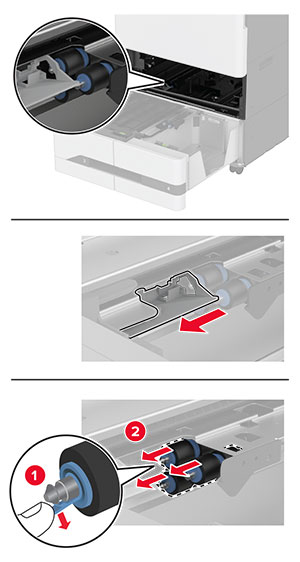
插入新的进纸匣辊组件直至其卡入到位。
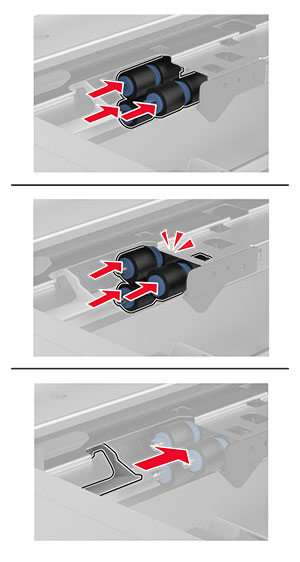
插入手柄 C。
插入进纸匣 3 和 4。
插入进纸匣 1 和 2。
打开打印机电源。
关闭打印机电源。
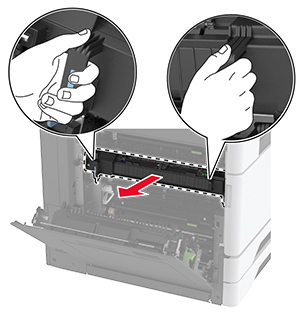
打开盖门 A。
小心—发热表面: 打印机内部可能很烫。为避免被发热组件烫伤的危险,在接触组件之前,请等待表面冷却。移除旧的第二转印辊。
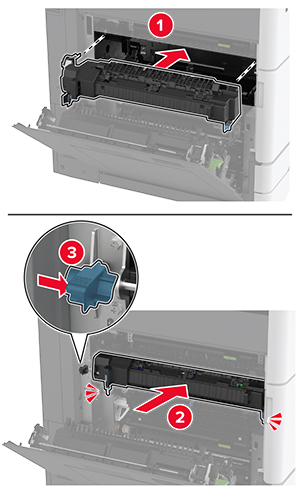
拆开新的第二转印辊的包装。
插入新的第二转印辊。
关闭盖门。
打开打印机电源。
打开前部盖门。
移除废碳粉转移箱。
移除打印头刷片,然后清洁打印头镜片。
将打印头刷片放回原位。
插入废碳粉转移箱直至其卡入到位,然后将其锁定。
移除旧的废碳粉瓶。
拆开新的废碳粉瓶的包装。
插入新的废碳粉瓶直至其卡入到位,然后关闭盖门。