Loading paper and specialty media
Setting the size and type of the specialty media
For specialty media like labels, card stock, or envelopes, do the following:
-
From the control panel, navigate to
Settings
>
Paper
>
Tray Configuration
>
Paper Size/Type
.
-
Select a paper source, and then set the size and type of the specialty media.
Configuring Universal paper settings
The
Universal Setup
menu lets you set the width and height of a paper size that is not preset in the printer.
-
From the control panel, navigate to
Settings
>
Paper
>
Media Configuration
>
Universal Setup
.
-
Select
All Input Trays
, and then configure the settings for the paper size that you want to customize.
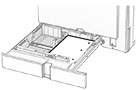
Loading the 550-sheet tray
 CAUTION—TIPPING HAZARD:
To reduce the risk of equipment instability, load each tray separately. Keep all other trays closed until needed.
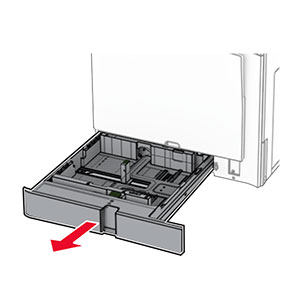
-
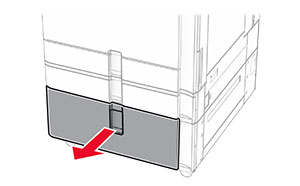
Open the tray.
Note:
To avoid jams, do not open trays while the printer is busy.
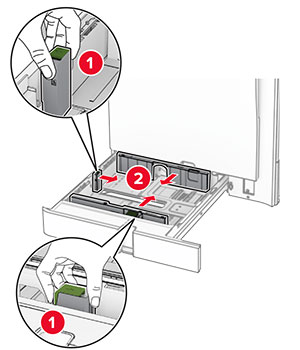
-
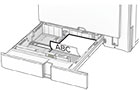
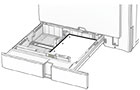
Adjust the guides to match the size of the paper that you are loading.
Notes:
-
Use the indicators on the bottom of the tray to position the guides.
-
Prepunched paper is supported only in the standard 550-sheet tray.
-
A3-size paper is supported only in the optional 550-sheet tray.
-
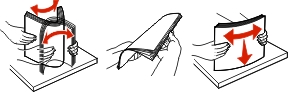
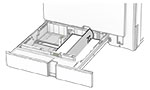
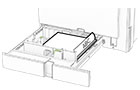
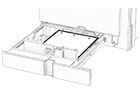
Flex, fan, and align the paper edges before loading.
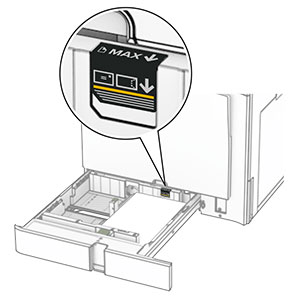
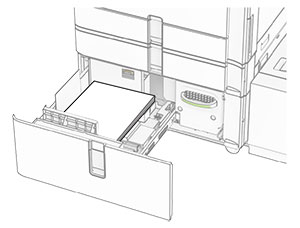
-
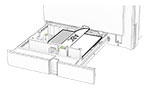
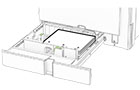
Load the paper stack with the printable side faceup.
Notes:
-
Do not slide paper into the tray.
-
Make sure that the side guides fit snugly against the paper.
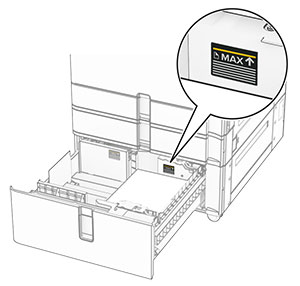
-
Make sure that the stack height is below the maximum paper fill indicator. Overfilling may cause paper jams.
-
Insert the tray.
If necessary, set the paper size and paper type to match the paper loaded in the tray.
Note:
When a finisher is installed, the pages are rotated to 180° when printed.
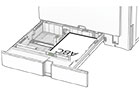
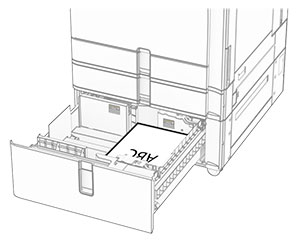
When loading letterhead, do any of the following:
|
One-sided, long-edge printing
|
One-sided, long-edge printing
|
|
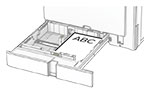
One-sided, short-edge printing
|
One-sided, short-edge printing
|
|
Two-sided, long-edge printing
|
Two-sided, long-edge printing
|
|
Two-sided, short-edge printing
|
Two-sided, short-edge printing
|
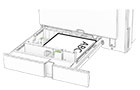
When loading prepunched paper, do any of the following:
|
One-sided, long-edge printing
|
One-sided, long-edge printing
|
|
One-sided, short-edge printing
|
One-sided, short-edge printing
|
|
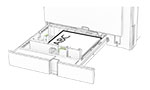
Two-sided, long-edge printing
|
Two-sided, long-edge printing
|
|
Two-sided, short-edge printing
|
Two-sided, short-edge printing
|
Loading the 2000-sheet tandem tray
CAUTION—TIPPING HAZARD:
To reduce the risk of equipment instability, load each tray separately. Keep all other trays closed until needed.
-
Open the tray.
Note:
To avoid jams, do not pull out trays while the printer is busy.
-
Flex, fan, and align the paper edges before loading.
-
Load the paper stack to the right tray insert with the printable side faceup.
Notes:
-
Do not slide paper into the tray.
-
Make sure that the stack height is below the maximum paper fill indicator. Overfilling may cause paper jams.
-
Insert the right tray insert into the printer.
-
Load the paper stack to the left tray insert with the printable side faceup.
-
Insert the tray.
If necessary, set the paper size and type to match the paper loaded in the tray.
Note:
When a finisher is installed, the pages are rotated to 180° when printed.
When loading letterhead for one-sided printing, load it faceup with the header toward the front of the tray.
When loading letterhead for two-sided printing, load it facedown with the header toward the front of the tray.
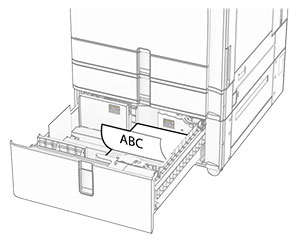
Loading the 1500-sheet tray
CAUTION—TIPPING HAZARD:
To reduce the risk of equipment instability, load each tray separately. Keep all other trays closed until needed.
-
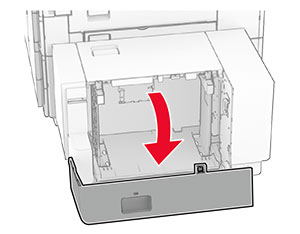
Open door K.
Note:
To avoid jams, do not open trays while the printer is busy.
-
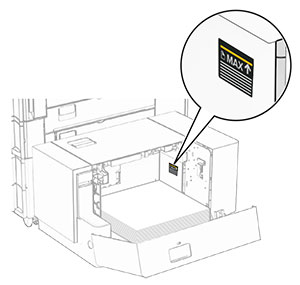
Flex, fan, and align the paper edges before loading.
-
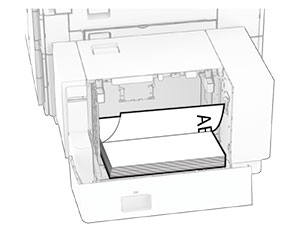
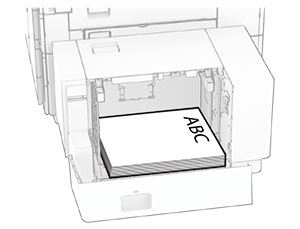
Load the paper stack with the printable side facedown.
Notes:
-
Do not slide paper into the tray.
-
Make sure that the stack height is below the maximum paper fill indicator. Overfilling may cause paper jams.
-
Close door K.
If necessary, set the paper size and type to match the paper loaded in the tray.
When loading letterhead for one-sided printing, load it facedown with the header toward the rear of the printer.
When loading letterhead for two-sided printing, load it faceup with the header toward the rear of the printer.
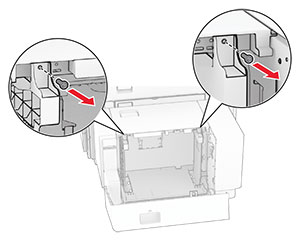
When loading a different paper size, make sure to adjust the guides. Do the following:
-
Using a flat-headed screwdriver, remove the screws from the paper guides.
-
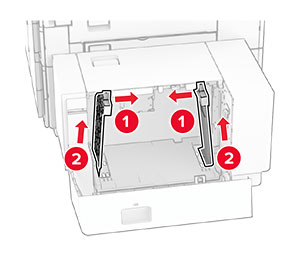
Remove the paper guides.
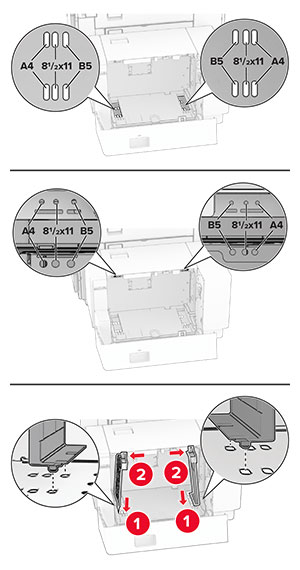
-
Align the paper guides to match the size of the paper that you are loading.
-
Install the screws on the paper guides.
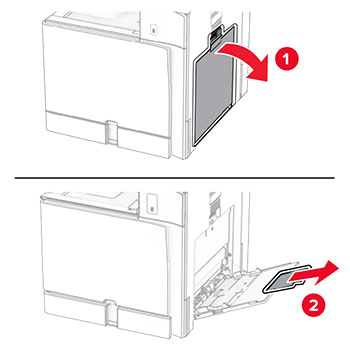
Loading the multipurpose feeder
-
Open the multipurpose feeder.
-
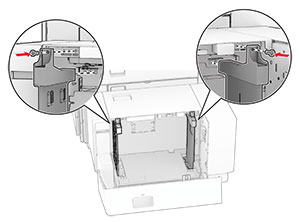
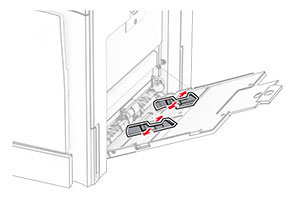
Adjust the side guides to match the size of the paper that you are loading.
-
Flex, fan, and align the paper edges before loading.
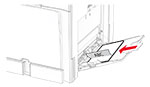
-
Load the paper.
Note:
Make sure that the side guides fit snugly against the paper.
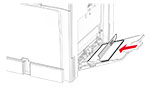
When loading prepunched paper, do either of the following:
|
One-sided, long-edge printing
|
One-sided, long-edge printing
|
|
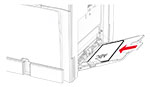
Two-sided, long-edge printing
|
Two-sided, long-edge printing
|
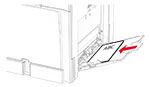
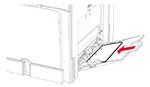
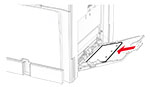
For envelopes
Load envelope with the flap faceup toward the rear of the printer. Load European envelope with the flap faceup entering the multipurpose feeder first.
Note:
When a finisher is installed, the printer rotates the pages to 180°.
Linking trays
-
Open a web browser, and then type the printer IP address in the address field.
Notes:
-
View the printer IP address on the printer home screen. The IP address appears as four sets of numbers separated by periods, such as 123.123.123.123.
-
If you are using a proxy server, then temporarily disable it to load the web page correctly.
-
Click
Settings
>
Paper
>
Tray Configuration
.
-
Set the same paper size and paper type for the trays that you are linking.
Note:
Make sure to load the linked trays with the same paper orientation.
-
Save the settings.
-
Click
Settings
>
Device
>
Maintenance
>
Configuration Menu
>
Tray Configuration
.
-
Set
Tray Linking
to
Automatic
.
-
Save the settings.
To unlink the trays, make sure that no trays have the same paper size and paper type settings.
Warning—Potential Damage:
The temperature of the fuser varies according to the specified paper type. To avoid printing issues, match the paper type setting in the printer with the paper loaded in the tray.