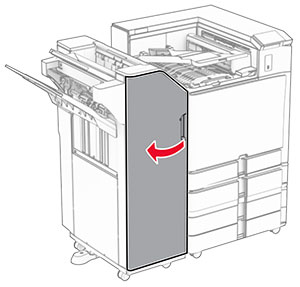
ホチキスパンチフィニッシャの紙詰まり
お使いのプリンタで用紙搬送ユニットが設定されている場合は、以下の手順に従います。
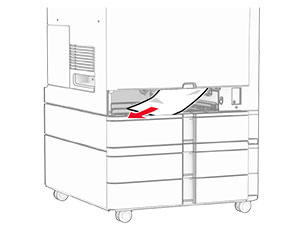
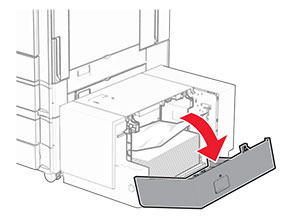
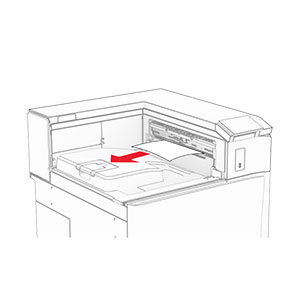
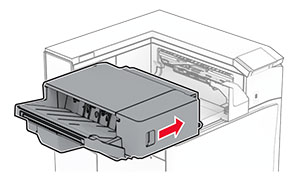
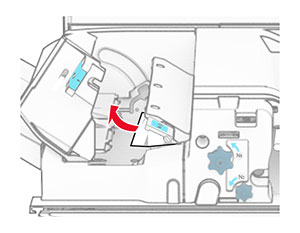
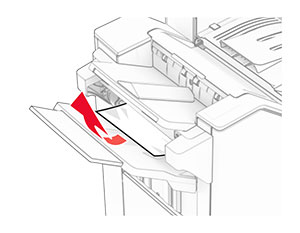
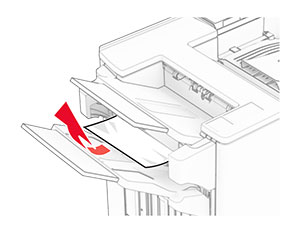
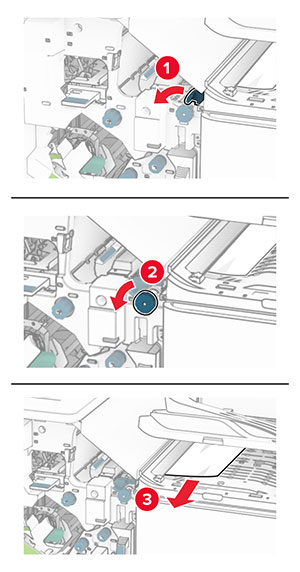
排紙トレイ 1 で詰まっている用紙を取り除きます。
メモ:
- 必ずすべての紙片を取り除いてください。
- ページの欠落を防ぐため、ホチキスコンパイラにある印刷済みのページは取り出さないでください。
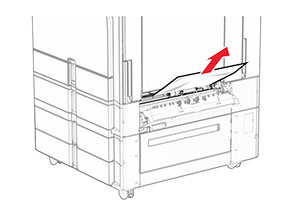
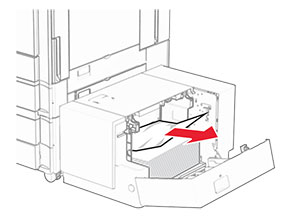
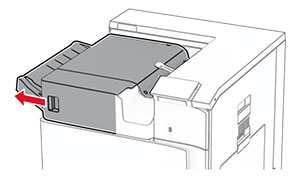
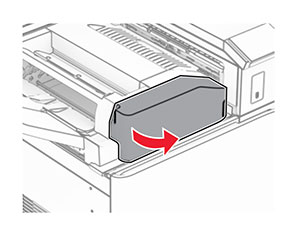
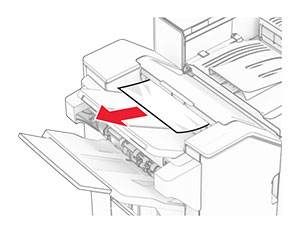
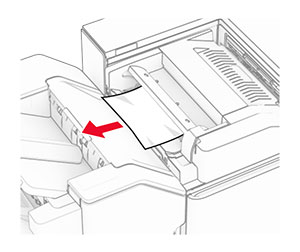
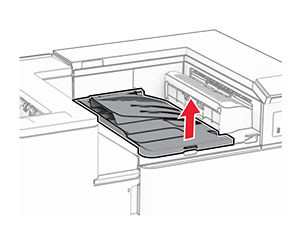
フィニッシャ標準排紙トレイから詰まった用紙を取り除きます。
メモ: 必ずすべての紙片を取り除いてください。
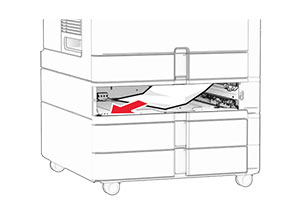
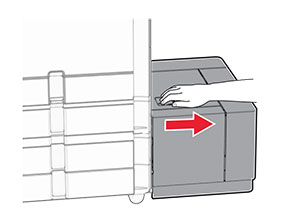
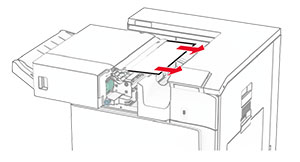
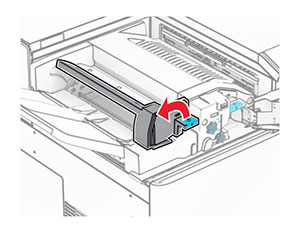
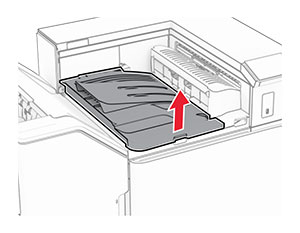
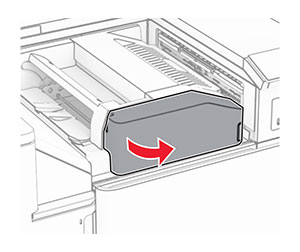
排紙トレイ 2 で詰まっている用紙を取り除きます。
メモ: 必ずすべての紙片を取り除いてください。
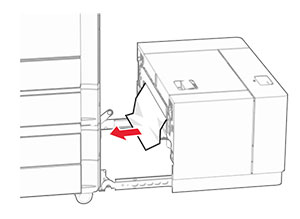
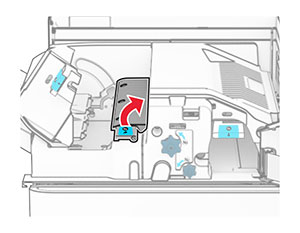
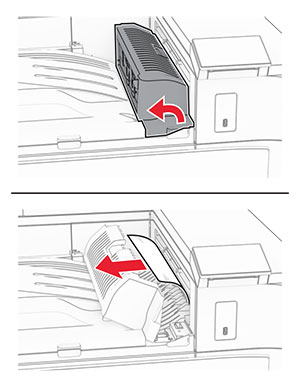
用紙搬送ユニットのカバー G を開き、詰まっている用紙を取り除きます。
メモ: 必ずすべての紙片を取り除いてください。
用紙搬送ユニットのカバー G を閉じます。
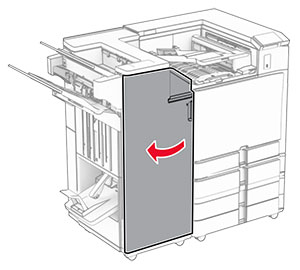
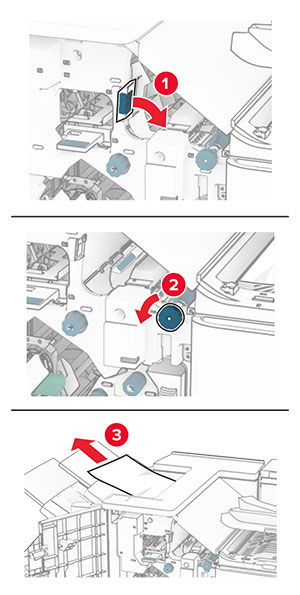
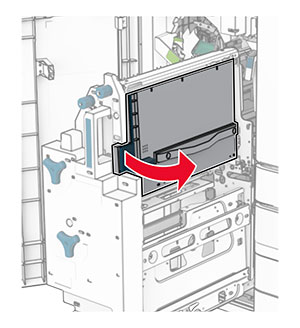
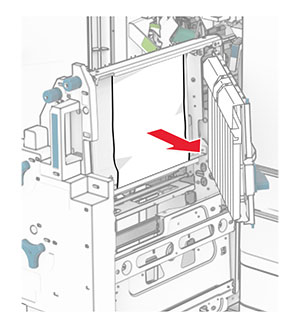
ドア I と ドア R1 を開いて、詰まっている用紙を取り除きます。
メモ: 必ずすべての紙片を取り除いてください。
ドア R1 を閉じ、次にドア I を閉じます。
用紙搬送ユニットのカバー F を閉じます。
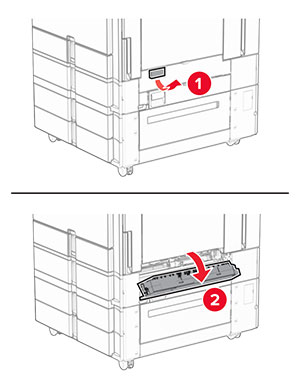
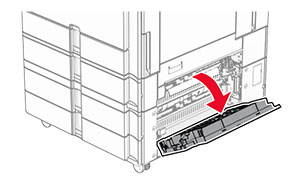
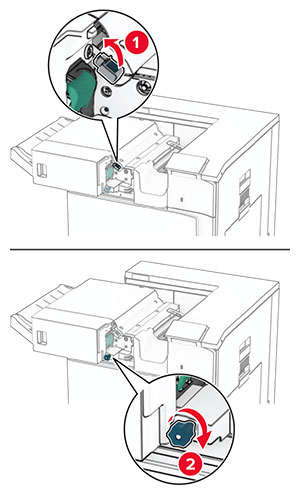
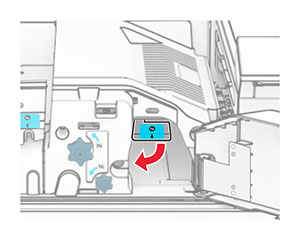
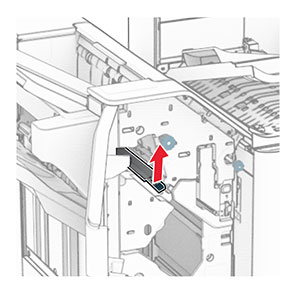
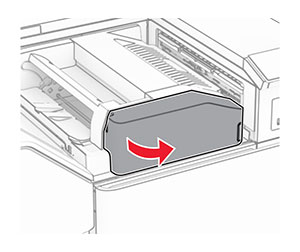
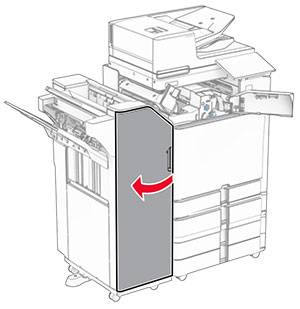
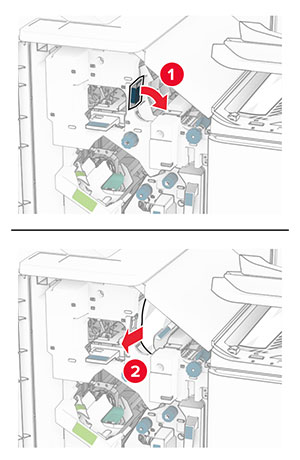
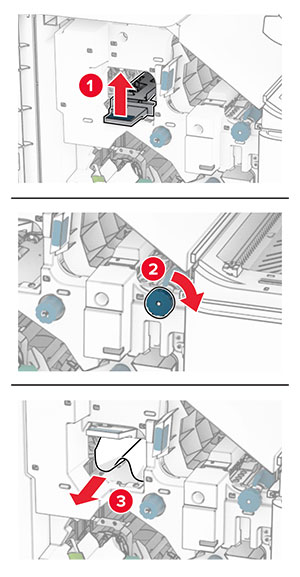
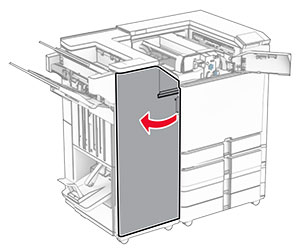
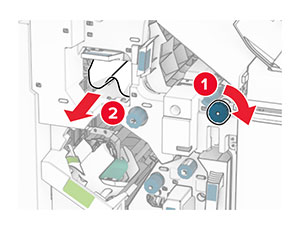
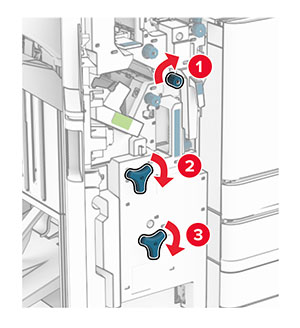
ドア H を開きます。
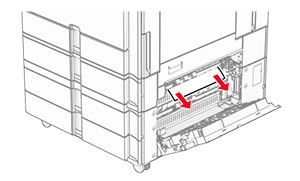
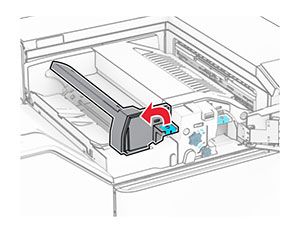
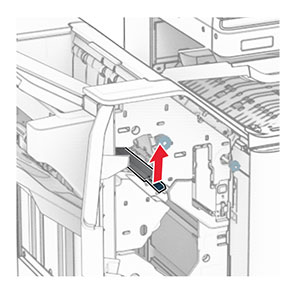
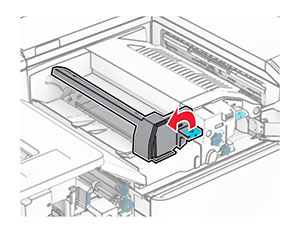
ハンドル R4 を持ち上げます。
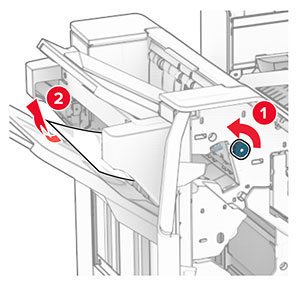
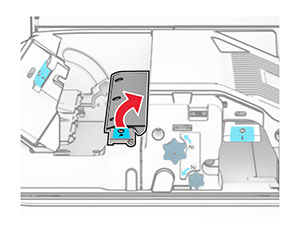
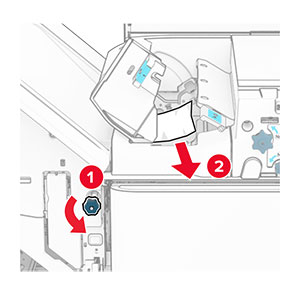
ノブ R3 を反時計回りに回し、排紙トレイ 1 で詰まっている用紙を取り除きます。
メモ: 必ずすべての紙片を取り除いてください。
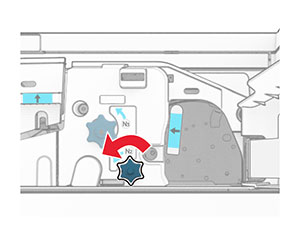
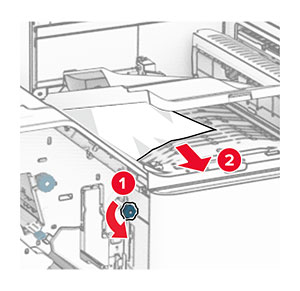
ノブ R2 を反時計回りに回し、用紙搬送ユニットのカバー F から詰まっている用紙を取り除きます。
メモ: 必ずすべての紙片を取り除いてください。
用紙搬送ユニットのカバー F を閉じます。
ハンドル R4 を元の位置に戻します。
ドア H を閉じます。
お使いのプリンタで折り畳みオプション付きの用紙搬送ユニットが設定されている場合は、以下の手順に従います。
排紙トレイ 1 で詰まっている用紙を取り除きます。
メモ:
- 必ずすべての紙片を取り除いてください。
- ページの欠落を防ぐため、ホチキスコンパイラにある印刷済みのページは取り出さないでください。
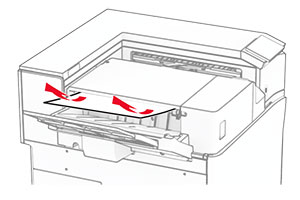
フィニッシャ標準排紙トレイから詰まった用紙を取り除きます。
メモ: 必ずすべての紙片を取り除いてください。
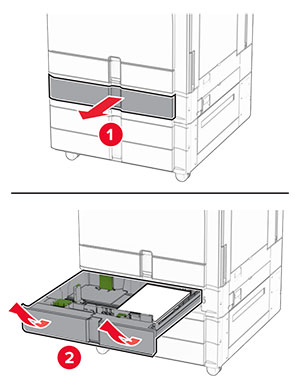
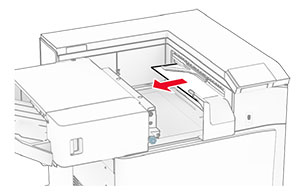
排紙トレイ 2 で詰まっている用紙を取り除きます。
メモ: 必ずすべての紙片を取り除いてください。
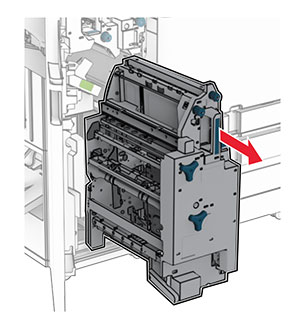
ドア F を開きます。
ドア N4 を開きます。
ドア N5 を開きます。
ドア H を開きます。
ハンドル R4 を持ち上げます。
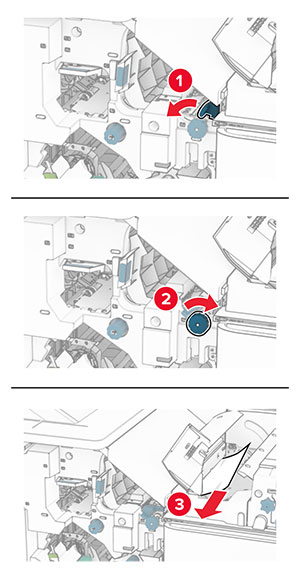
ノブ R3 を反時計回りに回し、排紙トレイ 1 で詰まっている用紙を取り除きます。
メモ: 必ずすべての紙片を取り除いてください。
ノブ R2 を反時計回りに回し、ドア N4 と N5 の間で詰まった用紙があれば取り除きます。
メモ: 必ずすべての紙片を取り除いてください。
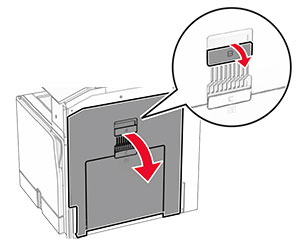
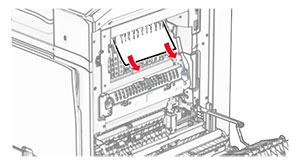
ドア B を開きます。
 注意—表面高温:
 プリンタの内部が高温になっている場合があります。高温のコンポーネントによる負傷の危険を減らすために、コンポーネントの表面が冷えるのを待ってから触れてください。
警告—破損の恐れあり: 静電気放電による損傷を防ぐため、プリンタ内部に手を入れたり触れたりする前に、プリンタの露出している金属製フレームに触れてください。
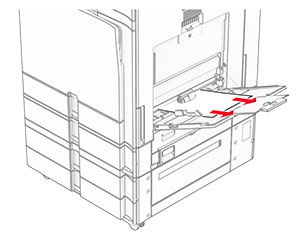
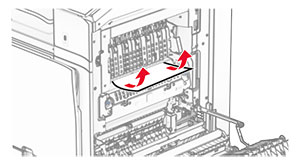
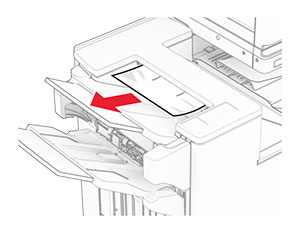
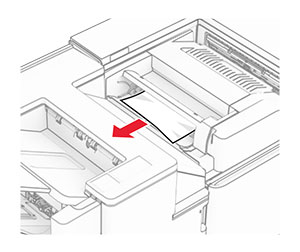
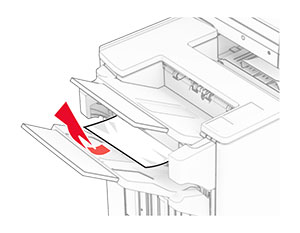
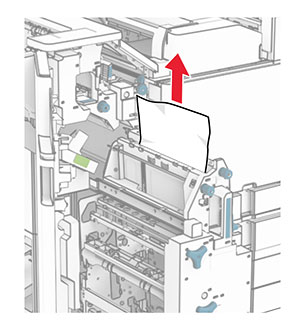
標準排紙トレイの排紙ローラーから詰まった用紙を取り除きます。
メモ: 必ずすべての紙片を取り除いてください。
ドア B を閉じます。
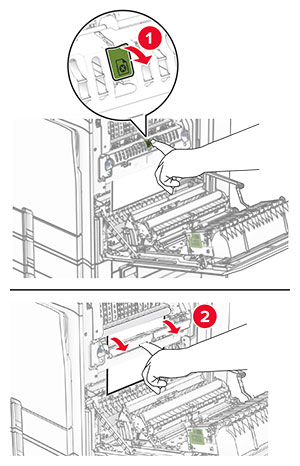
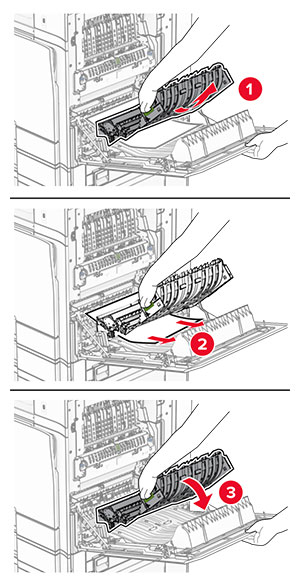
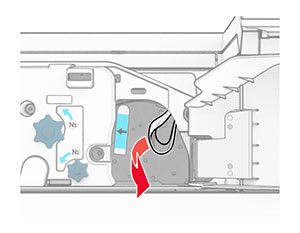
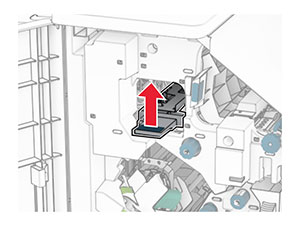
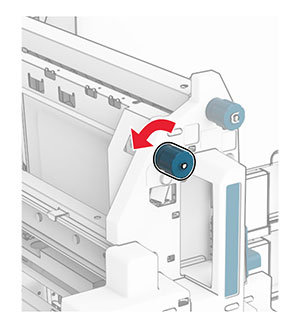
ハンドル N1 を押し下げます。
ノブ N2 を反時計方向に回します。
詰まっている用紙を取り除きます。
警告—破損の恐れあり: プリンタの損傷を防ぐため、詰まった用紙を取り除く前に、身に付けているアクセサリはすべて外してください。
メモ: 必ずすべての紙片を取り除いてください。
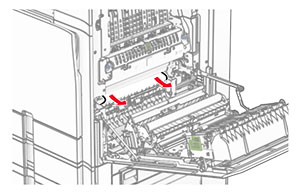
ハンドル N1 を元の位置に戻します。
ハンドル N5 を閉じ、次にハンドル N4 を閉じます。
ドア F を閉じます。
ハンドル R4 を元の位置に戻します。
ドア H を閉じます。