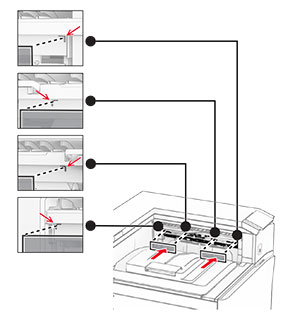
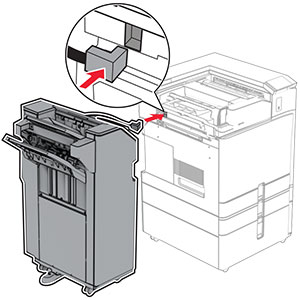
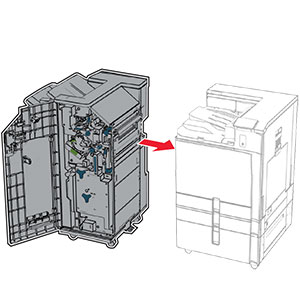
オプションの 550 枚トレイを取り付ける
 注意—感電危険: 感電を避けるため、プリンタのセットアップ後にコントローラボードにアクセスする際や、オプションのハードウェアまたはメモリデバイスを取り付ける際には、作業を進める前にプリンタの電源を切り、電源コードを抜きます。他のデバイスがプリンタに接続されている場合は、他のデバイスの電源も切り、プリンタに接続しているケーブルを抜きます。
メモ: この作業には、マイナスドライバが必要です。
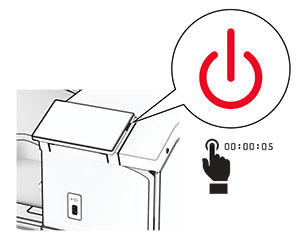
プリンタの電源を切ります。
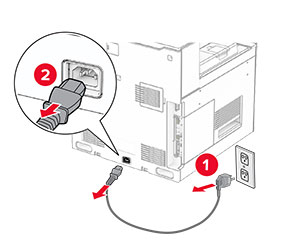
電源コードをコンセントから抜き、次にプリンタから抜きます。
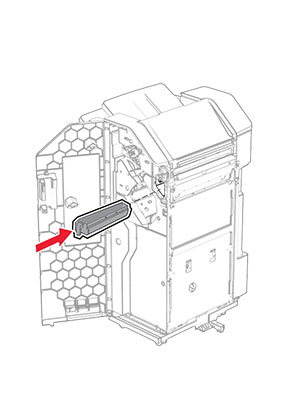
オプションの 550 枚トレイを梱包から取り出します。
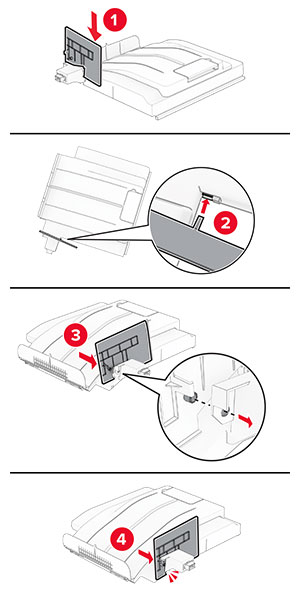
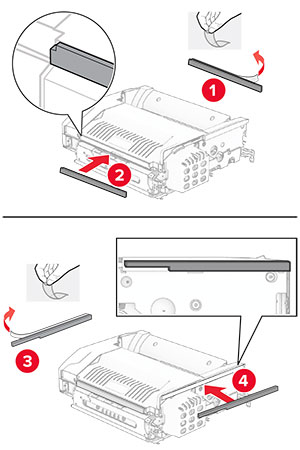
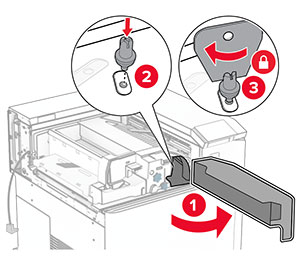
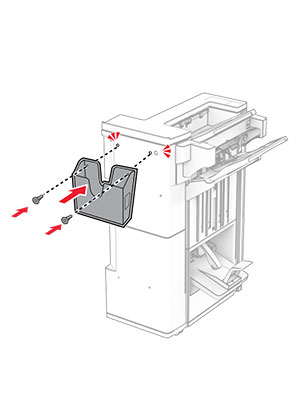
メモ: トレイの破損を防ぐため、トレイを持ち上げる際は必ず前面と背面を持ってください。右トレイのカバーを取り付けます。
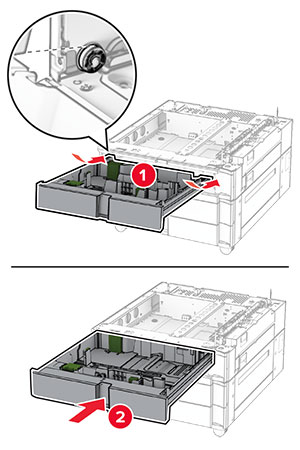
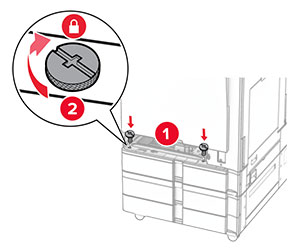
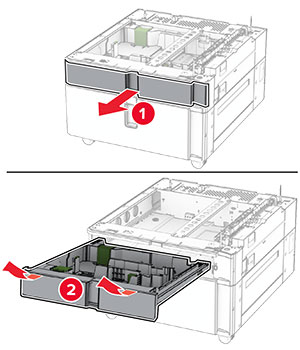
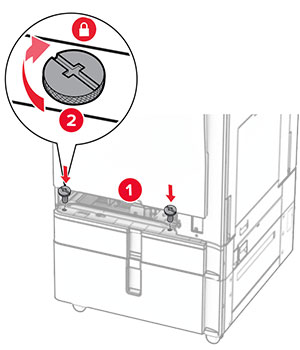
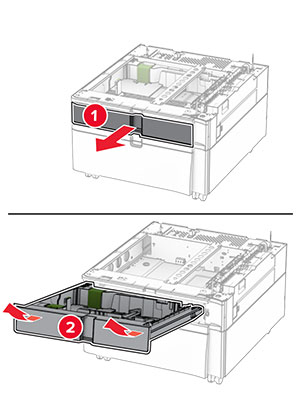
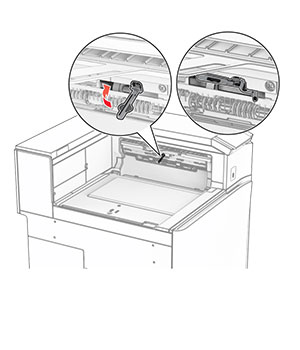
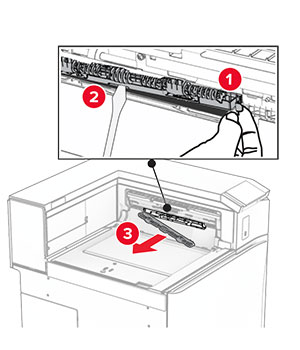
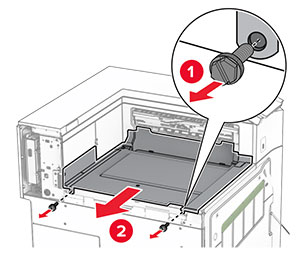
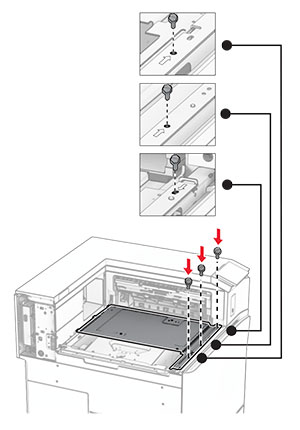
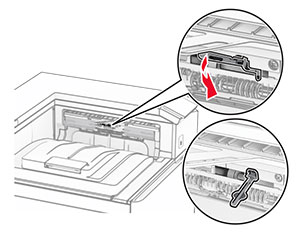
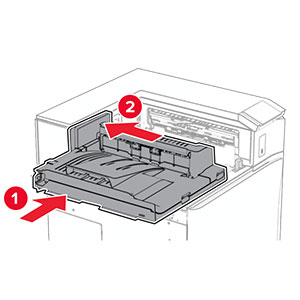
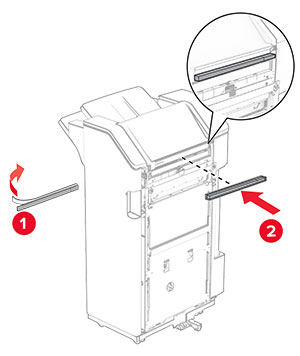
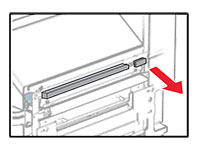
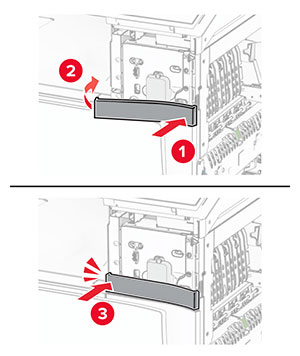
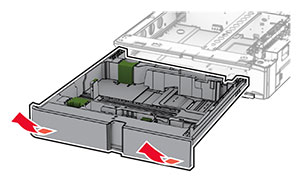
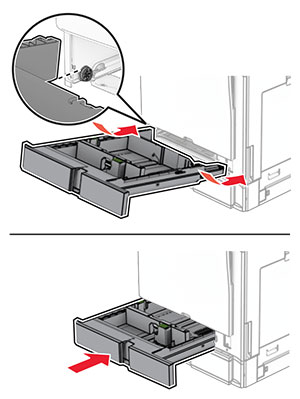
550 枚トレイの引き出し部を引き出します。
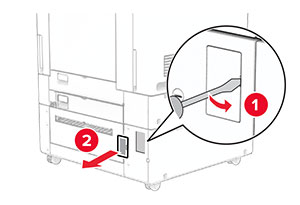
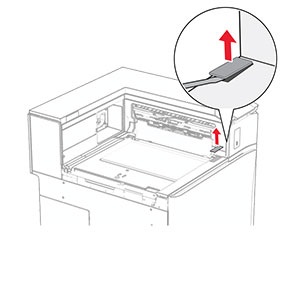
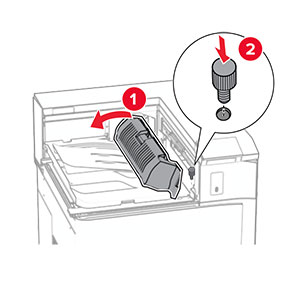
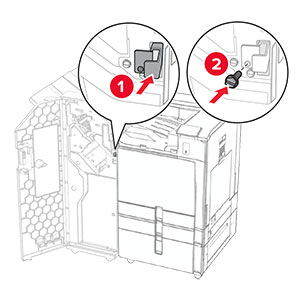
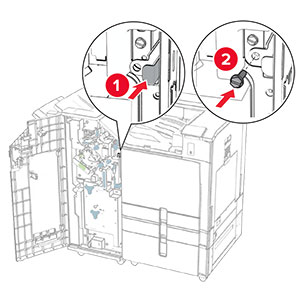
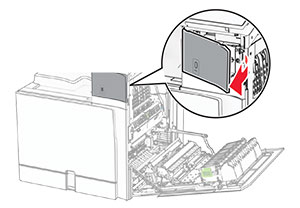
上部のトレイカバーを取り外します。
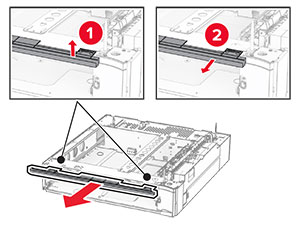
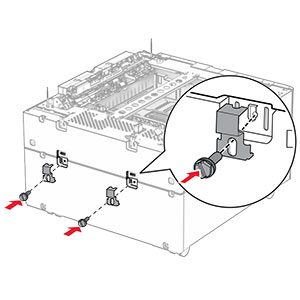
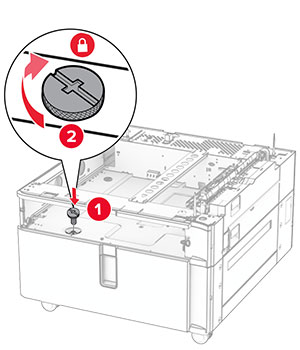
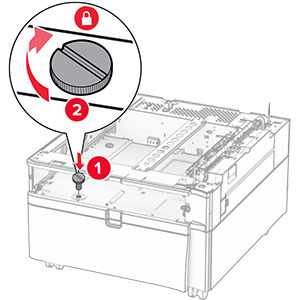
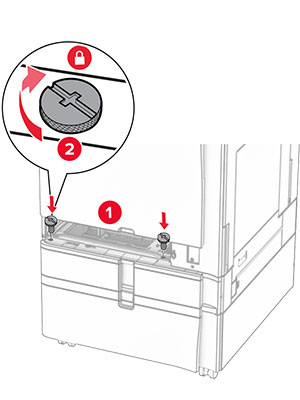
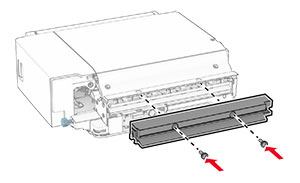
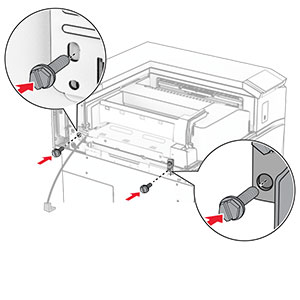
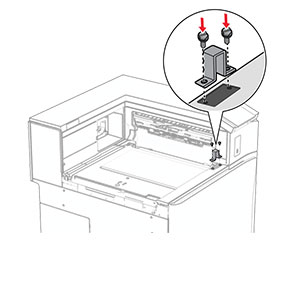
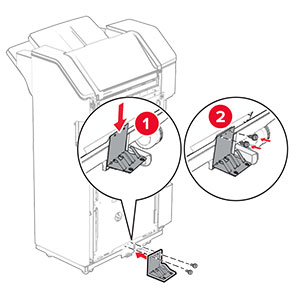
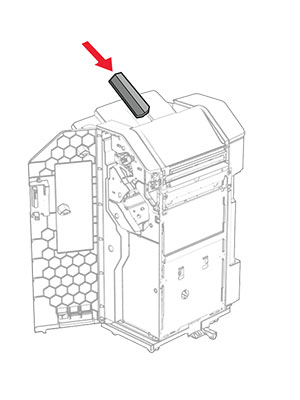
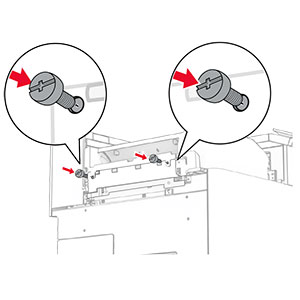
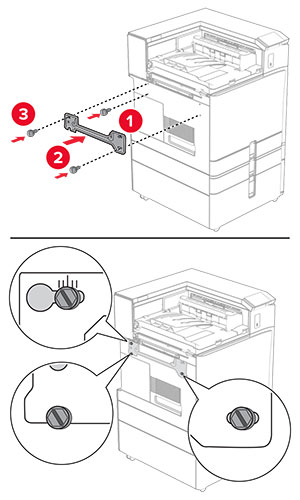
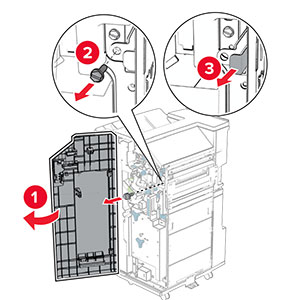
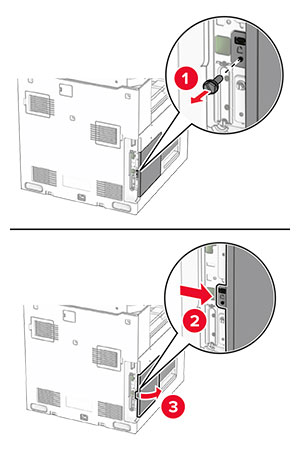
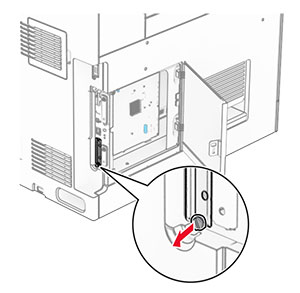
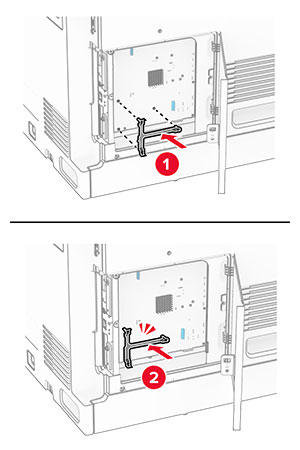
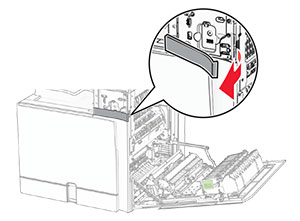
ねじを外します。
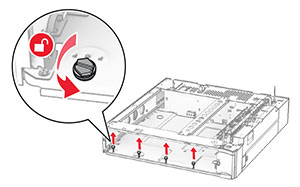
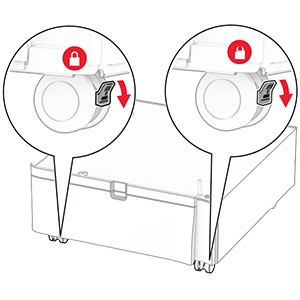
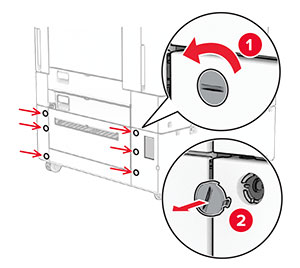
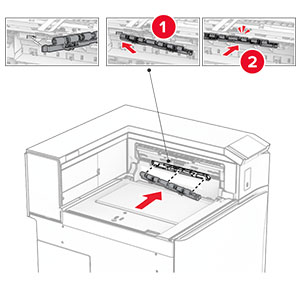
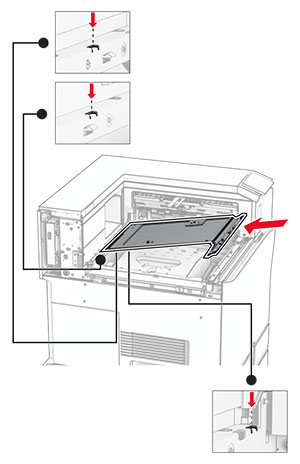
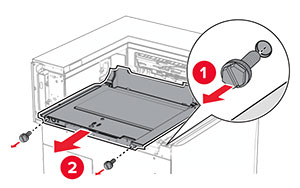
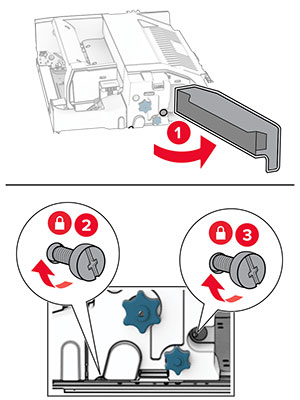
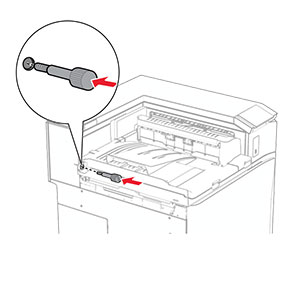
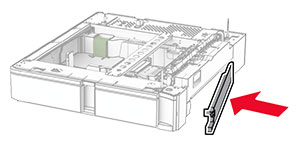
下部のトレイカバーを取り付けます。
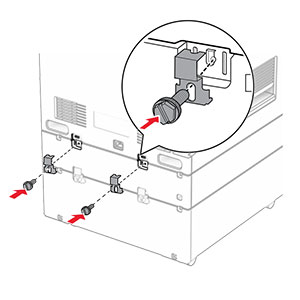
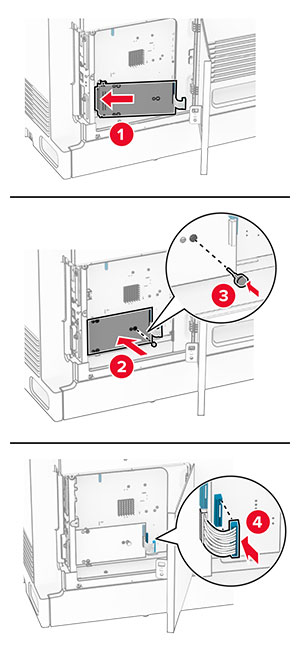
ネジを取り付けます。
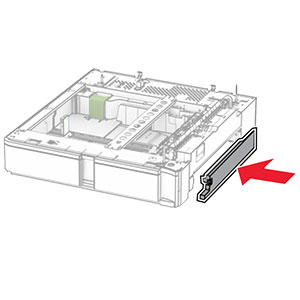
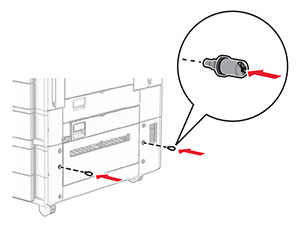
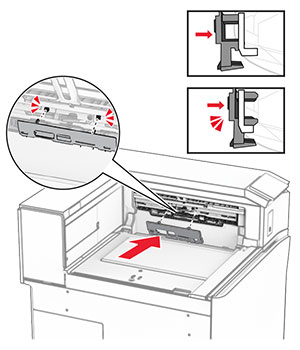
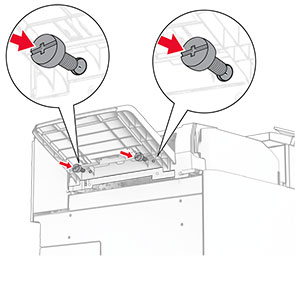
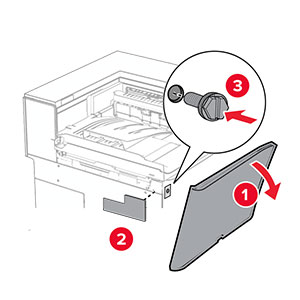
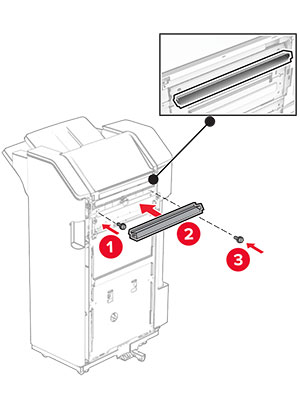
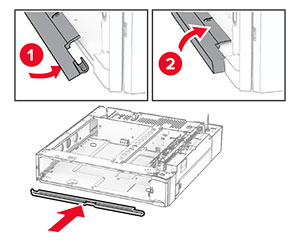
上部のトレイカバーを取り付けます。
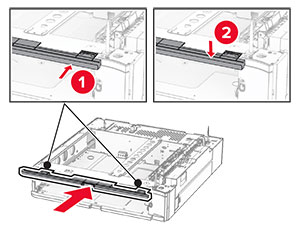
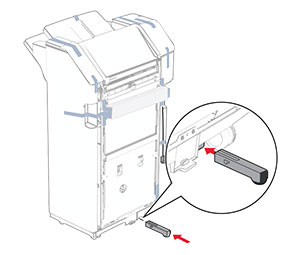
550 枚トレイの引き出し部を挿入します。
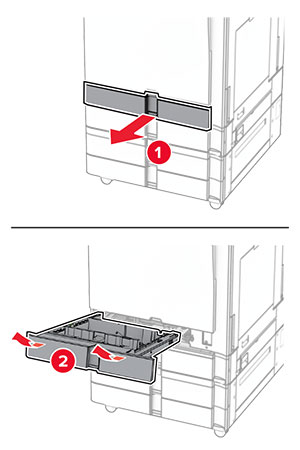
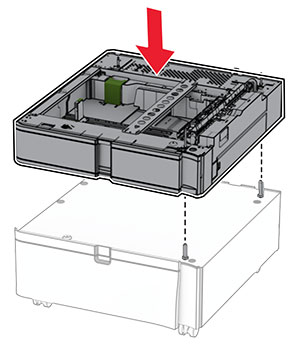
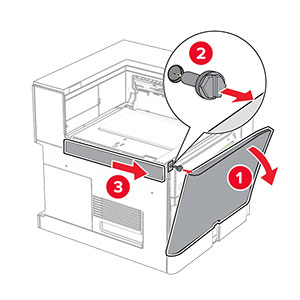
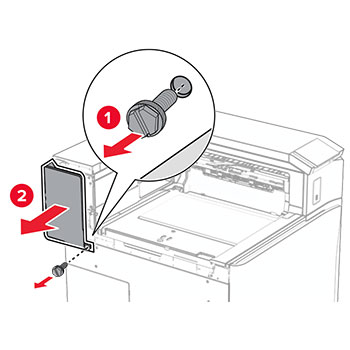
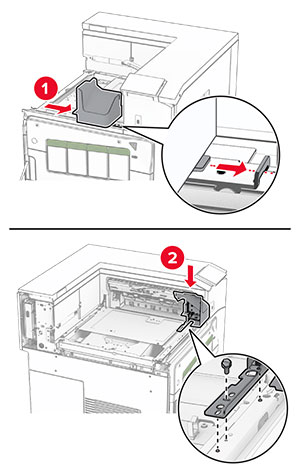
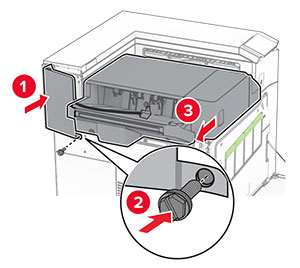
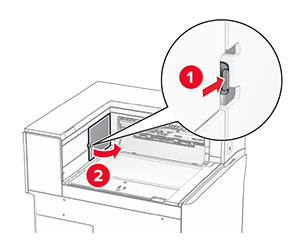
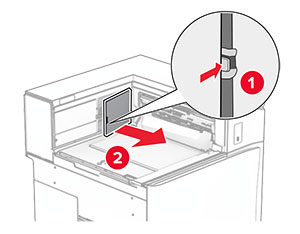
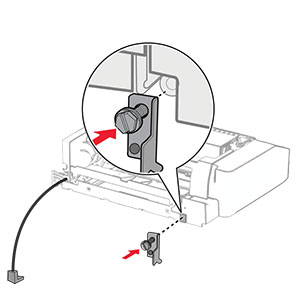
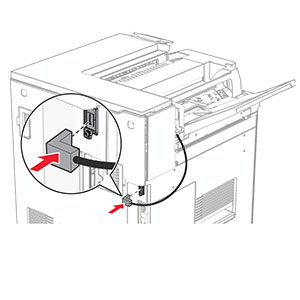
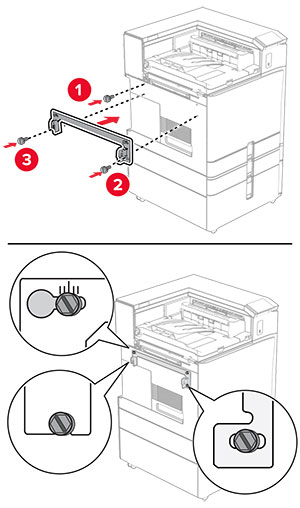
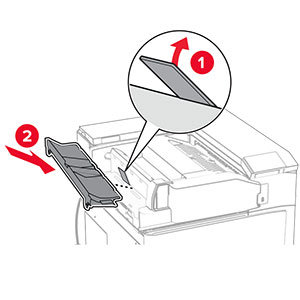
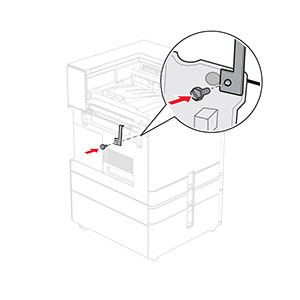
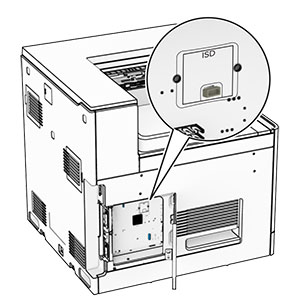
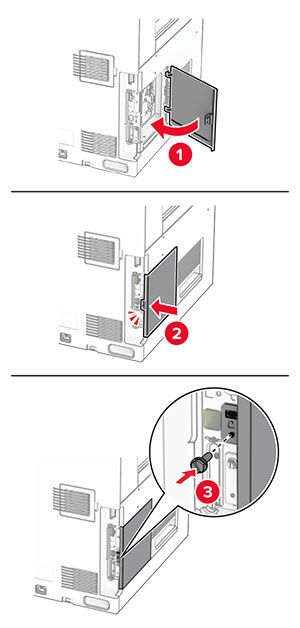
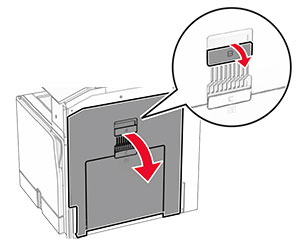
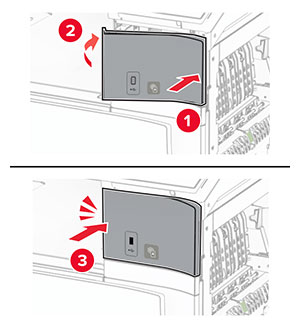
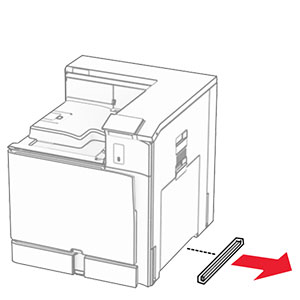
プリンタの左下のカバーを取り外します。
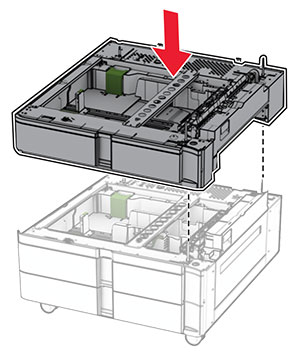
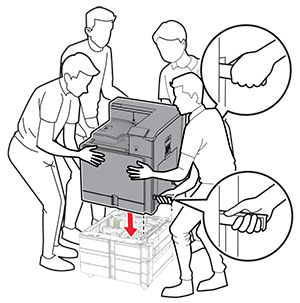
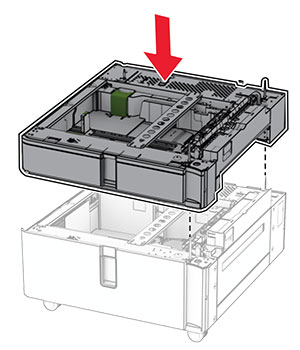
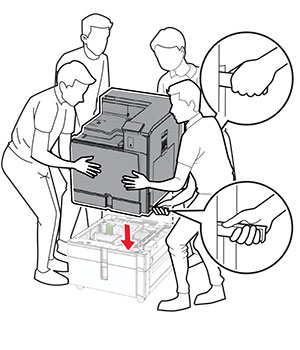
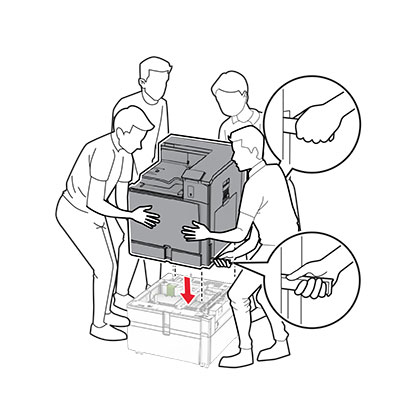
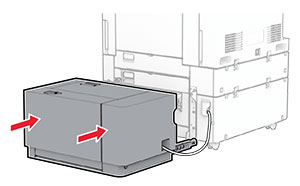
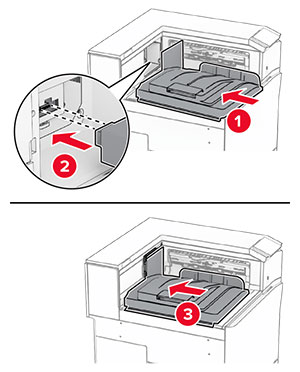
プリンタを 550 枚トレイに合わせ、所定の位置まで下げます。
 注意—傷害の恐れあり: プリンタの重さが 20 kg(44 lb)以上ある場合、安全に持ち上げるために 2 名以上の人が必要になることがあります。
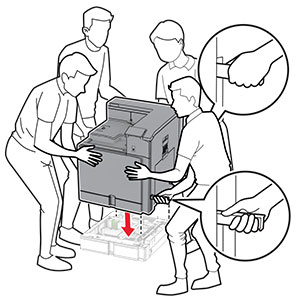
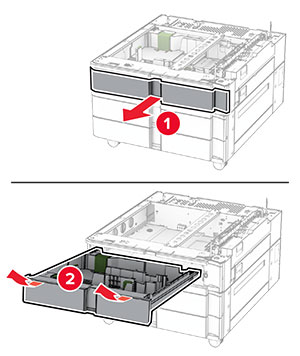
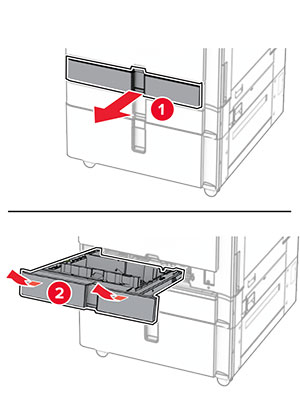
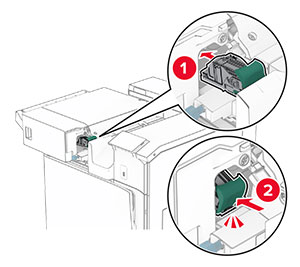
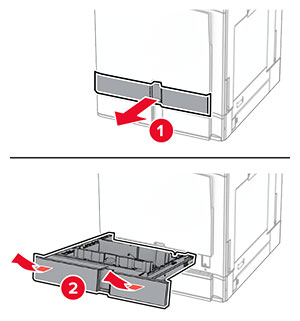
標準トレイの引き出し部を引き出します。
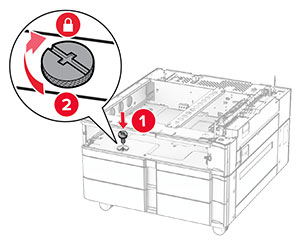
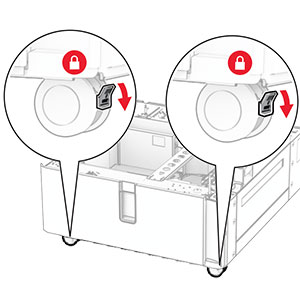
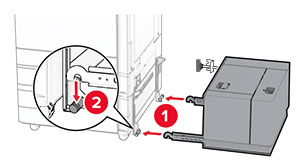
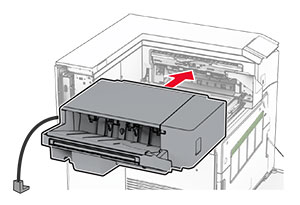
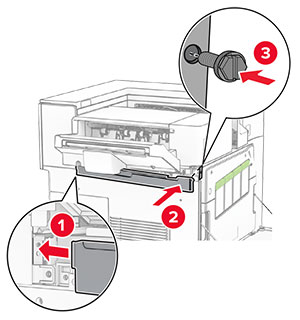
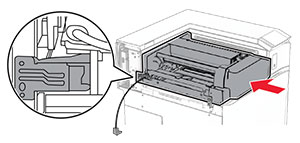
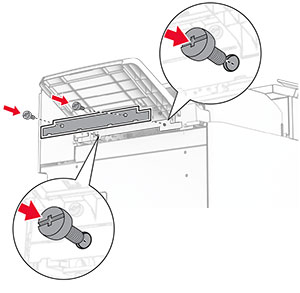
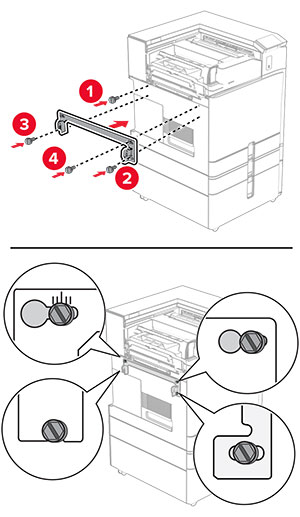
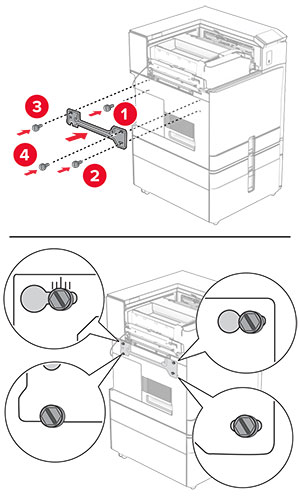
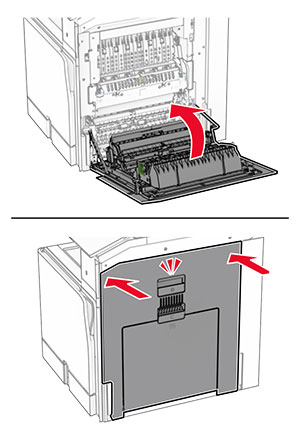
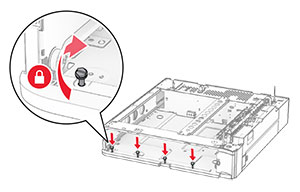
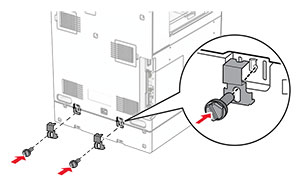
550 枚トレイにプリンタを固定します。

標準トレイの引き出し部を挿入します。
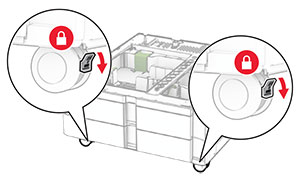
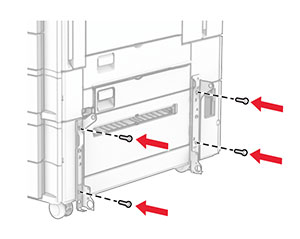
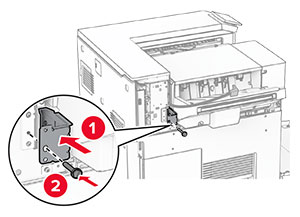
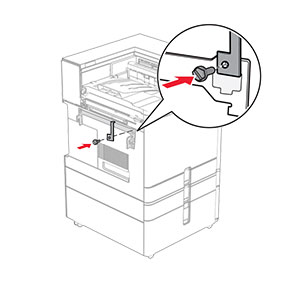
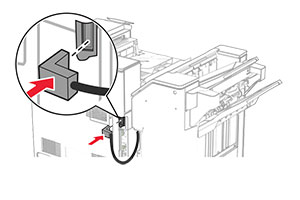
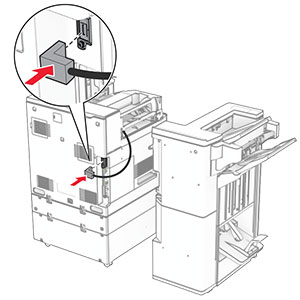
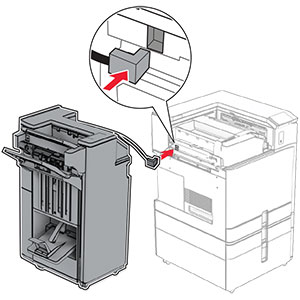
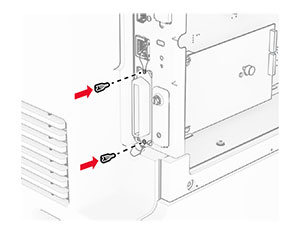
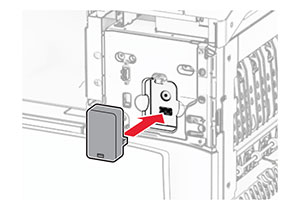
550 枚トレイの後部をプリンタに固定します。
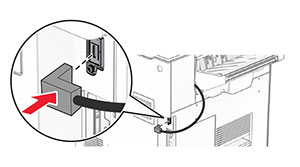
電源コードの一方の端をプリンタに接続してから、もう一方の端をコンセントに差し込みます。
注意—傷害の恐れあり: 火災や感電の危険を避けるため、電源コードを接続するコンセントが、製品の設置場所の近くにあること、アクセスしやすいこと、正しく接地されていること、適切な定格であることを確認してください。プリンタの電源を入れます。
プリントドライバにトレイを追加し、印刷ジョブで使用できるようにします。詳細については、プリンタドライバの使用可能なオプションを追加するを参照してください。