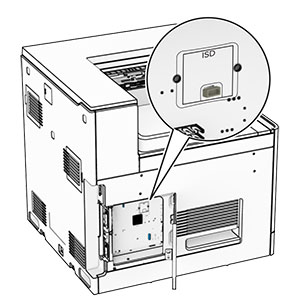
安裝選購性 550 張紙匣組件
 請當心—觸電危險: 為避免發生電擊的風險,若您是在安裝印表機之後,才要取用控制板或安裝選購性硬體或記憶裝置,請先關閉印表機電源,並從電源插座拔除電源線,再繼續作業。若您有任何其他裝置連接至印表機,請同時關閉它們的電源,並拔下所有連接到印表機的電纜。
請注意: 此作業需要一字螺絲起子。
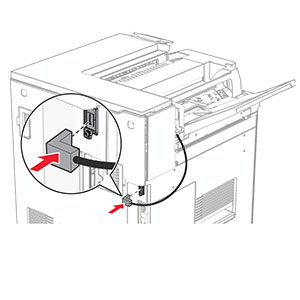
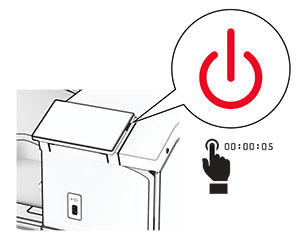
關閉印表機電源。
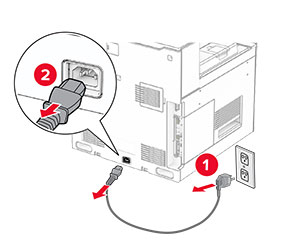
從電源插座拔除電源線,然後再從印表機拔除。
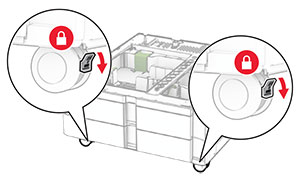
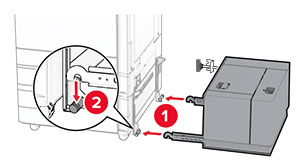
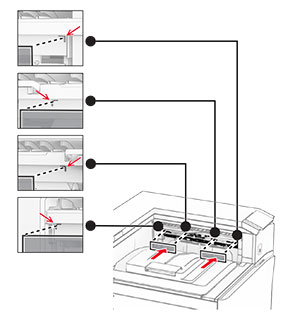
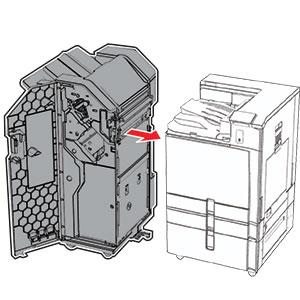
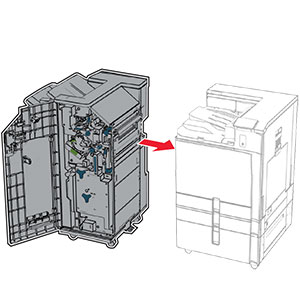
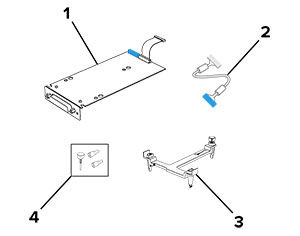
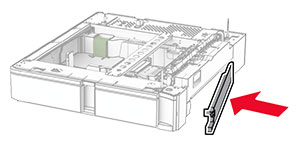
安裝選購性 550 張紙匣組件。
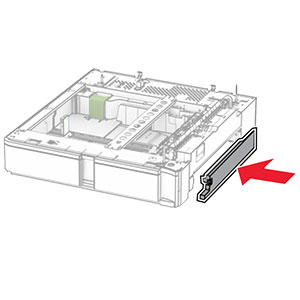
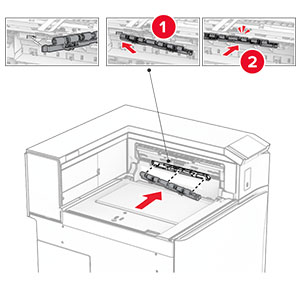
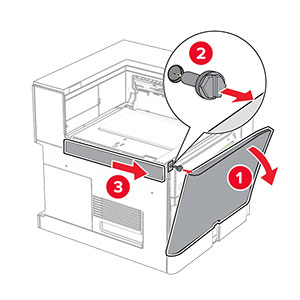
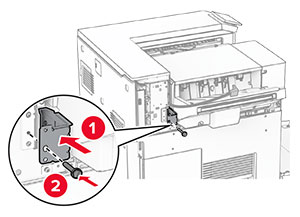
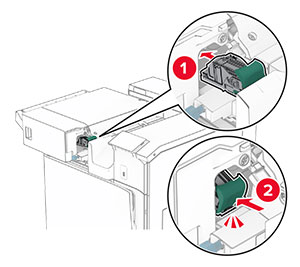
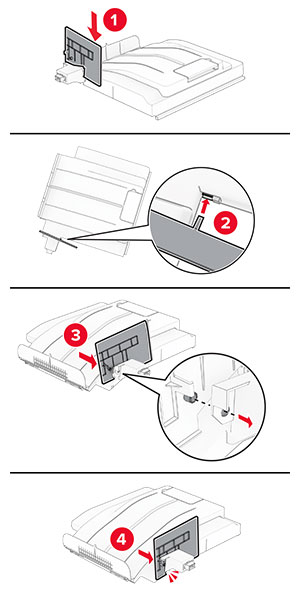
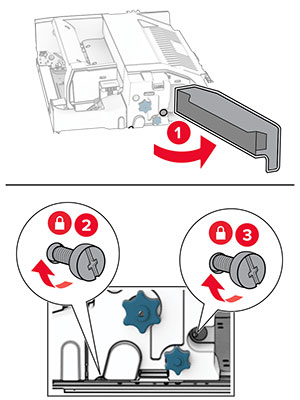
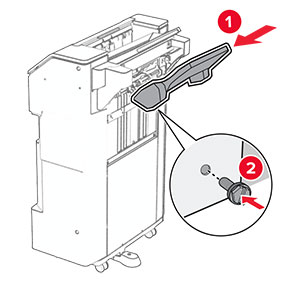
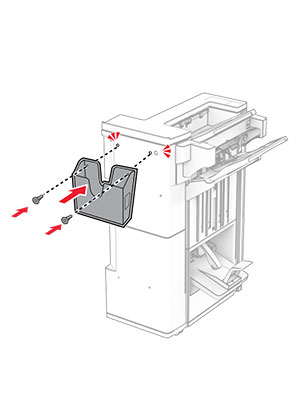
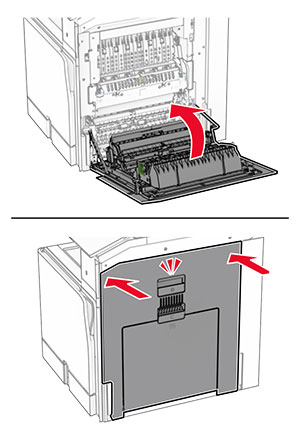
請注意: 為了避免損壞紙匣組件,在提起紙匣組件時,請務必抓住前後兩側。裝上右側紙匣組件蓋板。
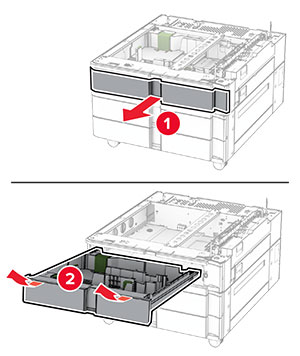
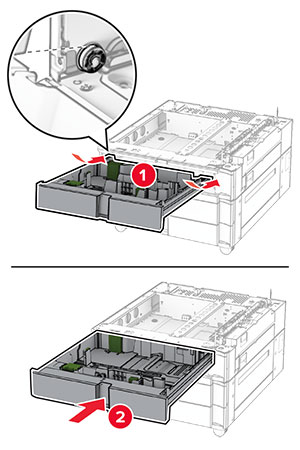
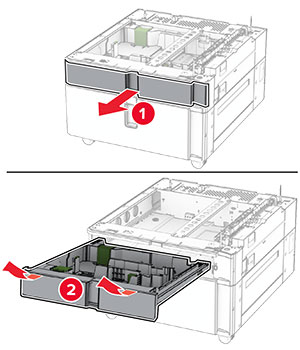
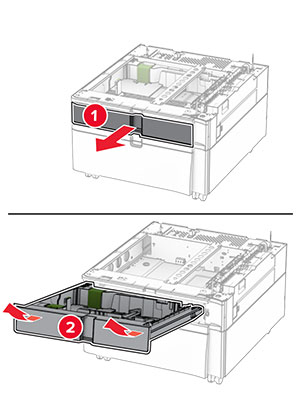
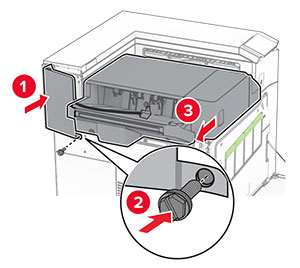
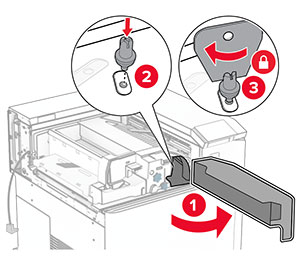
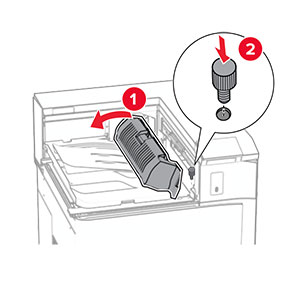
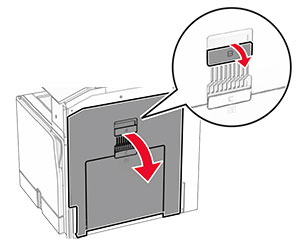
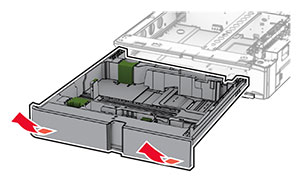
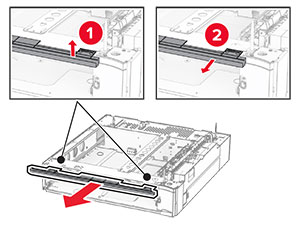
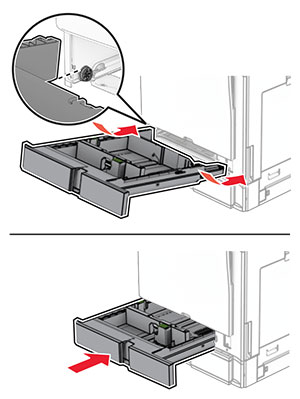
拉出 550 張紙匣組件。
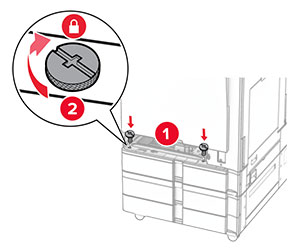
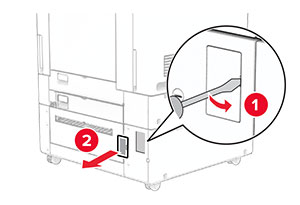
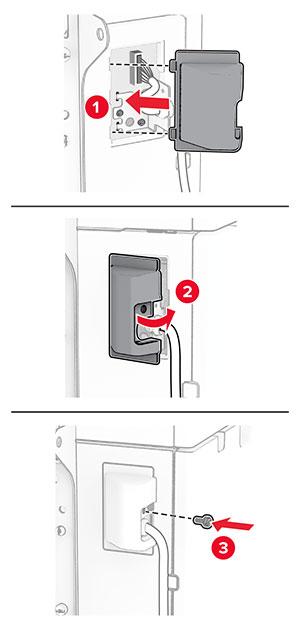
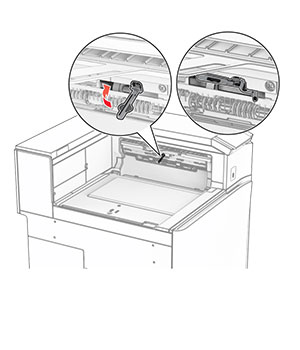
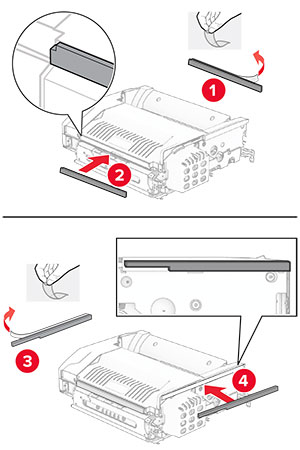
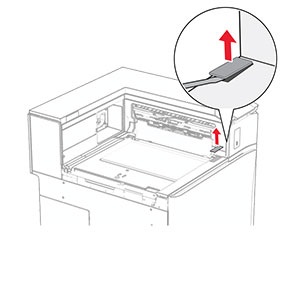
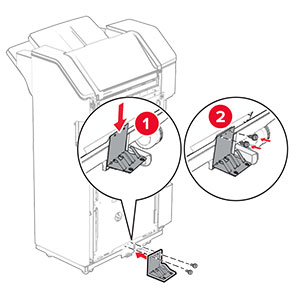
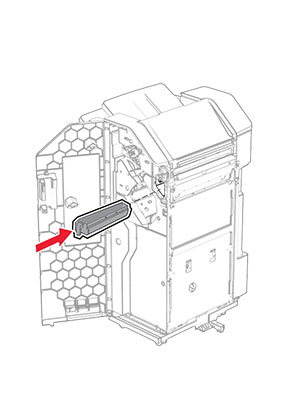
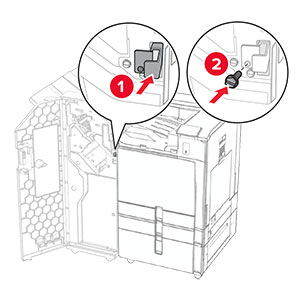
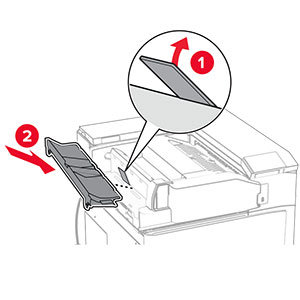
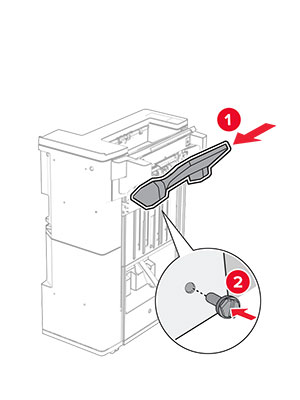
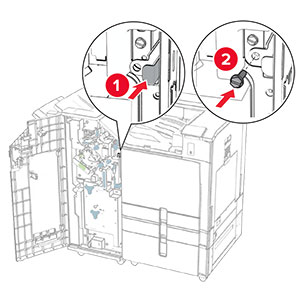
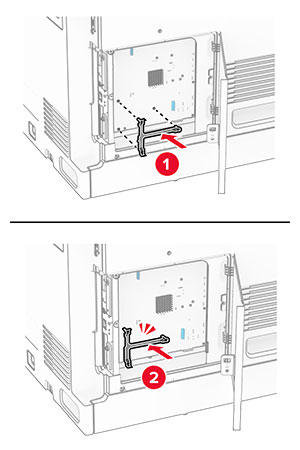
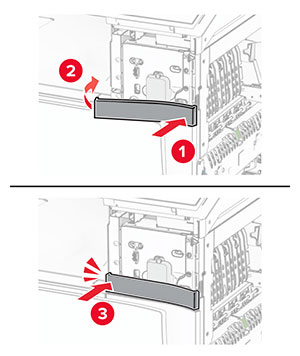
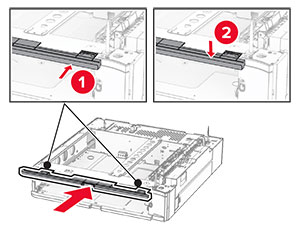
卸下上方紙匣組件蓋板。
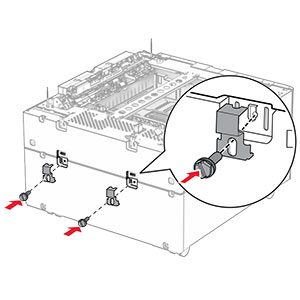
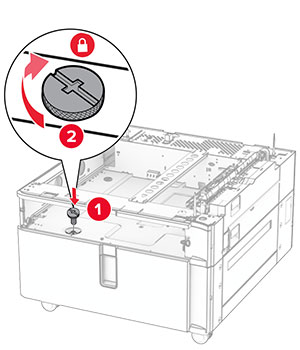
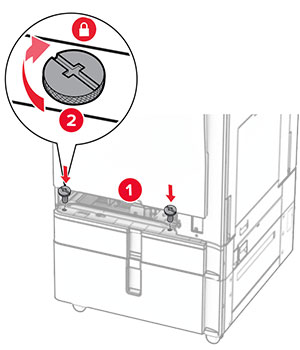
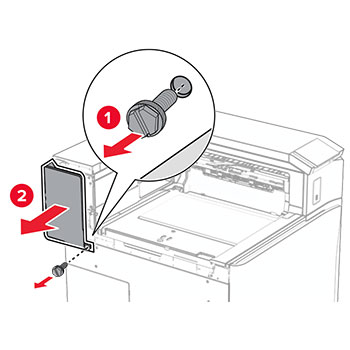
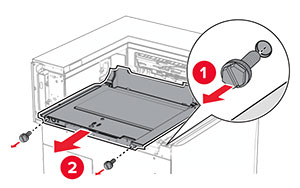
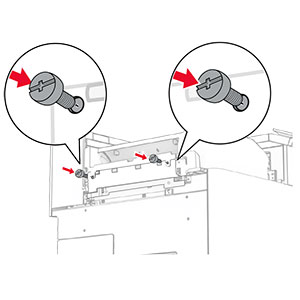
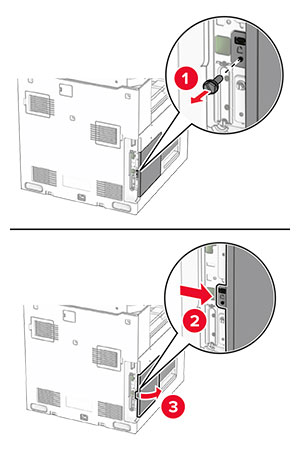
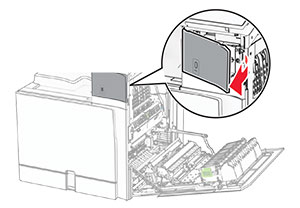
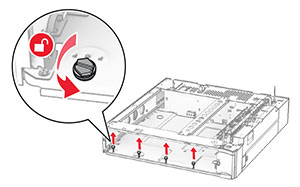
卸下螺絲。
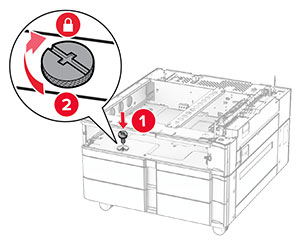
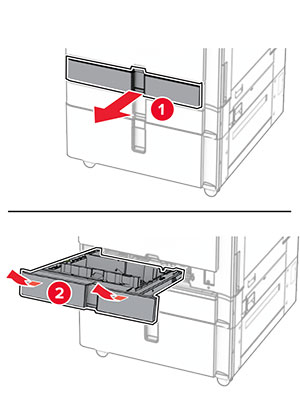
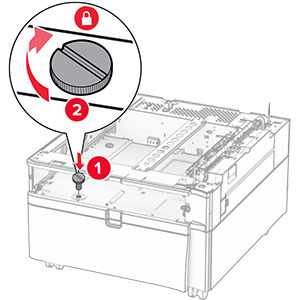
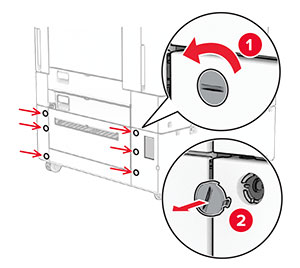
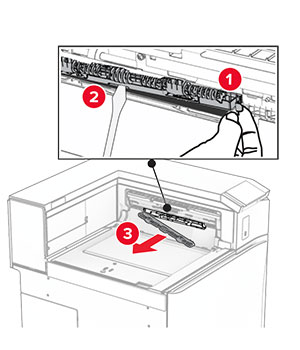
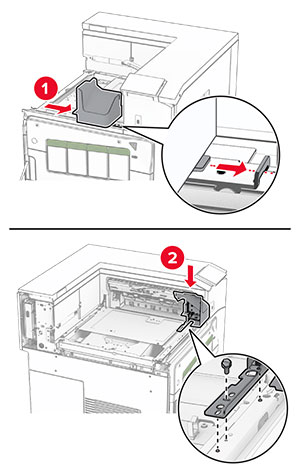
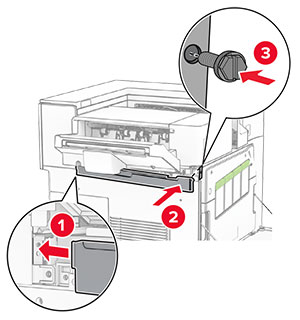
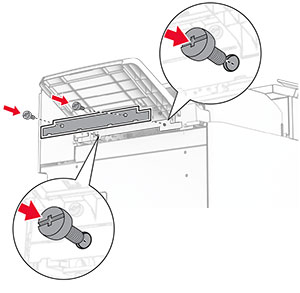
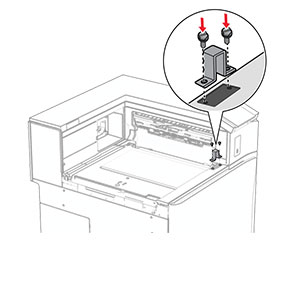
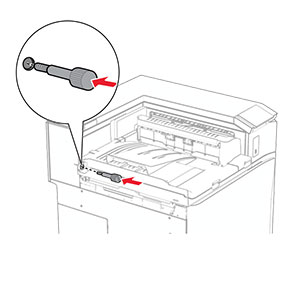
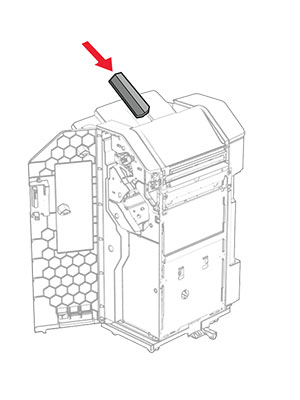
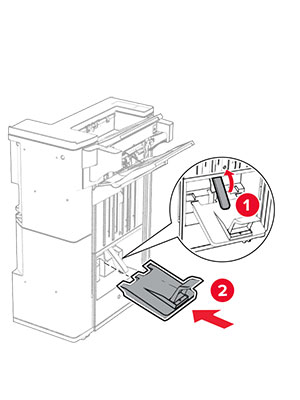
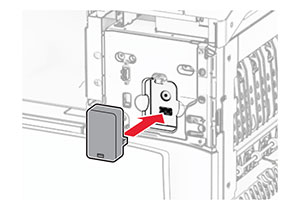
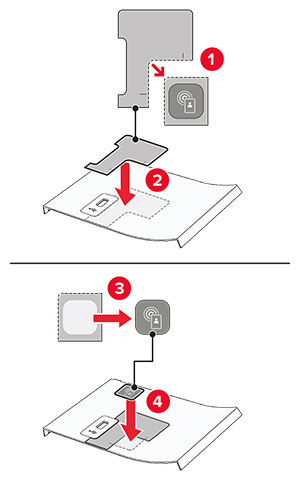
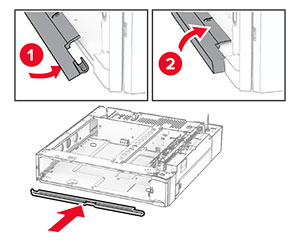
裝上下方紙匣組件蓋板。
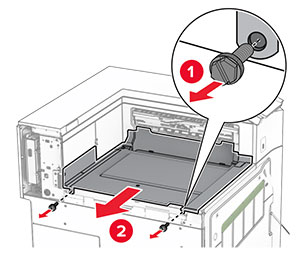
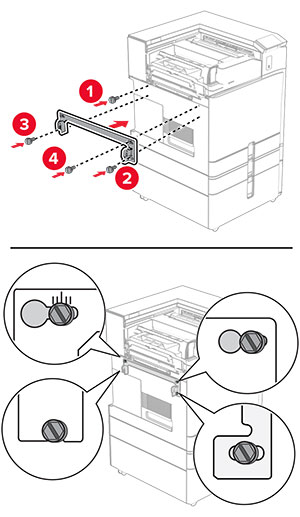
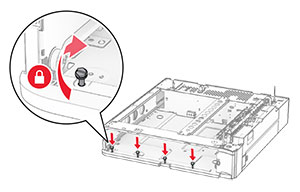
裝上螺絲。
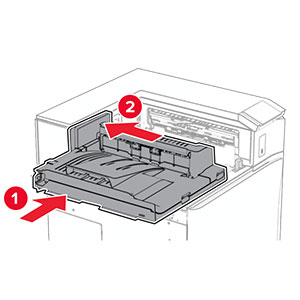
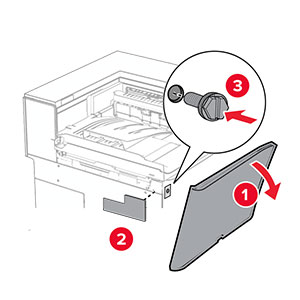
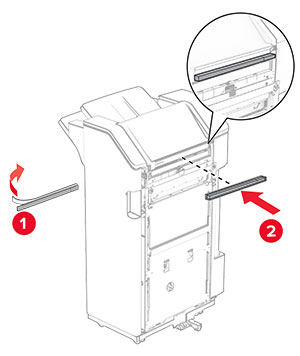
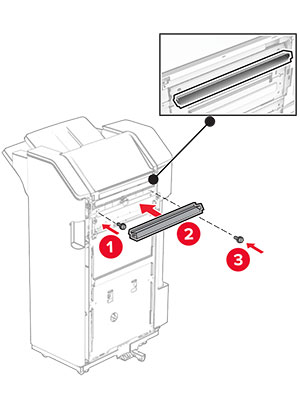
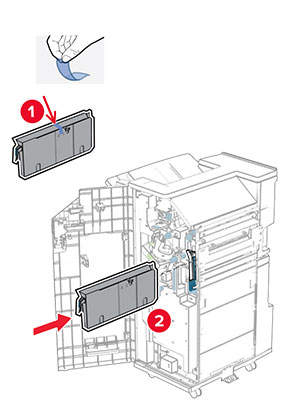
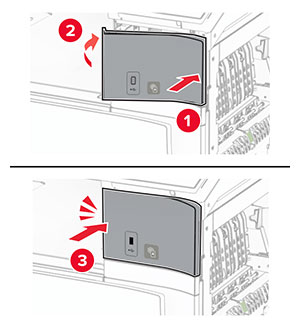
裝上上方紙匣組件蓋板。
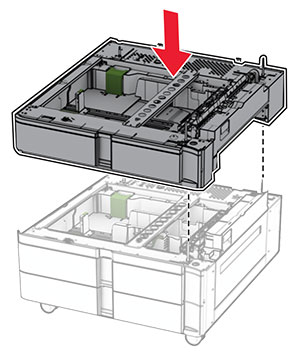
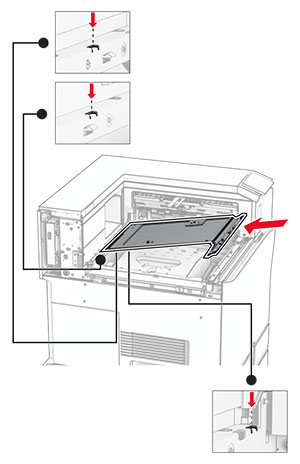
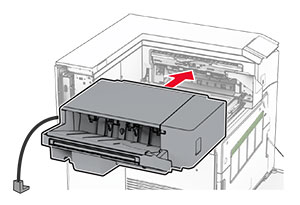
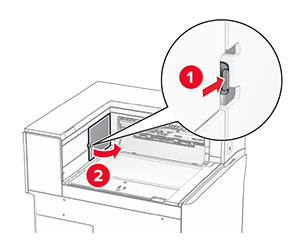
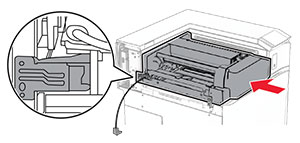
插入 550 張紙匣組件。
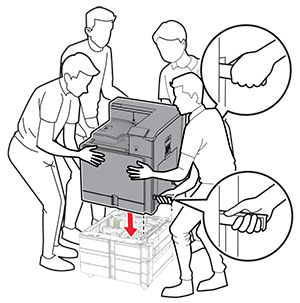
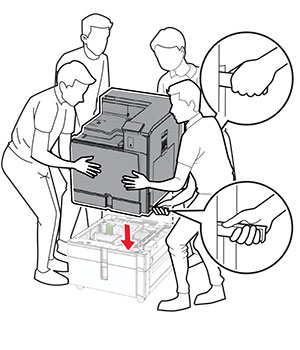
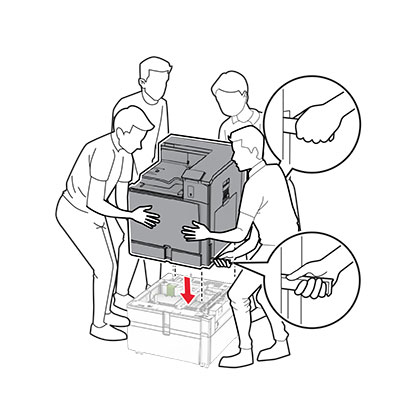
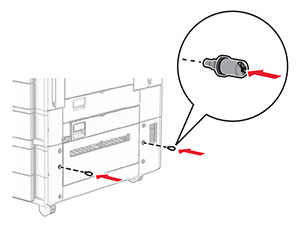
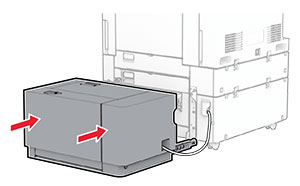
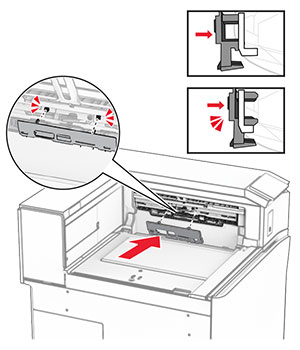
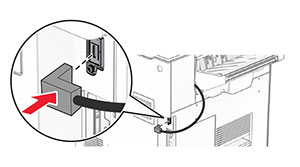
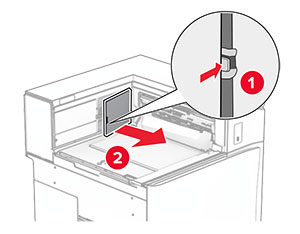
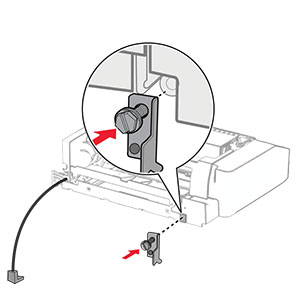
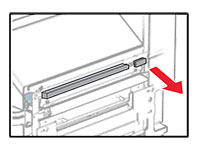
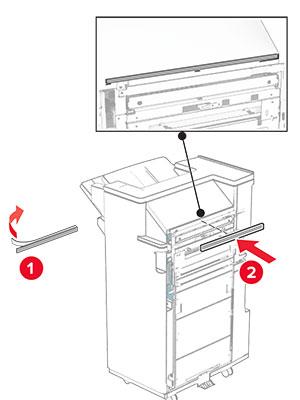
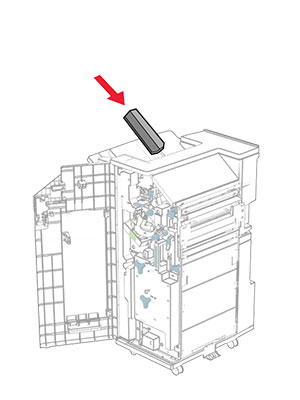
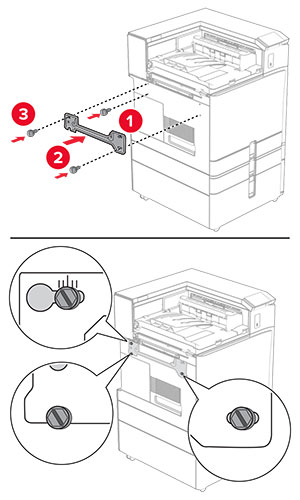
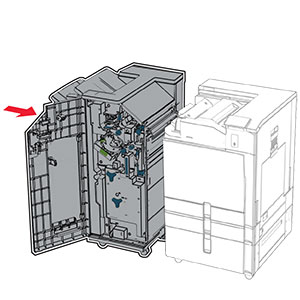
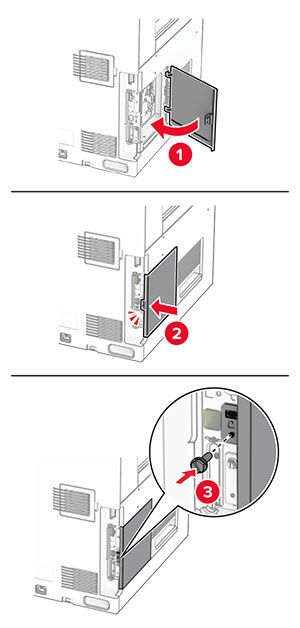
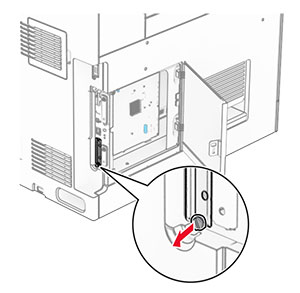
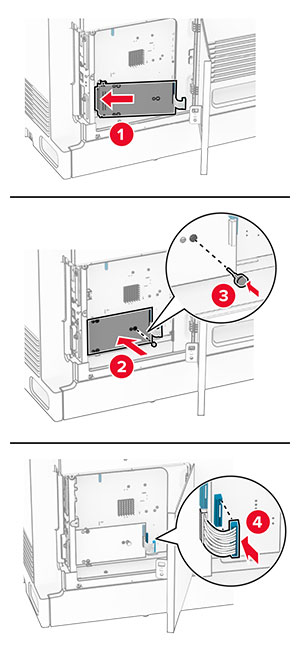
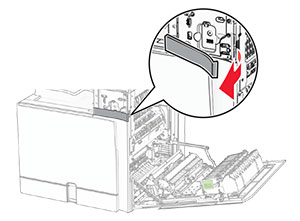
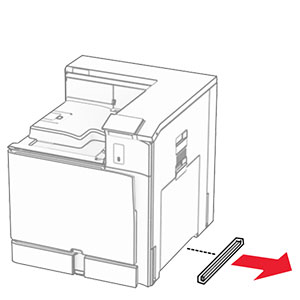
卸下印表機右側下方的蓋板。
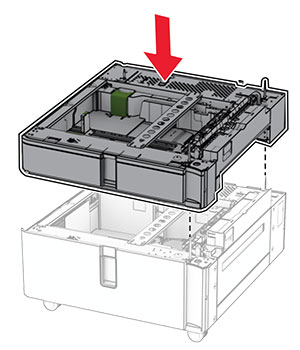
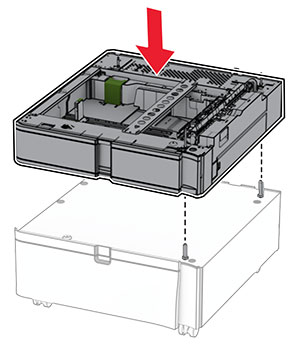
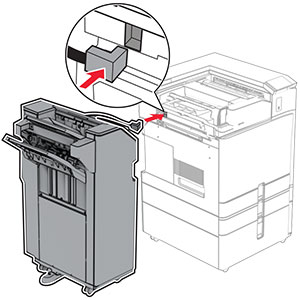
將印表機對齊 550 張紙匣組件,然後將其往下放至定位。
 請當心—潛在受傷危險性: 若印表機的重量超過 20 公斤(44 磅),這時需要有兩名或以上的人員,才能安全地抬起該裝置。
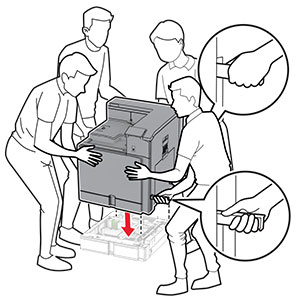
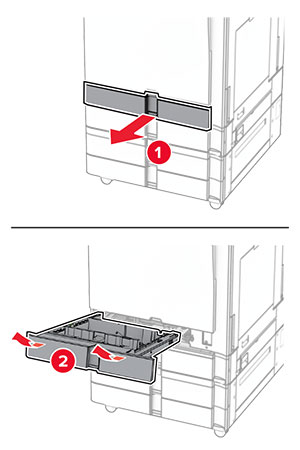
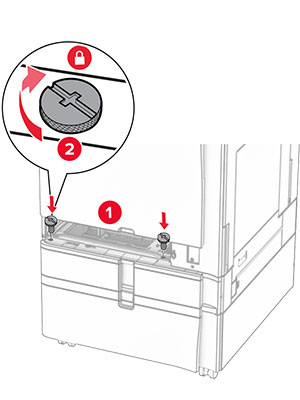
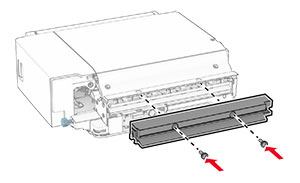
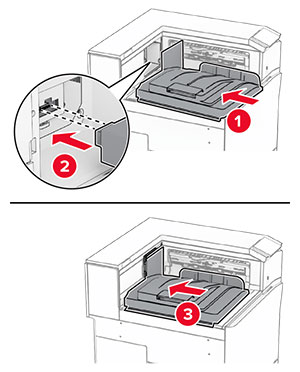
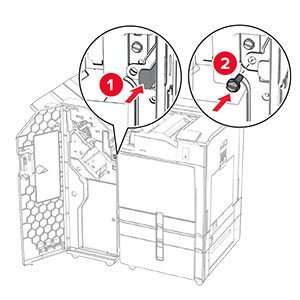
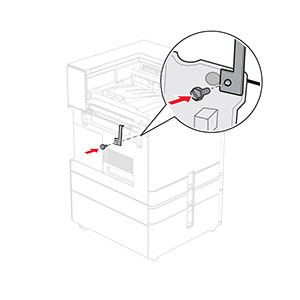
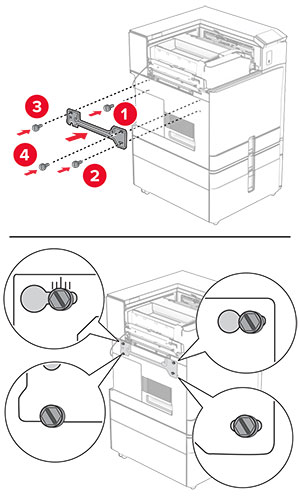
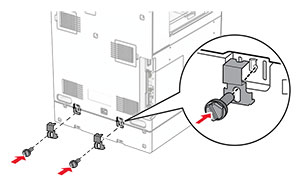
拉出標準紙匣組件。
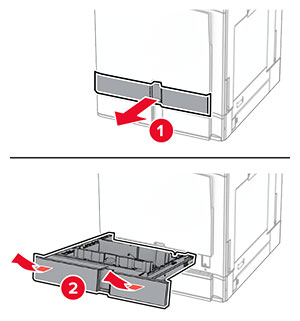
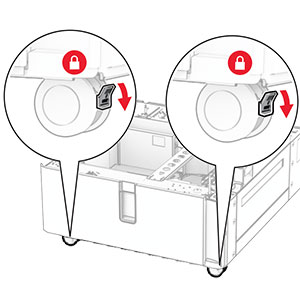
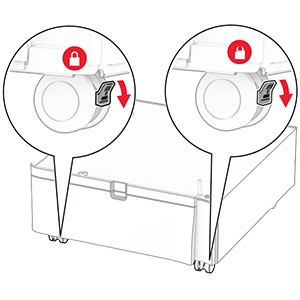
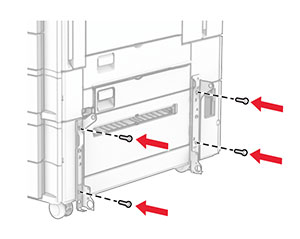
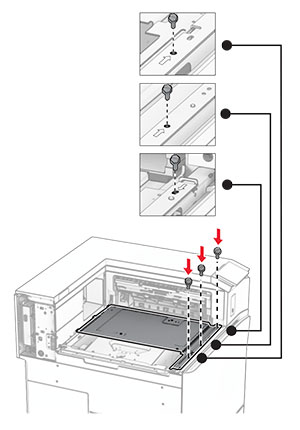
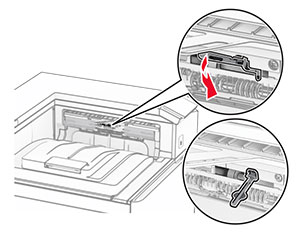
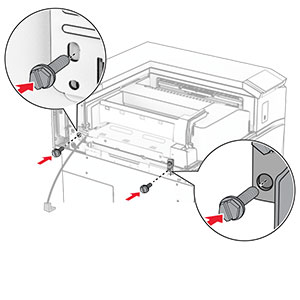
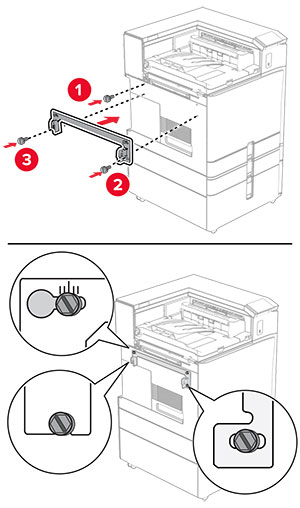
將 550 張紙匣組件固定至印表機。

插入標準紙匣組件。
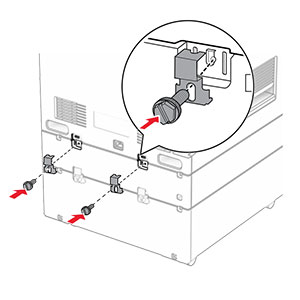
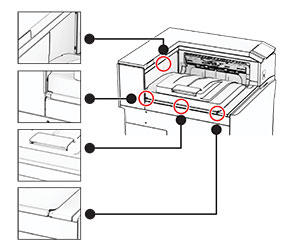
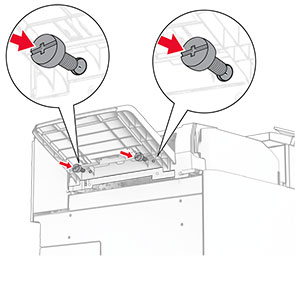
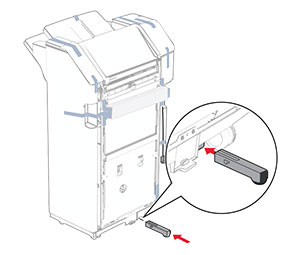
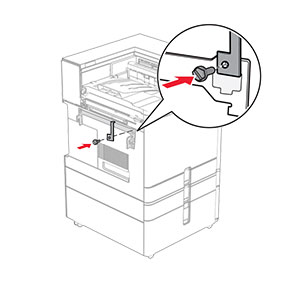
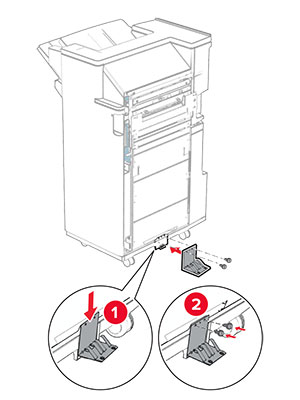
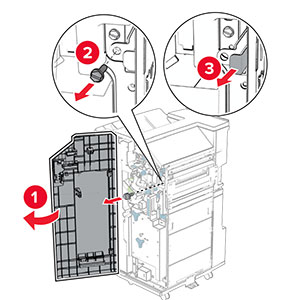
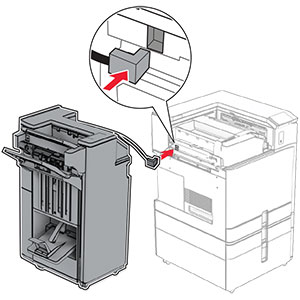
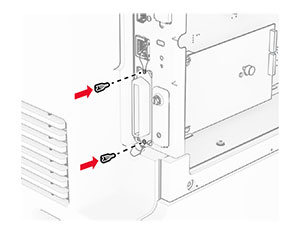
將 550 張紙匣組件的背部固定至印表機。
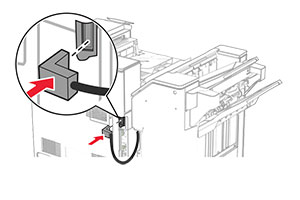
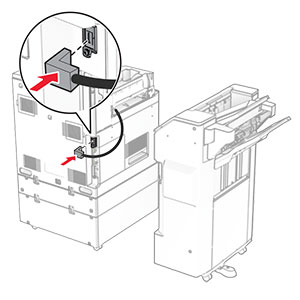
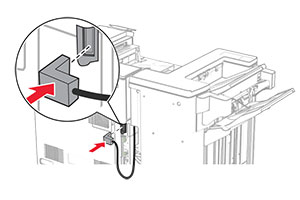
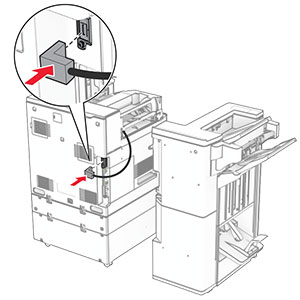
將電源線的一端連接到印表機,然後將另一端連接到電源插座。
請當心—潛在受傷危險性: 為避免發生火災或觸電的危險,請將電源線連接至產品附近額定電壓相符且正確接地的電源插座,以便於使用。開啟印表機電源。
請在列印驅動程式中新增此紙匣組件,才能將它用於列印工作。如需詳細資訊,請參閱在列印驅動程式中新增可用選購品。