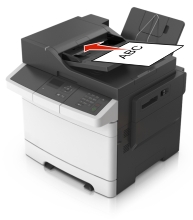
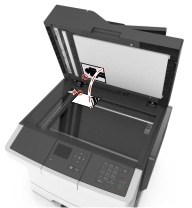
Automatic document feeder (ADF) | Scanner glass |
---|---|
![]() | ![]() |
Use the ADF for multiple-page documents. | Use the scanner glass for single-page documents, small items (such as postcards or photos), transparencies, photo paper, or thin media (such as magazine clippings). |
The scanner lets you scan documents directly to a computer or a flash drive. The computer does not have to be directly connected to the printer for you to receive images when scanning to a computer. You can scan the document back to the computer over the network by creating a scan profile on the computer and then downloading the profile to the printer.
Open a Web browser, and then type the printer IP address in the address field.
Notes:
Click Scan Profile > Create Scan Profile.
Select your scan settings, and then click Next.
Select a location on your computer where you want to save the scan image.
Type a scan name, and then a user name.
Note: The scan name is the name that appears in the Scan Profile list on the display. |
Click Submit.
Note: Clicking Submit automatically assigns a shortcut number. You can use this shortcut number when you are ready to scan your documents. |
Review the instructions on the Scan Profile screen.
Load an original document faceup, short edge first into the ADF tray or facedown on the scanner glass.
Notes:
If you are loading a document into the ADF tray, then adjust the paper guides.
Do either of the following:
Press #, and then enter the shortcut number using the keypad.
From the home screen, navigate to:
Held Jobs > Profiles > select your shortcut on the list
Note: The scanner scans and sends the document to the directory you specified. |
View the file from the computer.
Note: The output file is saved in the location or launched in the program you specified. |
Notes:
Open the printers folder, and then select your printer.
Note: If your printer is not in the list, then add your printer. |
Open the printer properties, and then adjust the settings as necessary.
From the control panel, touch Scan to Computer > select the appropriate scan setting > Send It.
Load an original document faceup, short edge first into the ADF tray or facedown on the scanner glass.
Notes:
If you are loading a document into the ADF tray, then adjust the paper guides.
Insert the flash drive into the USB port on the front of the printer.
Note: The USB Drive home screen appears. |
Select the destination folder, and then touch Scan to USB drive.
Note: The printer goes back to the home screen after 30 seconds of inactivity. |
Adjust the scan settings, and then touch Scan It.