Automatic document feeder (ADF) | Scanner glass |
---|---|
![]() | ![]() |
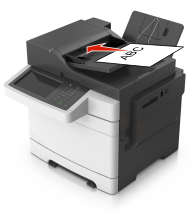
Use the ADF for multiple-page documents. | Use the scanner glass for single-page documents, small items (such as postcards or photos), transparencies, photo paper, or thin media (such as magazine clippings). |
The scanner lets you scan documents directly to a computer or a flash drive. The computer does not have to be directly connected to the printer for you to receive images using Scan to Computer. You can scan the document back to the computer over the network by creating a scan profile on the computer and then downloading the profile to the printer.
Open a Web browser, and then type the printer IP address in the address field.
Notes:
Click Scan Profile > Create Scan Profile.
Select your scan settings, and then click Next.
Select a location on your computer where you want to save the scan image.
Type a scan name, and then a user name.
Click Submit.
Review the instructions on the Scan Profile screen.
Load an original document faceup, short edge first into the ADF tray or facedown on the scanner glass.
Notes:
If you are loading a document into the ADF tray, then adjust the paper guides.
Do either of the following:
Press #, and then enter the shortcut number using the keypad.
From the home screen, navigate to:
Held Jobs > Profiles > select your shortcut on the list
View the file from the computer.
Notes:
Open the printers folder, and then select your printer.
Open the printer properties, and then adjust the settings as necessary.
From the control panel, touch Scan to Computer > select the appropriate scan setting > Send It.
Load an original document faceup, short edge first into the ADF tray or facedown on the scanner glass.
Notes:
If you are loading a document into the ADF tray, then adjust the paper guides.
Insert the flash drive into the USB port on the front of the printer.
Select the destination folder, and then touch Scan to USB drive.
Adjust the scan settings, and then touch Scan It.