Replacing a developer unit
-
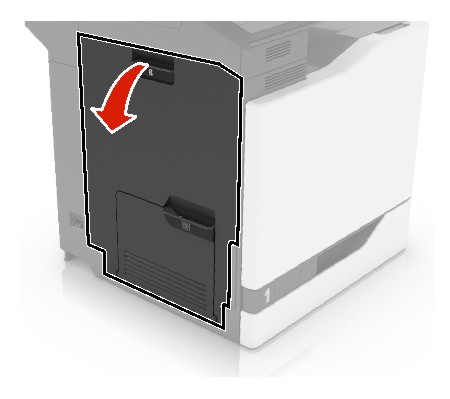
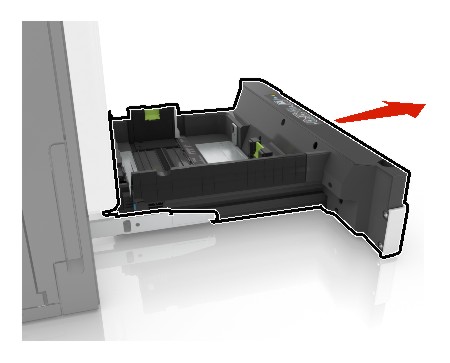
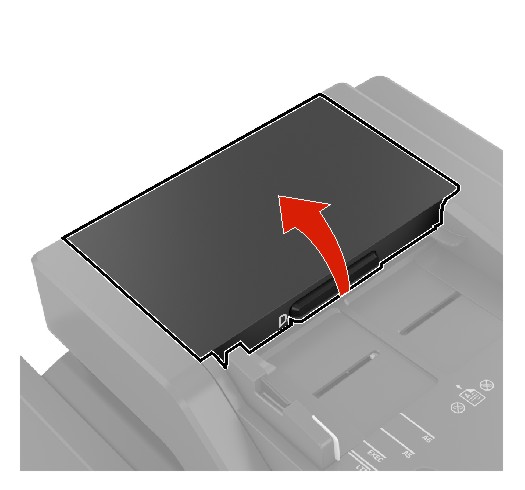
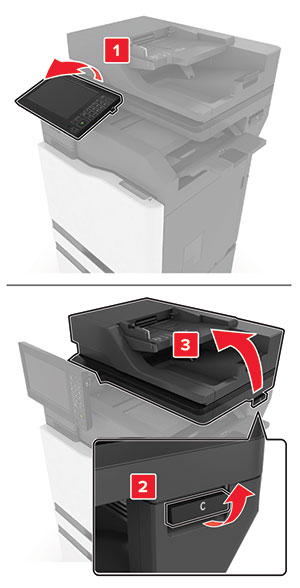
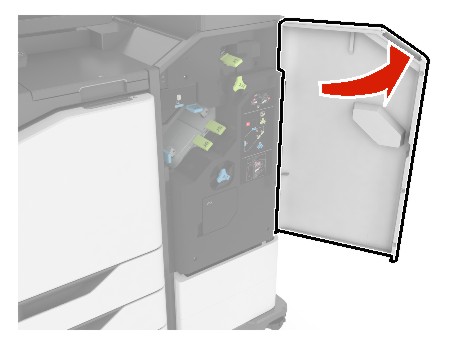
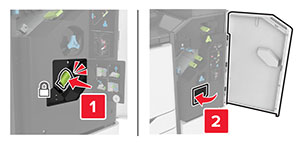
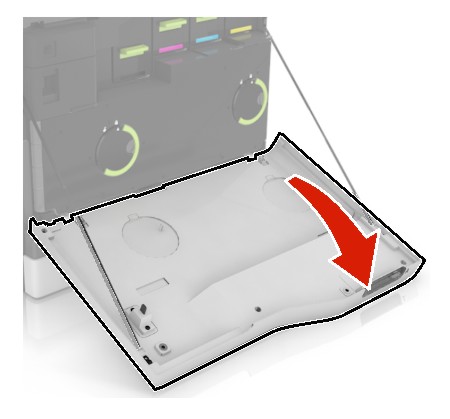
Open door A.
-
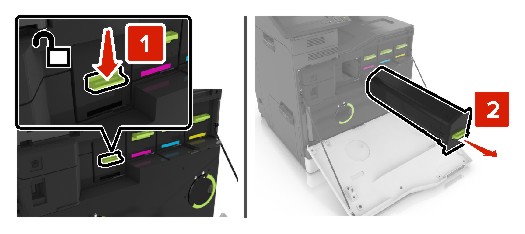
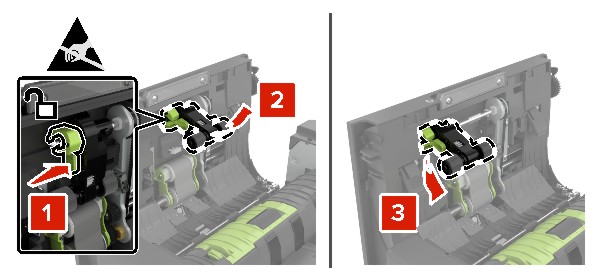
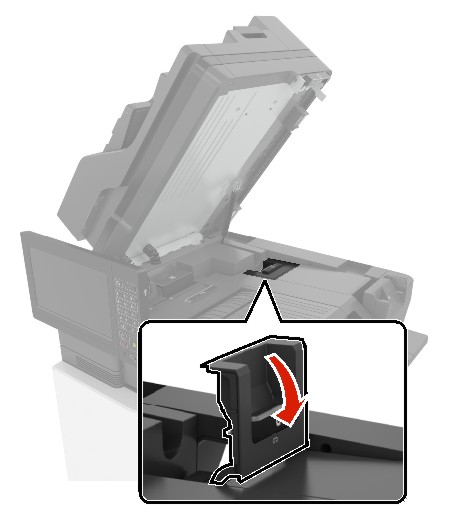
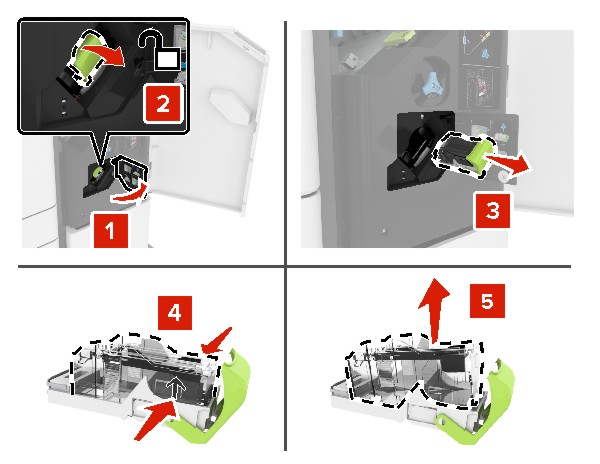
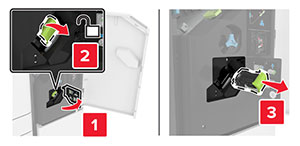
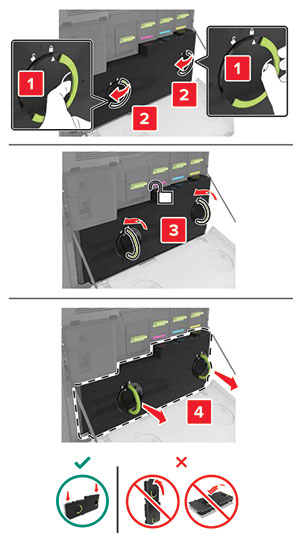
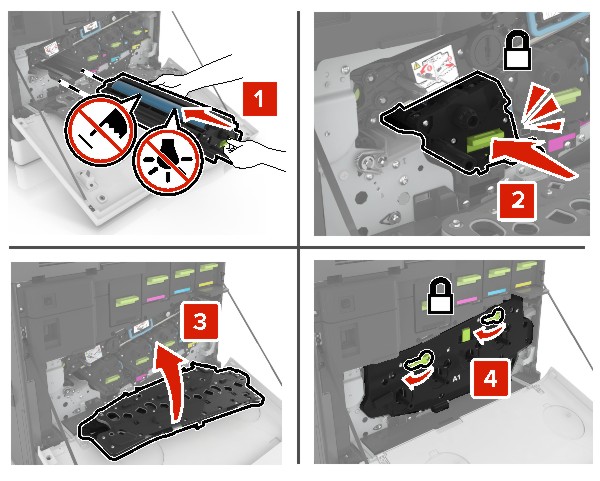
Remove the waste toner bottle.
-
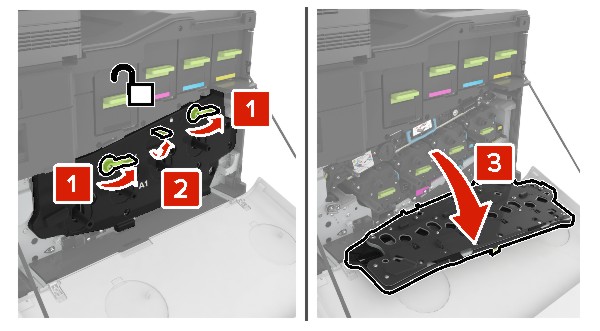
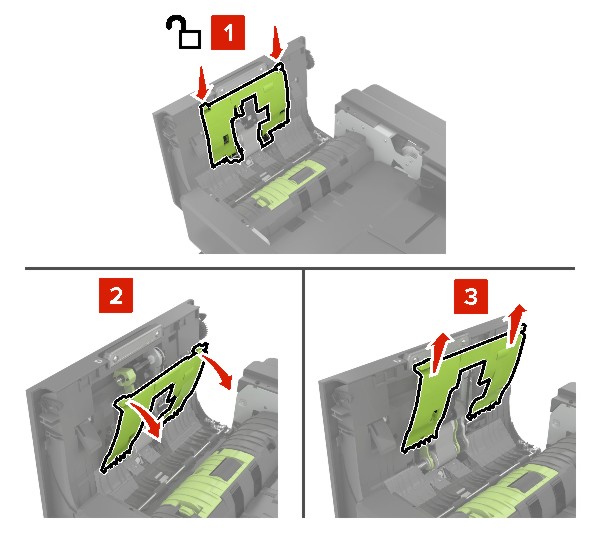
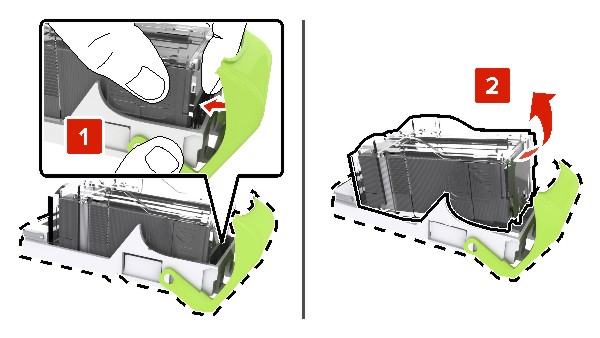
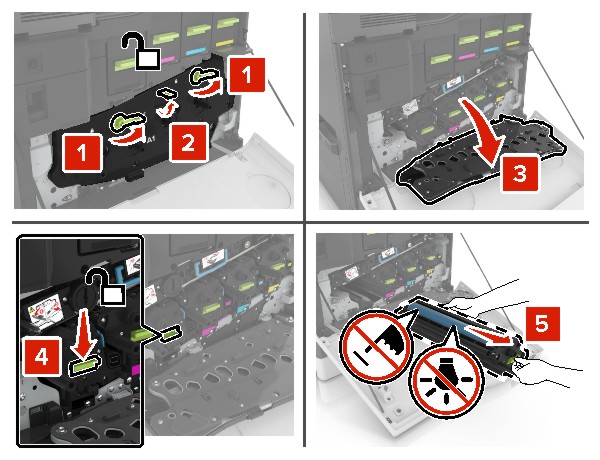
Remove the imaging unit.
-
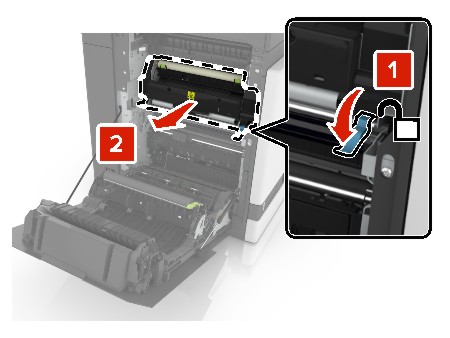
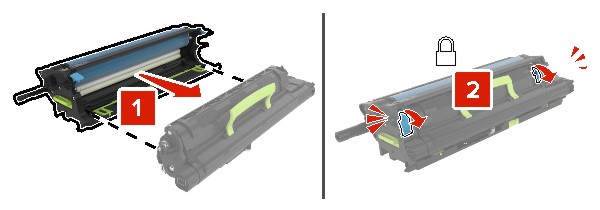
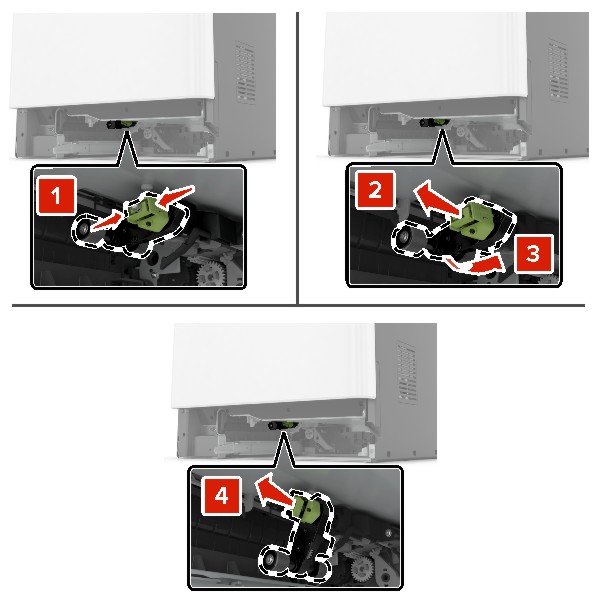
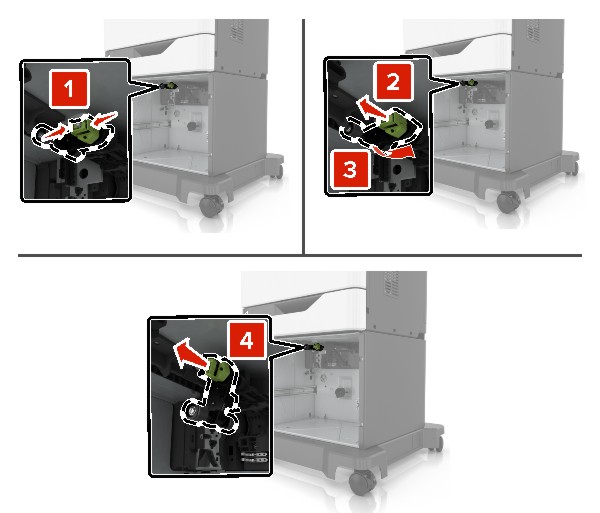
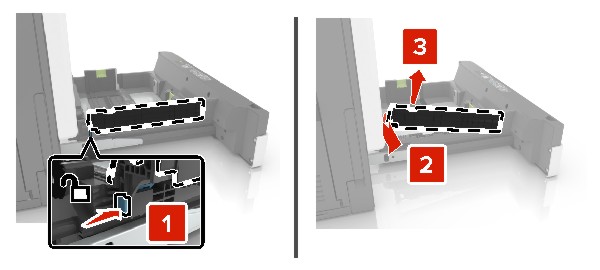
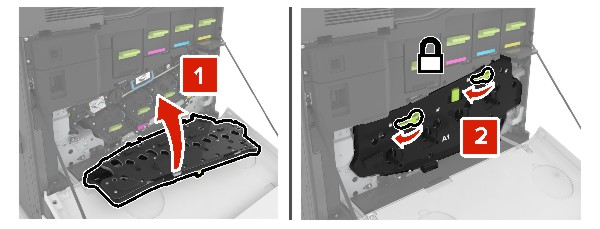
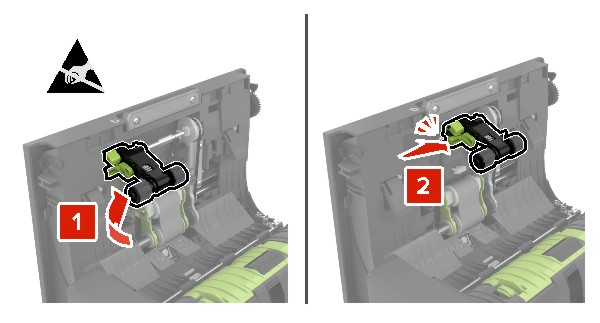
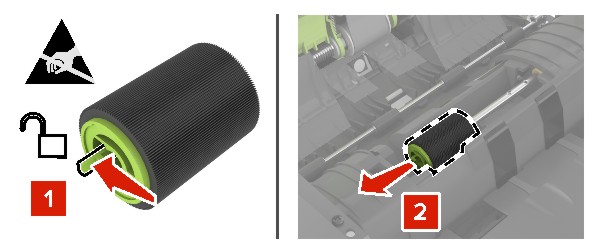
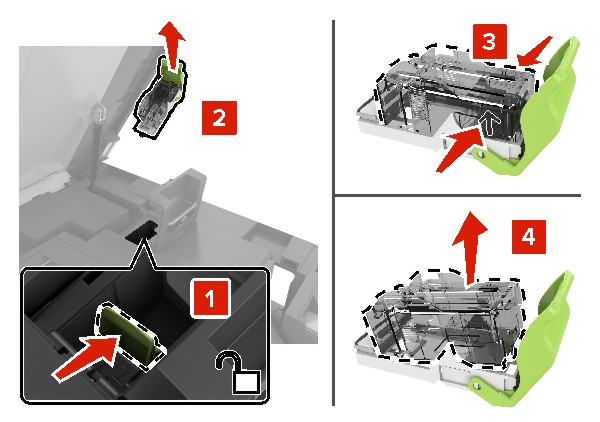
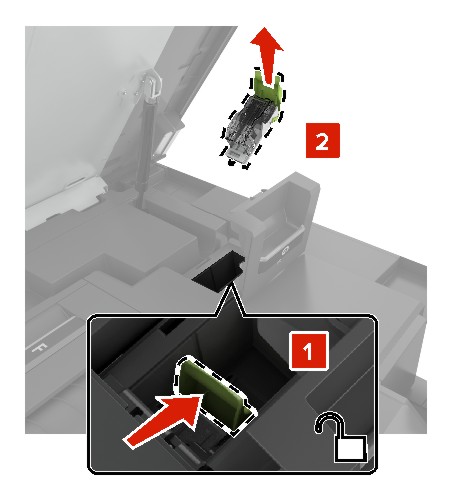
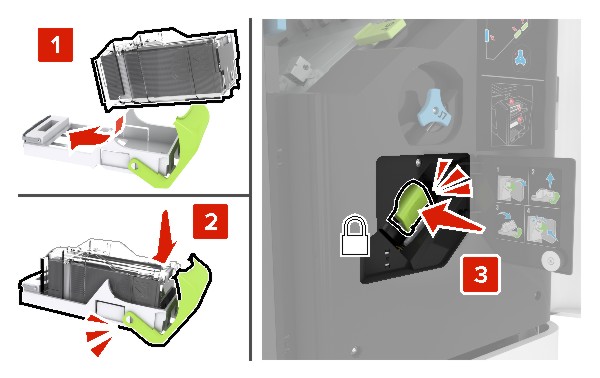
Remove the developer unit.
-
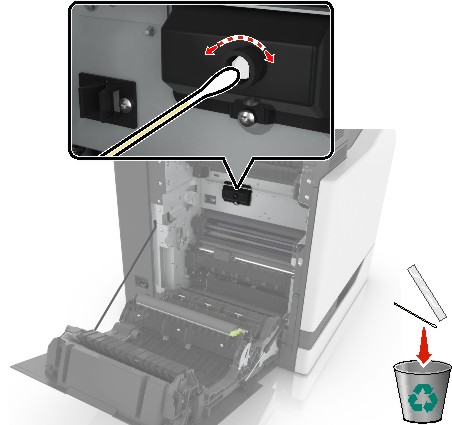
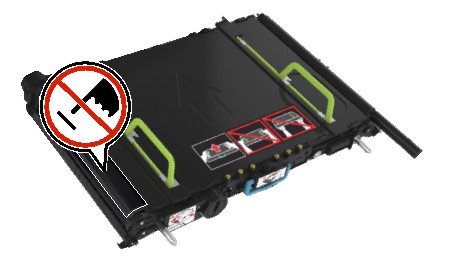
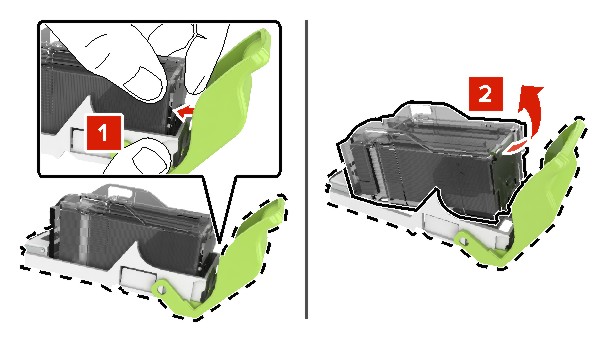
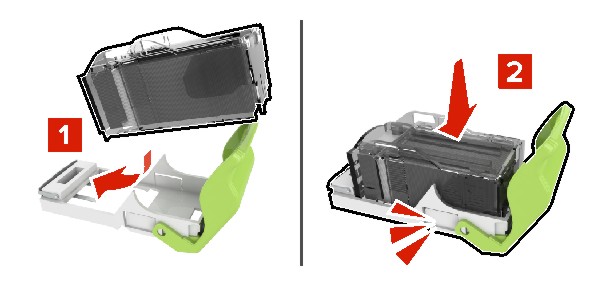
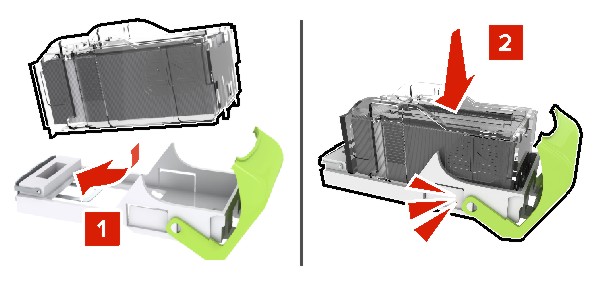
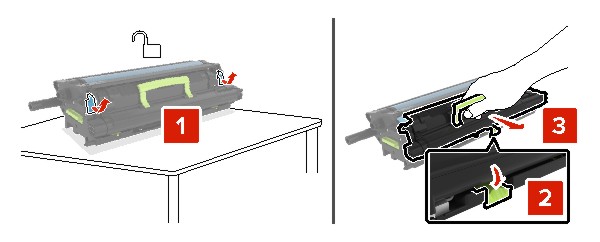
Unpack the new developer unit, and then remove the packing material.
-
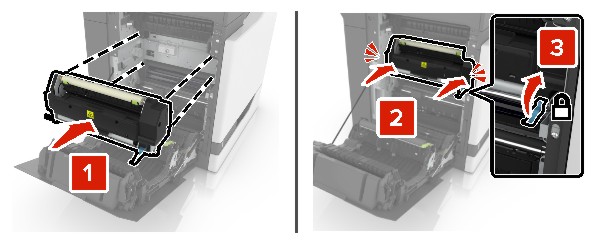
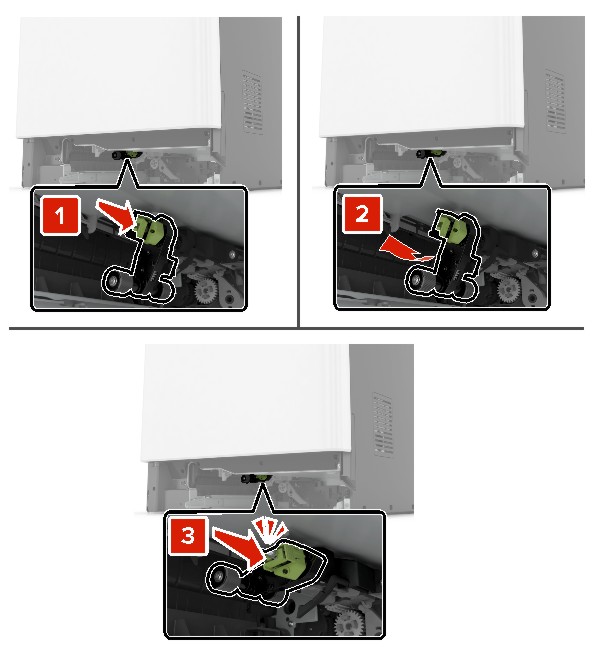
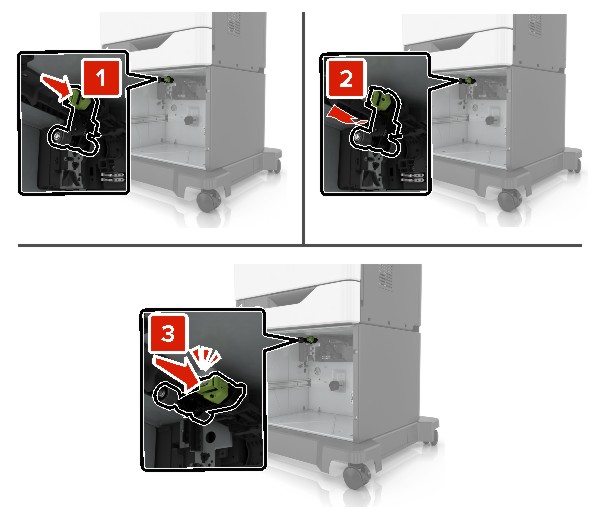
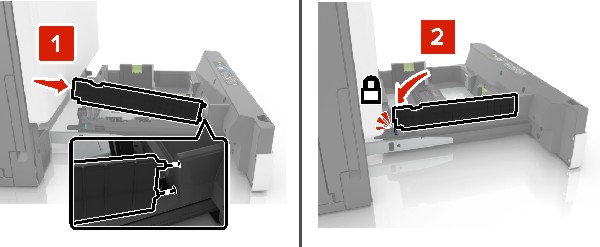
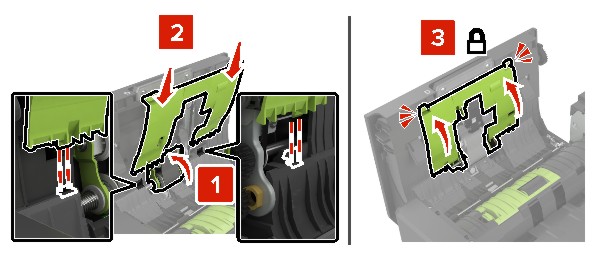
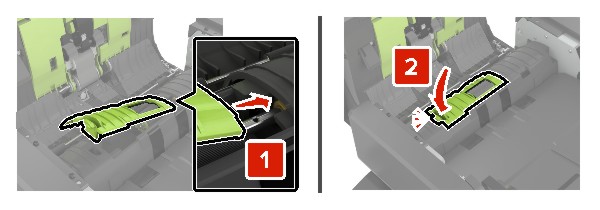
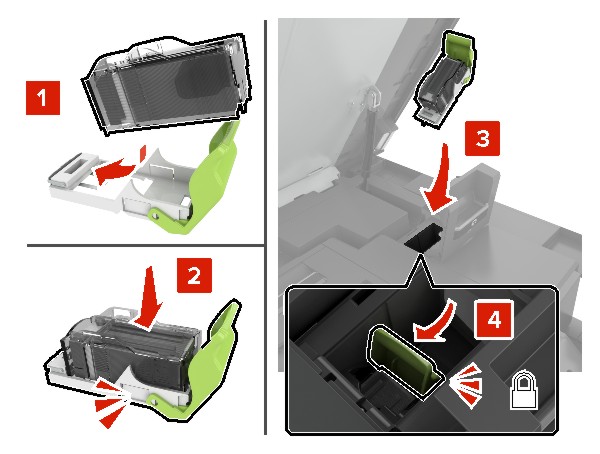
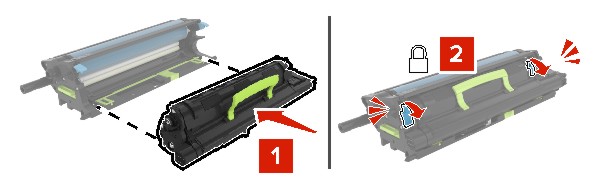
Insert the new developer unit.
-
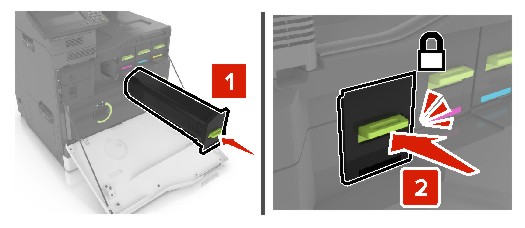
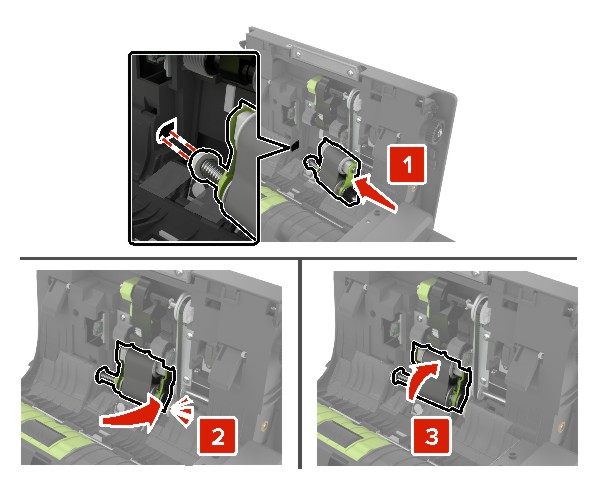
Insert the imaging unit.
-
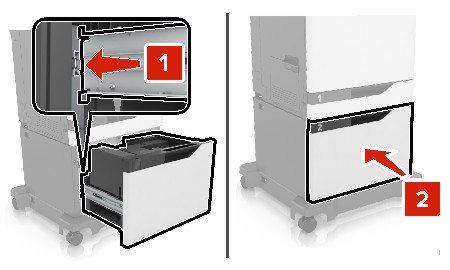
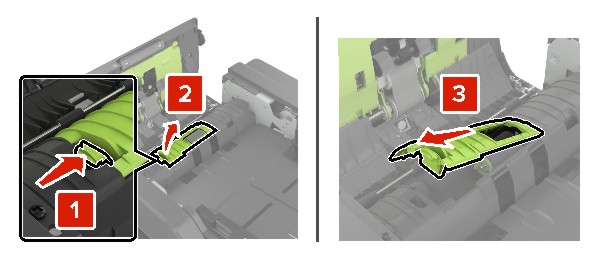
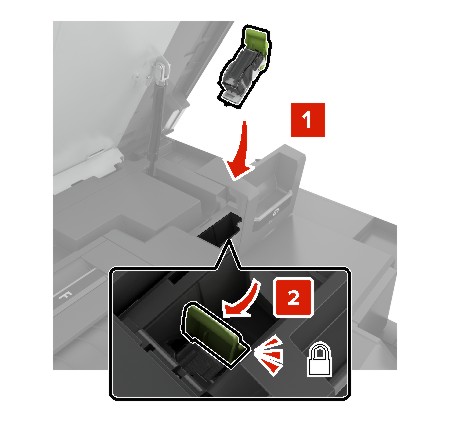
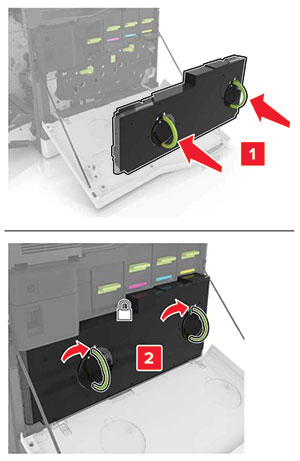
Insert the waste toner bottle.
-
Close door A.