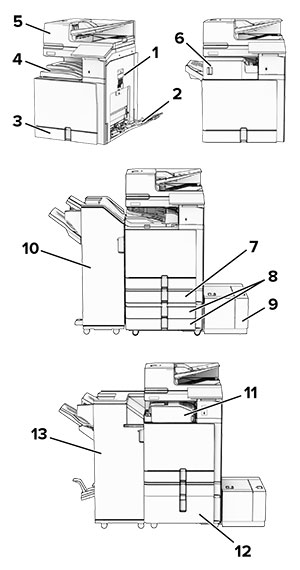
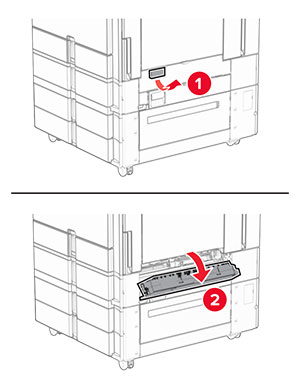
-
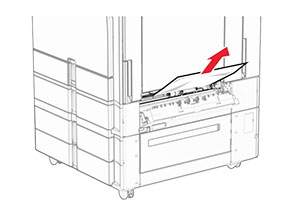
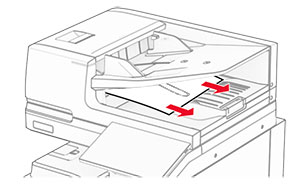
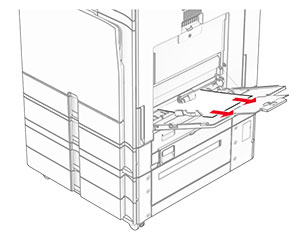
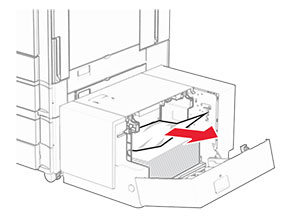
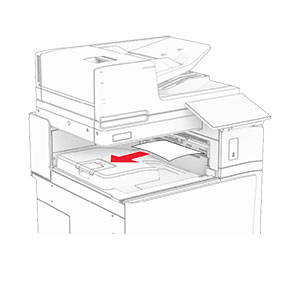
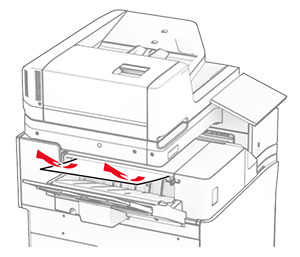
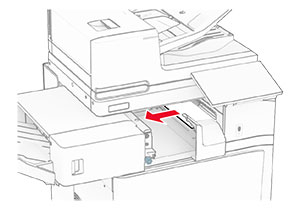
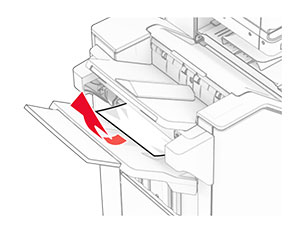
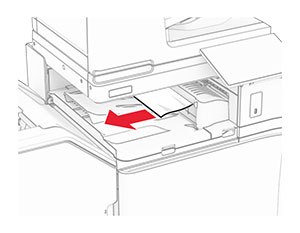
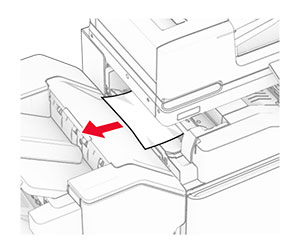
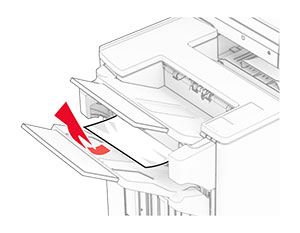
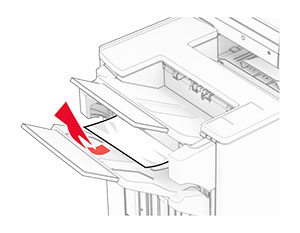
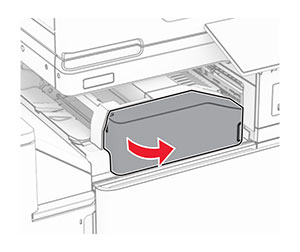
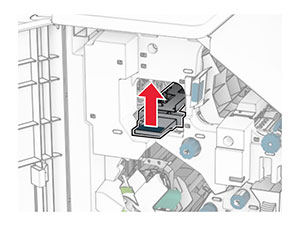
Remove the jammed paper in the finisher standard bin.
Note:
Make sure that all paper fragments are removed.
-
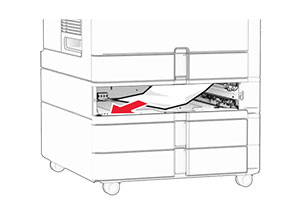
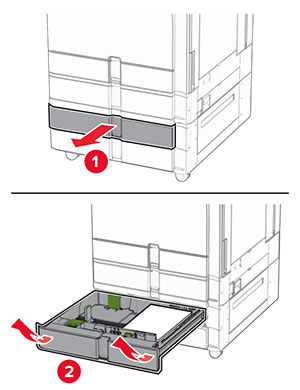
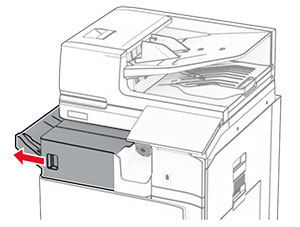
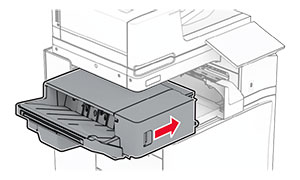
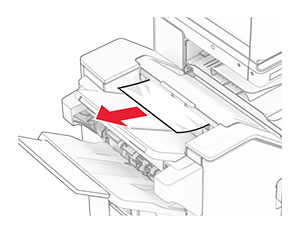
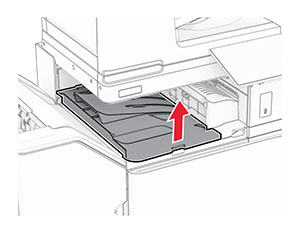
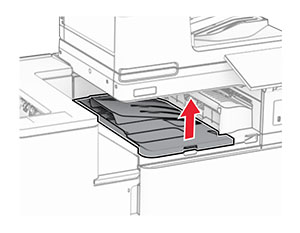
Remove the jammed paper in bin 1.
Note:
Make sure that all paper fragments are removed.
-
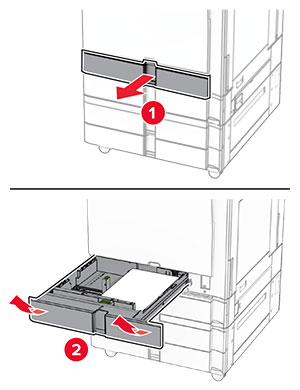
Remove the jammed paper in bin 1.
Notes:
-
Make sure that all paper fragments are removed.
-
Do not remove the printed pages that are in the staple compiler to avoid missing pages.
-
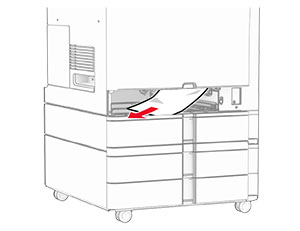
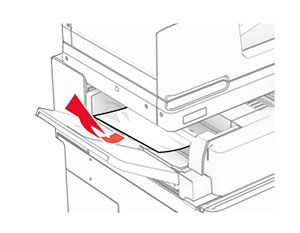
Remove the jammed paper in bin 3.
Note:
Make sure that all paper fragments are removed.
-
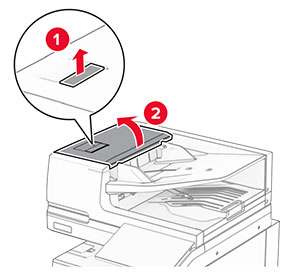
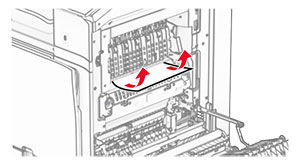
Open paper transport cover G, and then remove the jammed paper.
Note:
Make sure that all paper fragments are removed.
-
Close paper transport cover G.
-
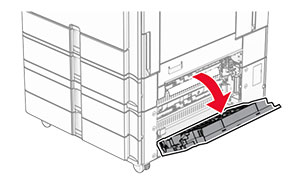
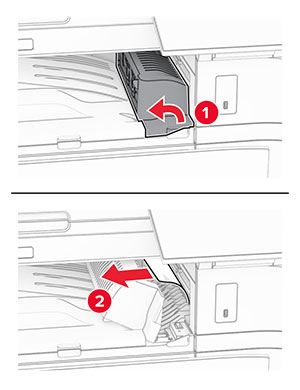
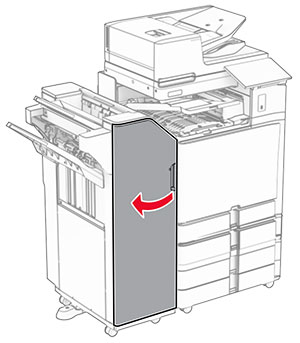
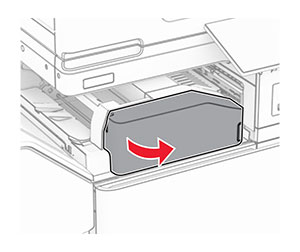
Open paper transport cover F.
-
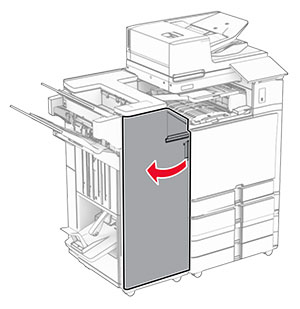
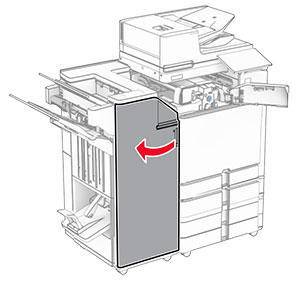
Open door H.
-
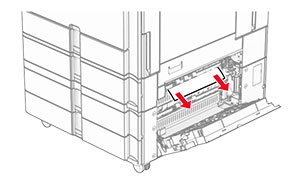
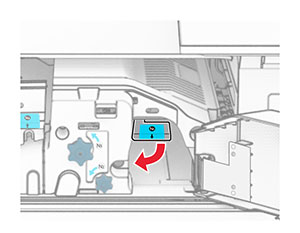
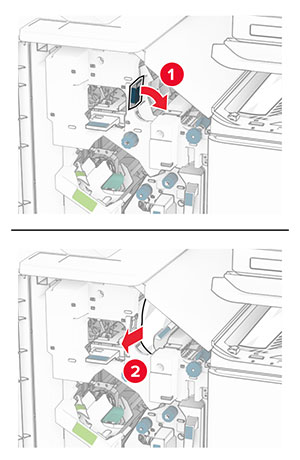
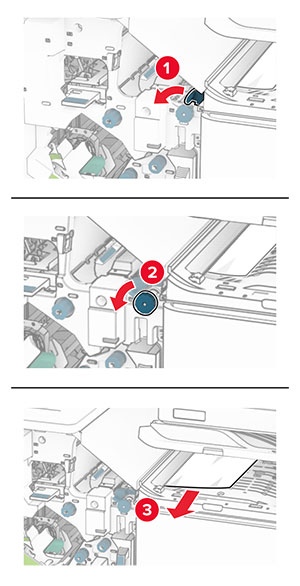
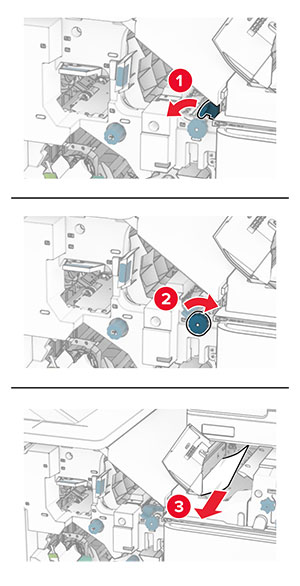
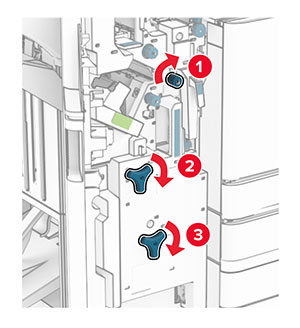
Move handle R3 to the right, and then remove the jammed paper.
Note:
Make sure that all paper fragments are removed.
-
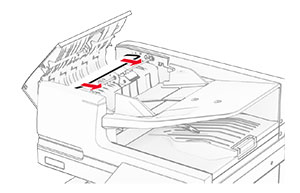
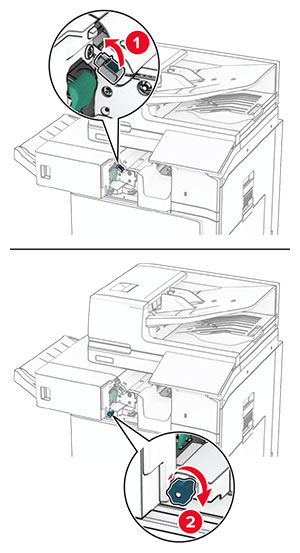
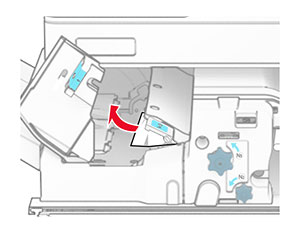
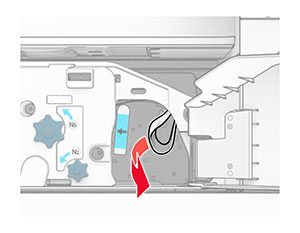
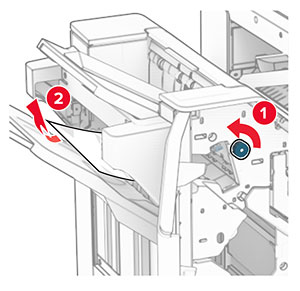
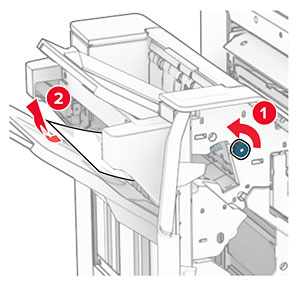
Move handle R1 to the left, turn knob R2 counterclockwise, and then remove the jammed paper.
Note:
Make sure that all paper fragments are removed.
-
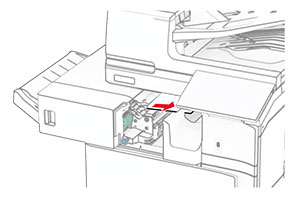
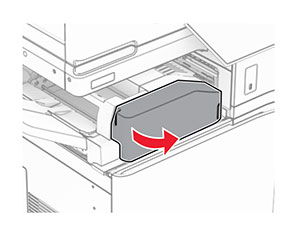
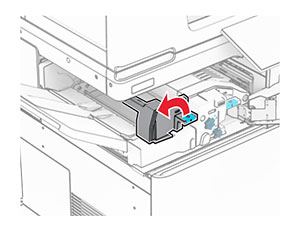
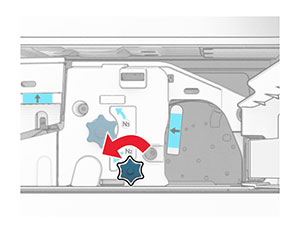
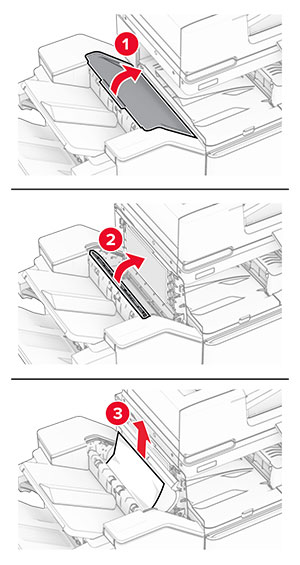
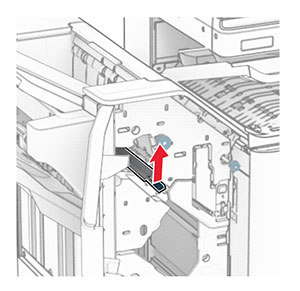
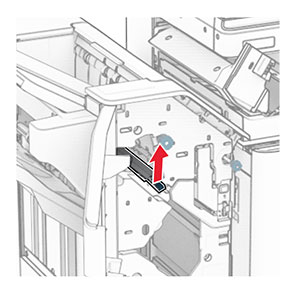
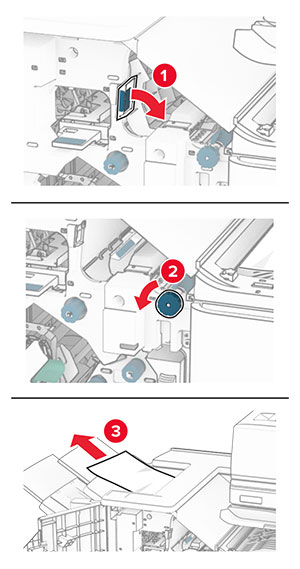
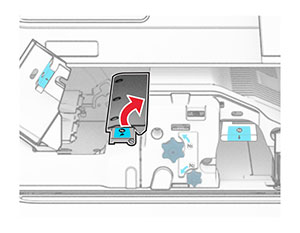
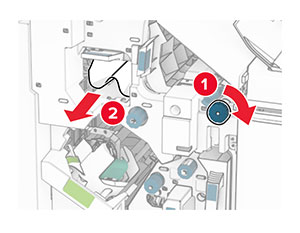
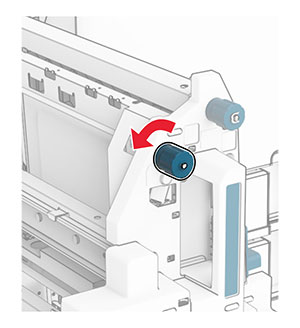
Turn knob R5 counterclockwise, and then remove the jammed paper from the finisher standard bin.
Note:
Make sure that all paper fragments are removed.
-
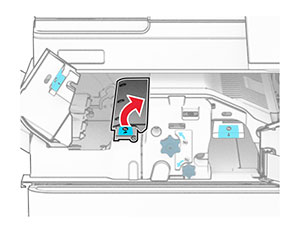
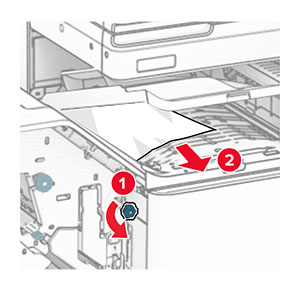
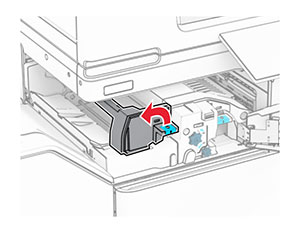
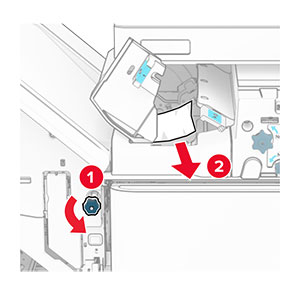
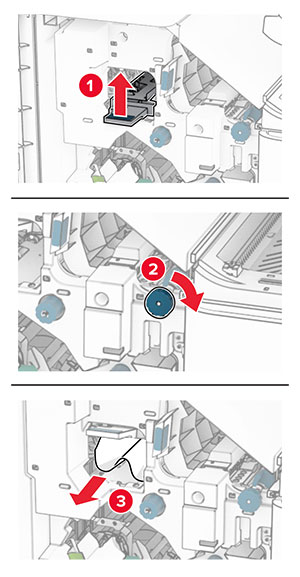
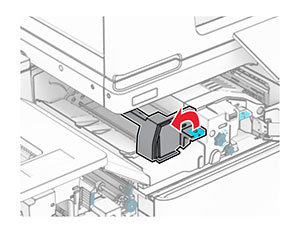
Lift handle R4, turn knob R2 clockwise, and then remove the jammed paper.
Note:
Make sure that all paper fragments are removed.
-
Close paper transport cover F.
-
Return handles R1, R3, and R4 to their original position.
-
Close door H.
-
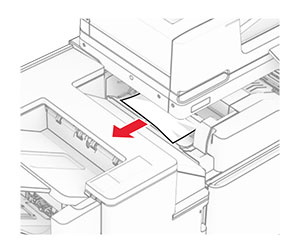
Remove the jammed paper in the finisher standard bin.
Note:
Make sure that all paper fragments are removed.
-
Remove the jammed paper in bin 1.
Note:
Make sure that all paper fragments are removed.
-
Remove the jammed paper in bin 1.
Notes:
-
Make sure that all paper fragments are removed.
-
Do not remove the printed pages that are in the staple compiler to avoid missing pages.
-
Remove the jammed paper in bin 3.
Note:
Make sure that all paper fragments are removed.
-
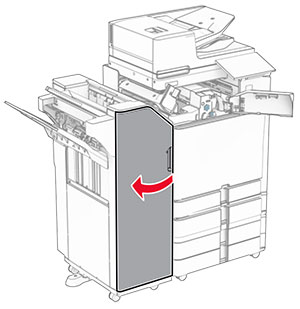
Open door F.
-
Open door H.
-
Open door N4.
-
Open door N5.
-
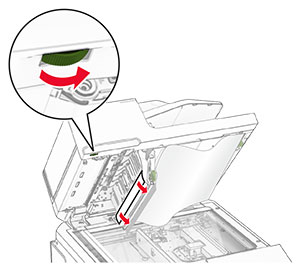
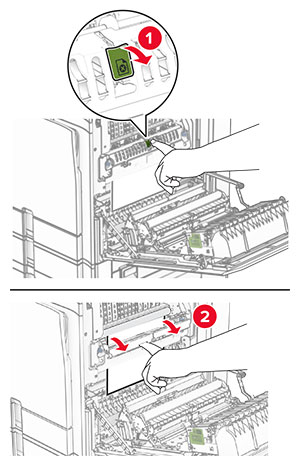
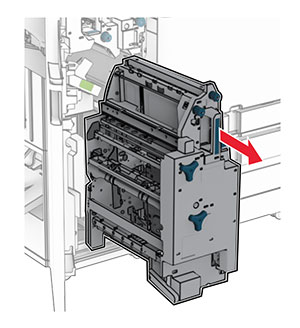
Lift handle R4.
-
Turn knob R2 clockwise, and then remove the jammed paper in handle R4.
Note:
Make sure that all paper fragments are removed.
-
Move handle R1 to the left, turn knob R2 counterclockwise, and then remove the jammed paper between doors N4 and N5.
Note:
Make sure that all paper fragments are removed.
-
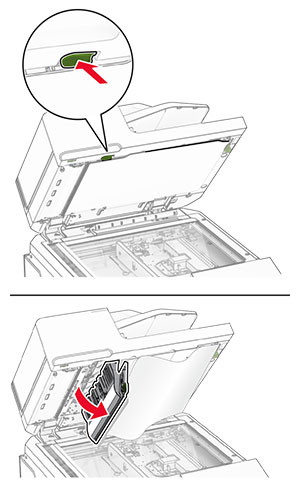
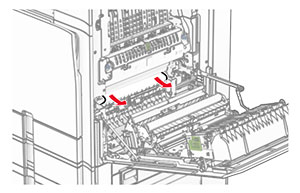
Open door B.
 CAUTION—HOT SURFACE:
The inside of the printer might be hot. To reduce the risk of injury from a hot component, allow the surface to cool before touching it.
Warning—Potential Damage:
To prevent damage from electrostatic discharge, touch any exposed metal frame of the printer before accessing or touching interior areas of the printer.
-
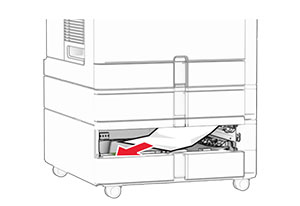
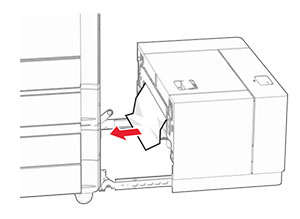
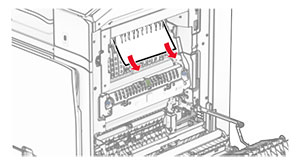
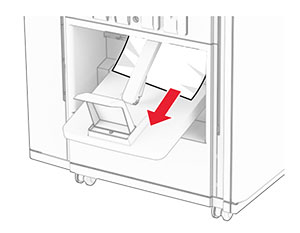
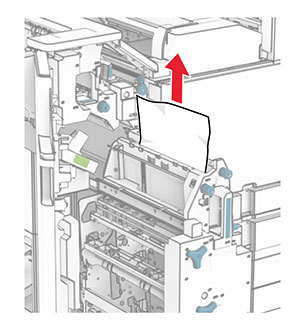
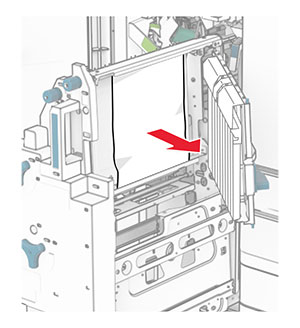
Remove the jammed paper under the standard bin exit roller.
Note:
Make sure that all paper fragments are removed.
-
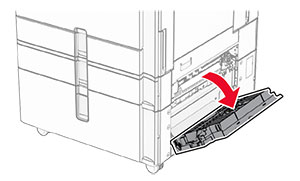
Close door B.
-
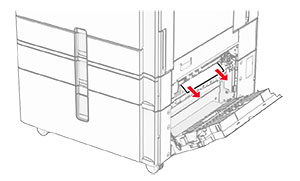
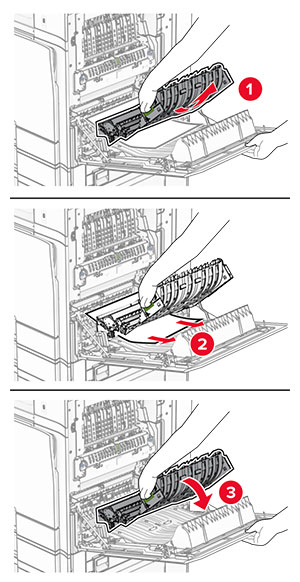
Push down handle N1.
-
Turn knob N2 counterclockwise.
-
Remove the jammed paper.
Warning—Potential Damage:
To prevent damage to the printer, remove any hand accessories before removing the jammed paper.
Note:
Make sure that all paper fragments are removed.
-
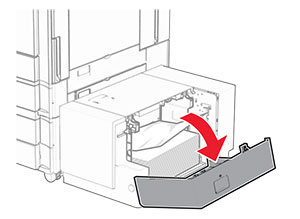
Put handle N1 back into place.
-
Close door N5, and then close door N4.
-
Close door F.
-
Return handles R1 and R4 back into their original positions.
-
Close door H.