Notes:
Try one or more of the following:
Make sure that all packing material is removed from the imaging kit, imaging unit, and toner cartridges.
Check if the printer is using a genuine and supported Lexmark toner cartridge.
Make sure that the imaging kit and black imaging unit are properly installed.
Remove the imaging kit, and then remove the black imaging unit.
Insert the black imaging unit, and then insert the imaging kit.
If the problem persists, then contact customer support .
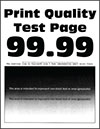
Notes:
Try one or more of the following:
From the control panel, navigate to Settings > Print > Quality > Advanced Imaging , and then select Color Adjust .
Depending on your operating system, reduce the toner darkness from the Printing Preferences or Print dialog.
Depending on your operating system, specify the paper type from the Printing Preferences or Print dialog. Make sure that the setting matches the paper loaded in the tray.
Make sure that the paper does not have a texture or rough finish.
Load paper from a fresh package.
If the problem persists, then contact customer support .
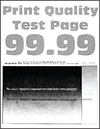
Notes:
Try one or more of the following:
Load the tray with the correct paper type and weight.
Depending on your operating system, specify the paper type from the Printing Preferences or Print dialog. Make sure that the setting matches the paper loaded in the tray.
From the control panel, navigate to Settings > Print > Quality > Advanced Imaging , and then select Color Adjust .
If the problem persists, then contact customer support .
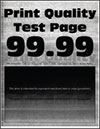
Notes:
Try one or more of the following:
Depending on your operating system, increase the toner darkness from the Printing Preferences or Print dialog.
From the control panel, navigate to Settings > Print > Quality > Advanced Imaging , and then select Color Adjust .
Make sure that the imaging kit and black imaging unit are properly installed.
Remove the imaging kit, and then remove the black imaging unit.
Insert the black imaging unit, and then insert the imaging kit.
If the problem persists, then contact customer support .
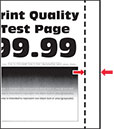
Try one or more of the following:
Adjust the paper guides in the tray to the correct position for the paper loaded.
Depending on your operating system, specify the paper size from the Printing Preferences or Print dialog. Make sure that the setting matches the paper loaded.
If the problem persists, then contact customer support .
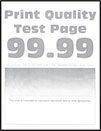
Notes:
Try one or more of the following:
Make sure that all packing material is removed from the imaging kit, imaging unit, and toner cartridges.
From the control panel, navigate to Settings > Print > Quality > Advanced Imaging , and then select Color Adjust .
Depending on your operating system, increase the toner darkness from the Printing Preferences or Print dialog.
From the control panel, navigate to Settings > Print > Quality , and then turn off Color Saver .
Depending on your operating system, specify the paper type from the Printing Preferences or Print dialog. Make sure that the setting matches the paper loaded.
Make sure that the paper does not have a texture or rough finish.
Load paper from a fresh package.
Make sure that the imaging kit and black imaging unit are properly installed.
Remove the imaging kit, and then remove the black imaging unit.
Insert the black imaging unit, and then insert the imaging kit.
If the problem persists, then contact customer support .
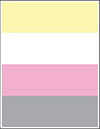
Notes:
Try one or more of the following:
Make sure that all packing material is removed from the imaging kit, imaging unit, and toner cartridges.
Remove the developer unit of the missing color.
Remove the imaging kit.
Remove, and then insert the developer unit of the missing color.
Insert the imaging kit.
If the problem persists, then contact customer support .
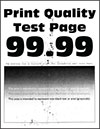
Notes:
Try one or more of the following:
Check the printer for leaked toner contamination.
Make sure that the paper size and paper type settings match the paper loaded. From the control panel, navigate to Settings > Paper > Tray Configuration > Paper Size/Type .
Depending on your operating system, specify the paper size and paper type from the Printing Preferences or Print dialog. Make sure that the settings match the paper loaded in the tray.
Load paper from a fresh package.
Make sure that the imaging kit and black imaging unit are properly installed.
Remove the imaging kit, and then remove the black imaging unit.
Insert the black imaging unit, and then insert the imaging kit.
If the problem persists, then contact customer support .
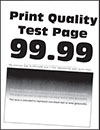
Notes:
Try one or more of the following:
Load paper from a fresh package.
Open the tray, and then remove the paper.
Load paper from a fresh package.
Adjust the paper guides in the tray to the correct position for the paper loaded.
Make sure that you are printing on a supported paper.
If the problem persists, then contact customer support .

Notes:
Remove the imaging kit, and then remove the black imaging unit.
Insert the black imaging unit, and then insert the imaging kit.
If the problem persists, then contact customer support .
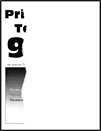
Notes:
Try one or more of the following:
Make sure that all packing material is removed from the imaging kit, imaging unit, and toner cartridges.
Adjust the paper guides in the tray to the correct position for the paper loaded.
Depending on your operating system, specify the paper size from the Printing Preferences or Print dialog. Make sure that the setting matches the paper loaded in the tray.
Make sure that the imaging kit and black imaging unit are properly installed.
Remove the imaging kit, and then remove the black imaging unit.
Insert the black imaging unit, and then insert the imaging kit.
If the problem persists, then contact customer support .
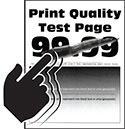
Notes:
Try any of the following:
Make sure that the printer power cord is plugged into an appropriately rated and properly grounded electrical outlet.
Depending on your operating system, specify the paper type from the Printing Preferences or Print dialog. Make sure that the setting matches the paper loaded.
Configure the paper type from the control panel. Navigate to Settings > Paper > Tray Configuration > Paper Size/Type .
If the problem persists, then contact customer support .
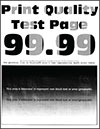
Notes:
Try one or more of the following:
Open door B, and then make sure that the second transfer roller is locked in place.
Make sure that the imaging kit and black imaging unit are properly installed.
Remove the imaging kit, and then remove the black imaging unit.
Insert the black imaging unit, and then insert the imaging kit.
If the problem persists, then contact customer support .
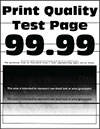
Notes:
Try one or more of the following:
Depending on your operating system, specify the paper type from the Printing Preferences or Print dialog. Make sure that the setting matches the paper loaded.
Make sure that the paper does not have a texture or rough finish.
Load paper from a fresh package.
Make sure that the imaging kit and black imaging unit are properly installed.
Remove the imaging kit, and then remove the black imaging unit.
Insert the black imaging unit, and then insert the imaging kit.
If the problem persists, then contact customer support .
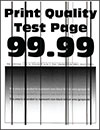
Notes:
Try one or more of the following:
Depending on your operating system, specify the paper type from the Printing Preferences or Print dialog. Make sure that the setting matches the paper loaded in the tray.
Make sure that the paper does not have a texture or rough finish.
Load paper from a fresh package.
Make sure that the imaging kit and black imaging unit are properly installed.
Remove the imaging kit, and then remove the black imaging unit.
Insert the black imaging unit, and then insert the imaging kit.
If the problem persists, then contact customer support .
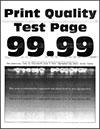
Notes:
Try one or more of the following:
Depending on your operating system, specify the paper type from the Printing Preferences or Print dialog. Make sure that the setting matches the paper loaded in the tray.
Load the specified paper source with the recommended paper type.
Make sure that the imaging kit and black imaging unit are properly installed.
Remove the imaging kit, and then remove the black imaging unit.
Insert the black imaging unit, and then insert the imaging kit.
If the problem persists, then contact customer support .
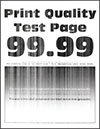
Notes:
Try one or more of the following:
Depending on your operating system, specify the paper type from the Printing Preferences or Print dialog. Make sure that the setting matches the paper loaded in the tray.
Check if you are using the recommended paper type.
Be sure to load the specified paper source with the recommended paper type.
Make sure that the imaging kit and black imaging unit are properly installed.
Remove the imaging kit, and then remove the black imaging unit.
Insert the black imaging unit, and then insert the imaging kit.
If the problem persists, then contact customer support .
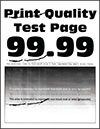
Notes:
Measure the distance between the repeating defects on the affected color page. Using the Maintenance Defect Ruler, measure the distance between the repeating defects on the affected color page.
Replace the supply item or part that matches the measurement on the affected color page.
94.5 mm (3.72 in.)
19.9 mm (1.18 in.)
23.2 mm (0.19 in.)
43.6 mm (1.72 in.)
45.0 mm (1.77 in.)
95 mm (3.74 in.)
110 mm (4.33 in.)
If the problem persists, then contact customer support .
Try one or more of the following:
From the document that you are trying to print, open the Printing Preferences or Print dialog, and then check if the correct printer is selected.
Check if the printer is on, and then resolve any error messages that appear on the display.
Check if the ports are working and if the cables are securely connected to the computer and the printer. For more information, see the setup documentation that came with the printer.
Turn off the printer, wait for about 10 seconds, and then turn on the printer.
Remove, and then reinstall the print driver.
If the problem persists, then contact customer support .
Try one or more of the following:
From the control panel, check if the documents appear in the Held Jobs list.
Resolve possible formatting errors or invalid data in the print job.
Delete the print job, and then send it again.
For PDF files, generate a new file, and then print the document.
If you are printing from the Internet, then the printer may be reading the multiple job titles as duplicates.
For Windows users, make sure to select Keep duplicate documents in the Printing Preferences or Print dialog.
For Macintosh users, name each job differently.
Delete some held jobs to free up printer memory.
Install more printer memory.
If the problem persists, then contact customer support .
Try one or more of the following:
Make sure that you are printing on the correct paper.
Depending on your operating system, specify the paper size and paper type from the Printing Preferences or Print dialog. Make sure that the settings match the paper loaded.
Check if the trays are linked. For more information, see Linking trays .
If the problem persists, then contact customer support .
Try one or more of the following:
Make sure that the printer cable is securely connected to the printer, computer, print server, option, and other network device.
Make sure that the printer is not in Quiet Mode .
From the control panel, navigate to Settings > Device > Maintenance > Config Menu > Device Operations > Quiet Mode .
Specify the resolution of the document that you want to print.
Depending on your operating system, access the Printing Preferences or Print dialog.
Set the resolution to 4800 CQ .
Depending on your operating system, specify the paper type from the Printing Preferences or Print dialog.
Notes:
Make sure that the printer settings for texture and weight match the paper being loaded.
From the control panel, navigate to Settings > Paper > Media Configuration > Media Types .
Remove held jobs.
Make sure that the printer is not overheating.
Notes:
If the problem persists, then contact customer support .