更換碳粉匣
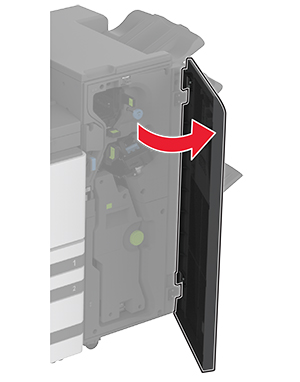
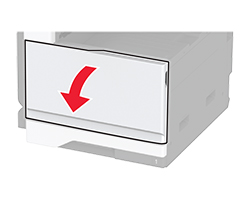
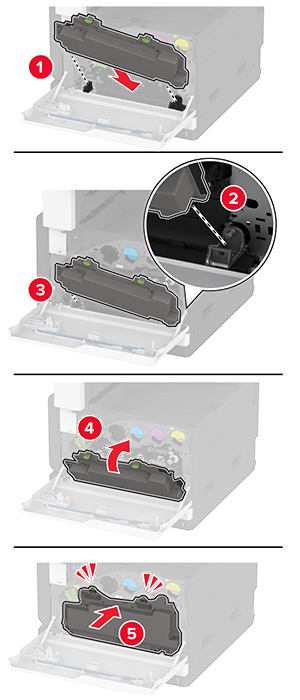
打開前門。
取出使用過的碳粉匣。
拆開新碳粉匣的包裝。
搖晃碳粉匣,使碳粉重新分佈均勻。
插入新的碳粉匣。
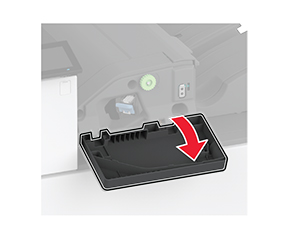
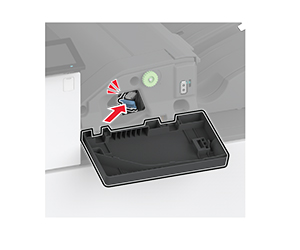
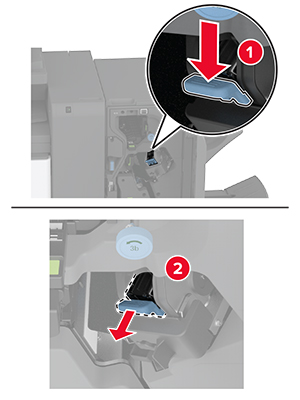
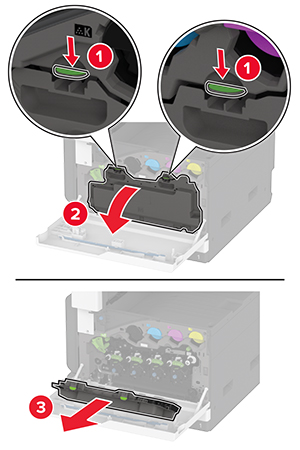
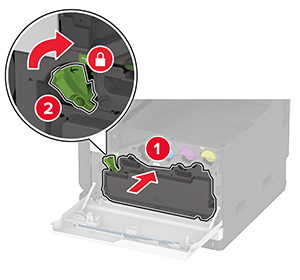
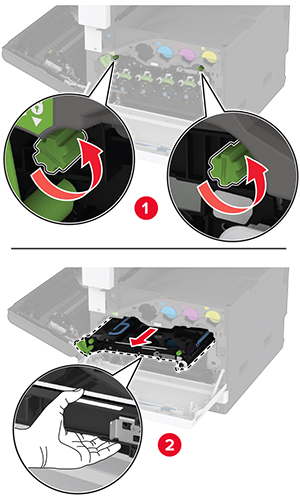
解除鎖定廢棄碳粉回收瓶。
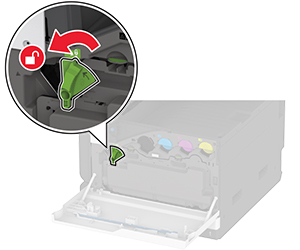
取出廢棄碳粉回收瓶。
 請注意: 若要避免碳粉溢出,請將回收瓶垂直擺放。
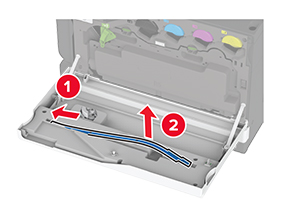
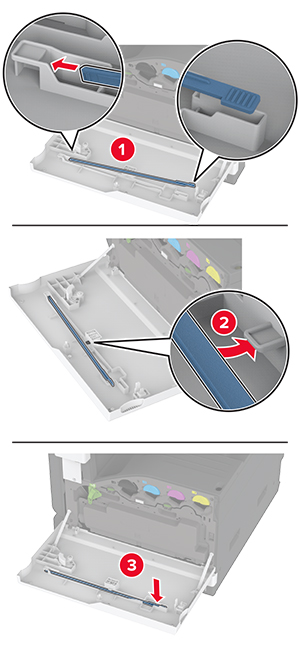
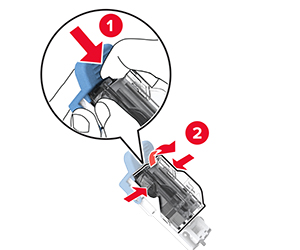
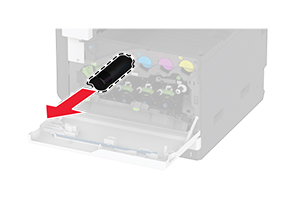
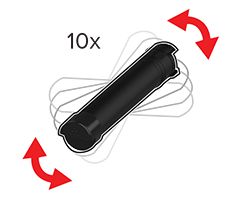
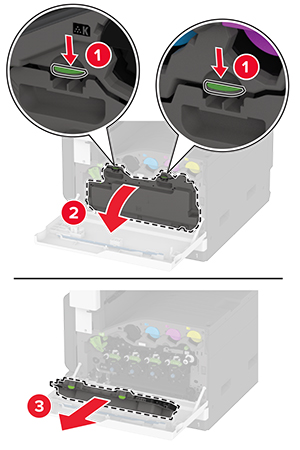
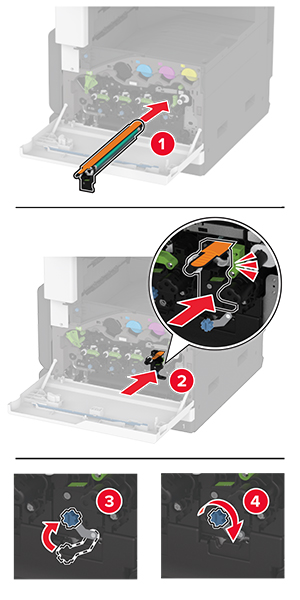
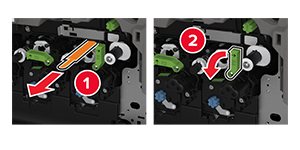
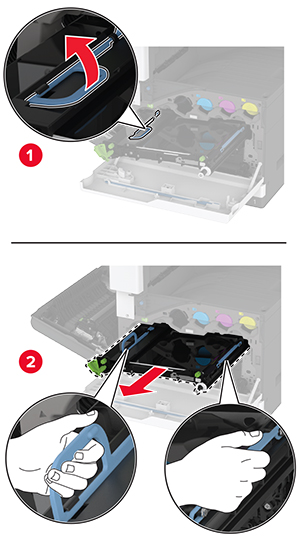
卸下列印頭刷,然後清潔列印頭鏡片。
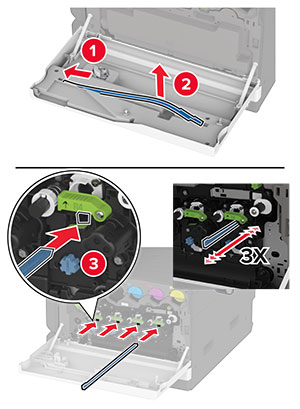
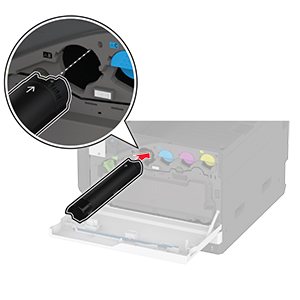
將列印頭刷插回定位。
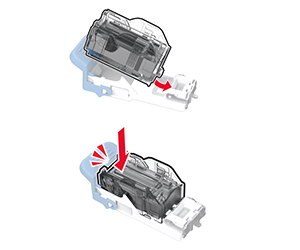
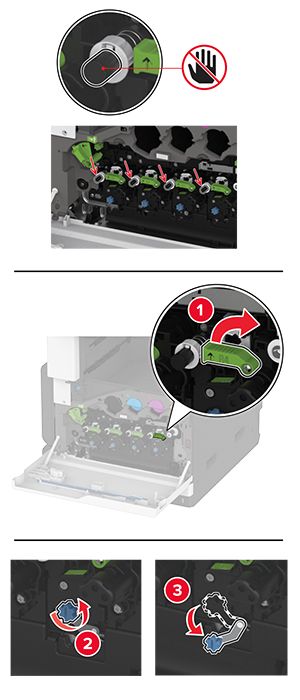
插入廢棄碳粉回收瓶,直到其卡入定位。
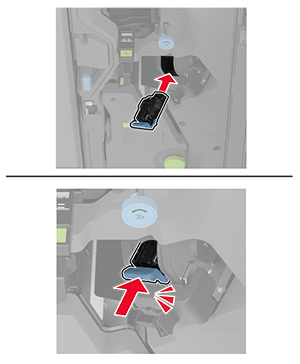
鎖定廢棄碳粉回收瓶。
關上門。
打開前門。
取出使用過的碳粉匣。
拆開新碳粉匣的包裝。
搖晃碳粉匣,使碳粉重新分佈均勻。
插入新的碳粉匣。
解除鎖定廢棄碳粉回收瓶。
取出廢棄碳粉回收瓶。
卸下列印頭刷,然後清潔列印頭鏡片。
將列印頭刷插回定位。
插入廢棄碳粉回收瓶,直到其卡入定位。
鎖定廢棄碳粉回收瓶。
關上門。
打開前門。
解除鎖定廢棄碳粉回收瓶。
卸下廢棄碳粉回收瓶。
卸下列印頭刷,然後清潔列印頭鏡片。
將列印頭刷插回定位。
拆開新的廢棄碳粉回收瓶的包裝。
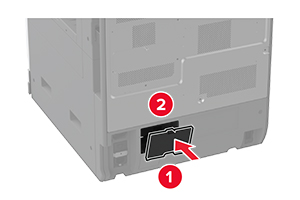
插入新廢棄碳粉回收瓶,直到其卡入定位。
鎖定廢棄碳粉回收瓶。
關上門。
打開前門。
解除鎖定廢棄碳粉回收瓶。
取出廢棄碳粉回收瓶。
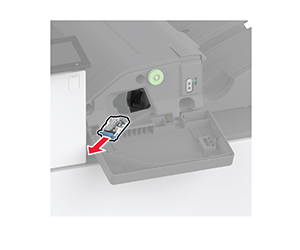
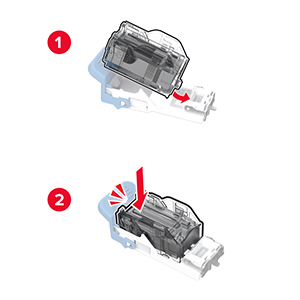
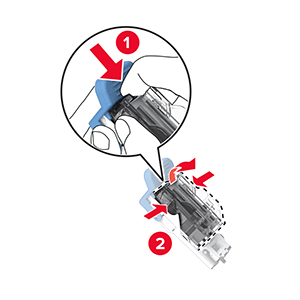
解除鎖定使用過的感光鼓組件。
移除使用過的感光鼓組件。

拆開感光鼓組件的包裝。
插入新感光鼓組件,然後鎖定下方。
移除包裝材料,然後鎖定上方。
卸下列印頭刷,然後清潔列印頭鏡片。
將列印頭刷插回定位。
插入廢棄碳粉回收瓶,直到其卡入定位。
鎖定廢棄碳粉回收瓶。
關上門。
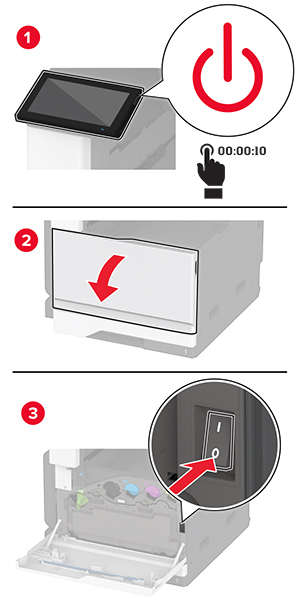
關閉印表機電源。
打開 A 門。
 請當心—表面高溫: 印表機內部的溫度可能很高。為降低高溫組件導致受傷的風險,請先讓表面冷卻再碰觸。
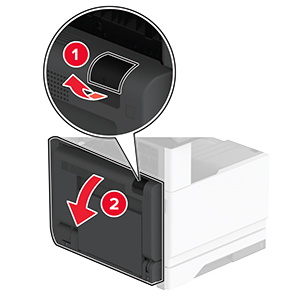
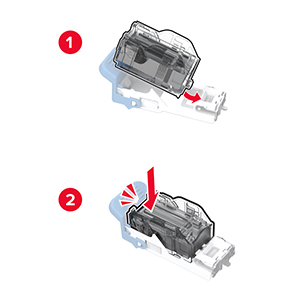
解除鎖定使用過的加熱熔合組件。
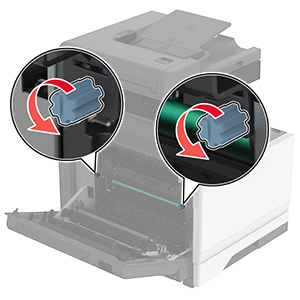
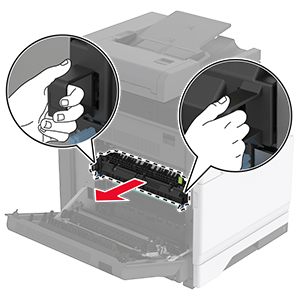
取出使用過的加熱熔合組件。
拆開新加熱熔合組件的包裝。
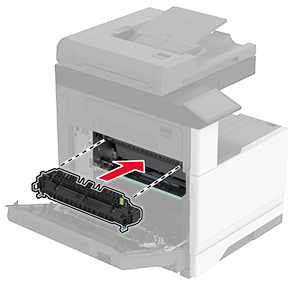
插入新加熱熔合組件。
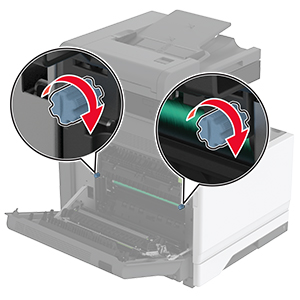
鎖定新加熱熔合組件的。
關上門。
開啟印表機電源。
關閉印表機電源。
打開 A 門。
請當心—表面高溫: 印表機內部的溫度可能很高。為降低高溫組件導致受傷的風險,請先讓表面冷卻再碰觸。移除使用過的轉印滾輪。
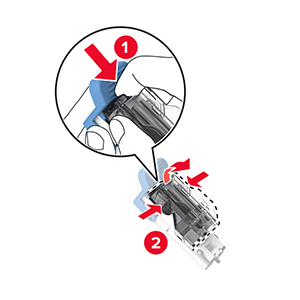
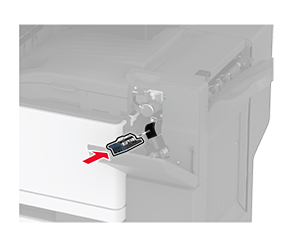
拆開新轉印滾輪的包裝。
插入新轉印滾輪,直到其卡入定位。
關上蓋板 A,然後關閉前門。
開啟印表機電源。
關閉印表機電源。
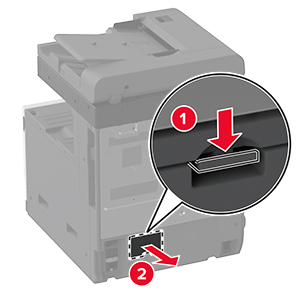
解除鎖定廢棄碳粉回收瓶。
取出廢棄碳粉回收瓶。
打開 A 門。
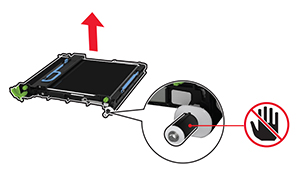
請當心—表面高溫: 印表機內部的溫度可能很高。為降低高溫組件導致受傷的風險,請先讓表面冷卻再碰觸。解除鎖定,然後拉出使用過的轉印套件模組。
移除使用過的轉印套件模組。
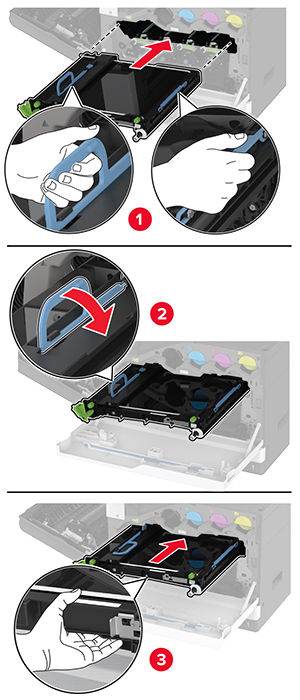
拆開新轉印套件模組的包裝。
插入新轉印套件模組,直到其卡入定位。
鎖定新轉印套件模組,然後關上 A 門。
插入廢棄碳粉回收瓶,直到其卡入定位。
鎖定廢棄碳粉回收瓶。
開啟印表機電源。
關閉印表機電源。
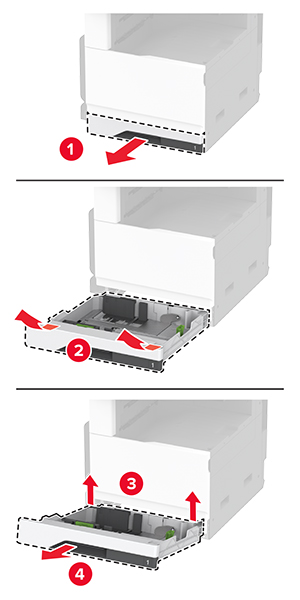
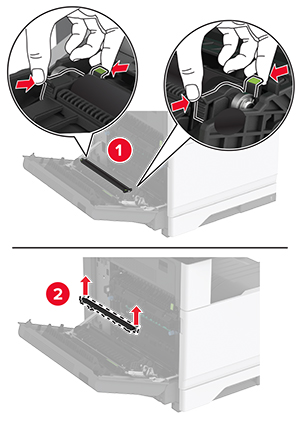
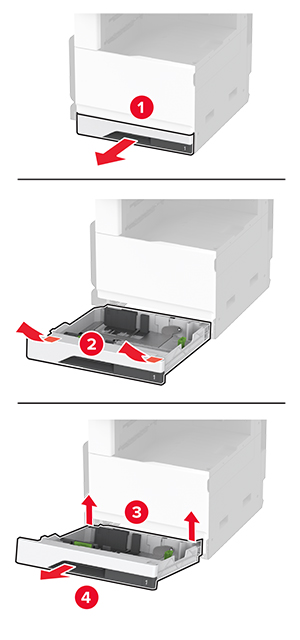
卸下標準紙匣組件。
卸下使用過的紙匣組件滾輪套件。
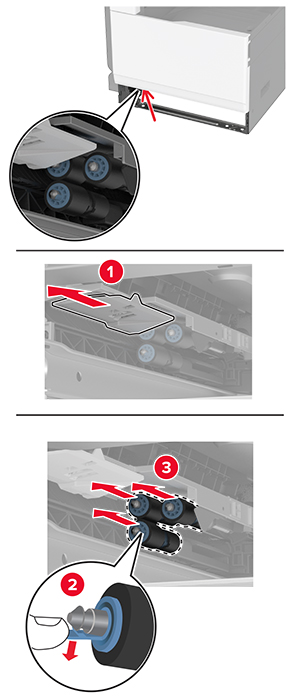
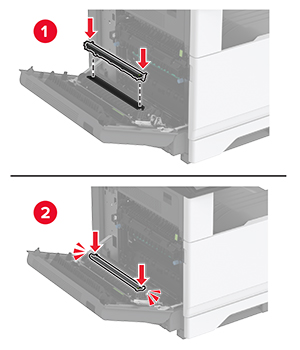
拆開新紙匣組件滾輪套件的包裝。
插入新的紙匣組件滾輪套件,直到其卡入定位。
插入紙匣組件。
開啟印表機電源。
關閉印表機電源。
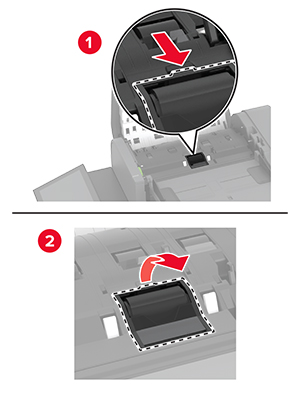
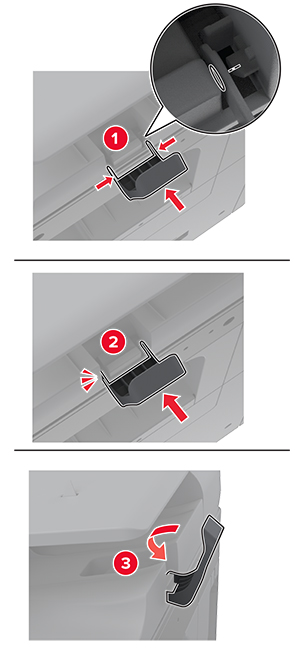
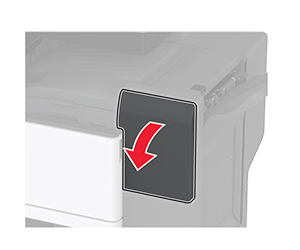
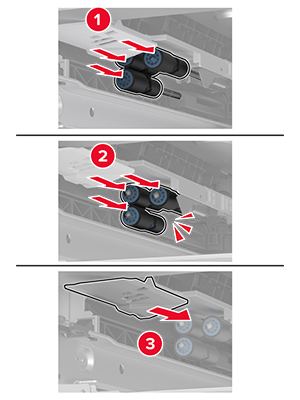
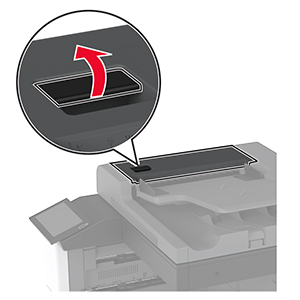
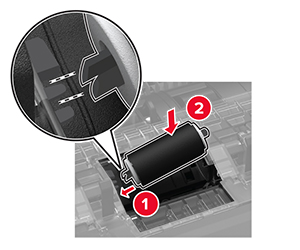
打開自動送稿器的頂蓋。
s
取出分頁器滾輪蓋。
取出使用過的分頁器滾輪。
拆開新分頁器滾輪的包裝。
插入新的分頁器滾輪。
插入分頁器滾輪蓋,直到其卡入定位。
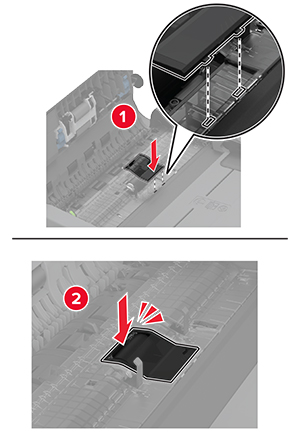
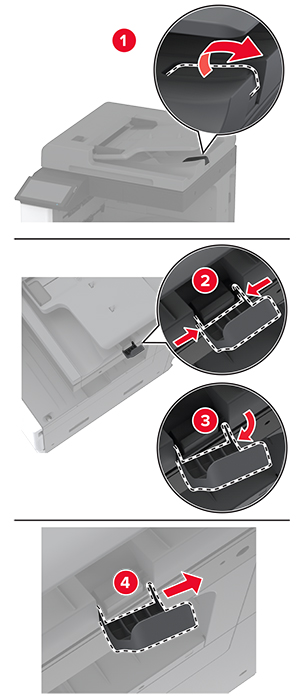
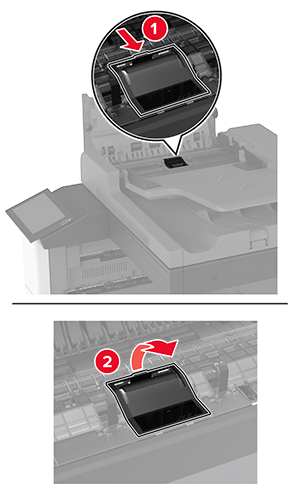
取出使用過的分頁器滾輪組件。
拆開新分頁器滾輪組件的包裝。
插入新分頁器滾輪組件蓋板,直到其卡入定位。
關上自動送稿器的頂蓋。
開啟印表機電源。
關閉印表機電源。
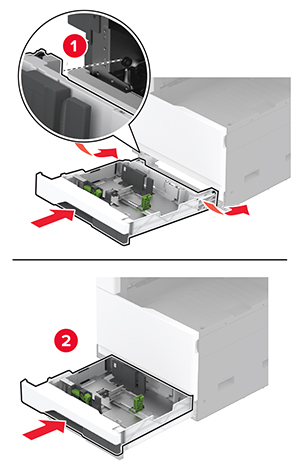
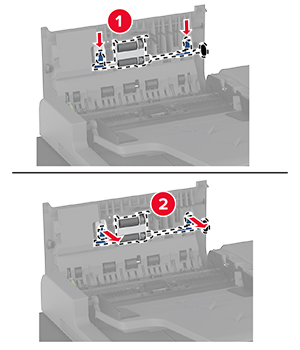
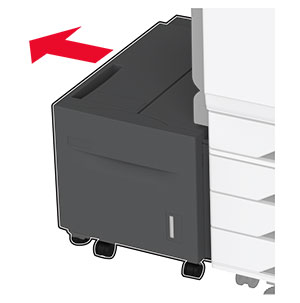
將紙匣組件滑向左側。
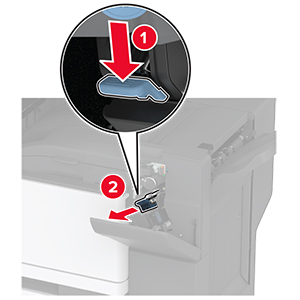
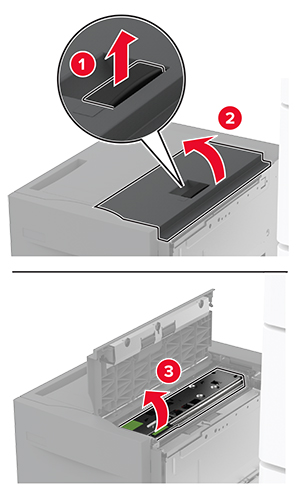
打開 J 門,然後打開滾輪套件蓋板。
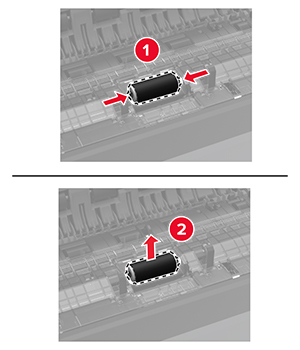
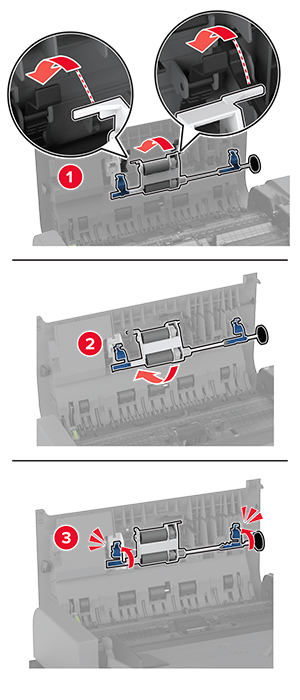
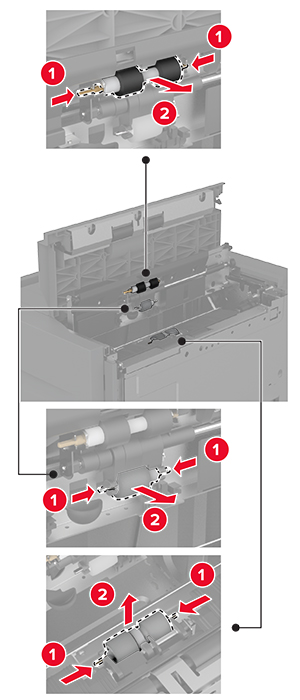
找出並卸下使用過的滾輪套件。
拆開新滾輪套件的包裝。
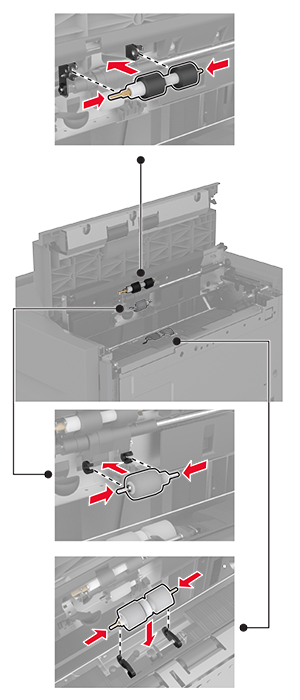
插入新的滾輪套件。
關上滾輪套件蓋板,然後關上 J 門。
將紙匣組件滑回定位。
開啟印表機電源。
從主畫面,觸控設定 > 裝置 > 維護 > 配置功能表 > 耗材用量和計數器。
選擇您要重設的計數器。