Replacing parts and supplies

Replacing the toner cartridge

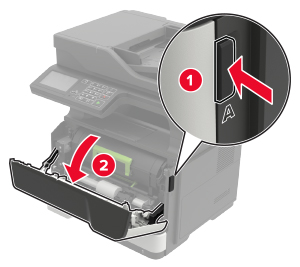
  1. Open door A.

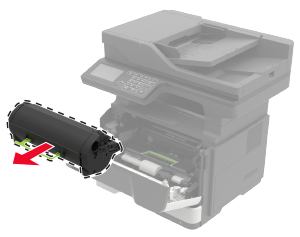
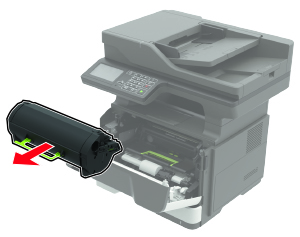
  2. Remove the used toner cartridge.

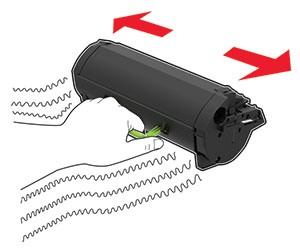
  3. Unpack the new toner cartridge, and then shake it three times to redistribute the toner.

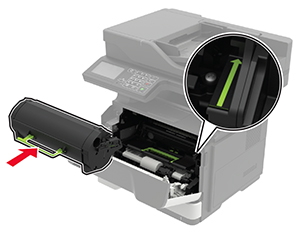
  4. Insert the new toner cartridge.

    Note: Use the arrows inside the printer as guides.
  5. Close door A.

Replacing the imaging unit

  1. Open door A.

  2. Remove the toner cartridge.

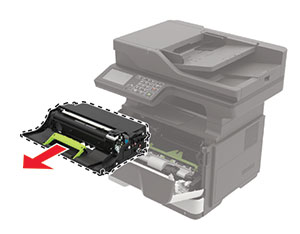
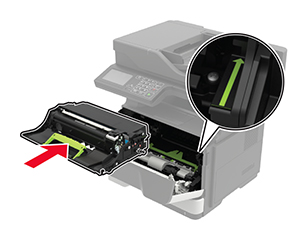
  3. Remove the used imaging unit.

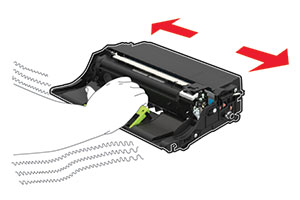
  4. Unpack the new imaging unit, and then shake it three times to redistribute the toner.

    Warning—Potential Damage: Do not expose the imaging unit to direct light for more than 10 minutes. Extended exposure to light may cause print quality problems.
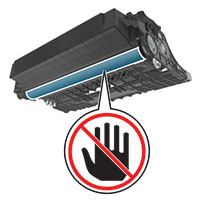
    Warning—Potential Damage: Do not touch the photoconductor drum. Doing so may affect the quality of future print jobs.
  5. Insert the new imaging unit.

    Note: Use the arrows inside the printer as guides.
  6. Insert the toner cartridge.

    Note: Use the arrows inside the printer as guides.
  7. Close door A.

Replacing the pick tires

  1. Turn off the printer.

  2. Unplug the power cord from the electrical outlet, and then from the printer.

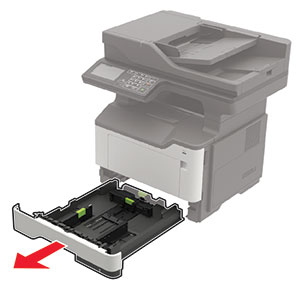
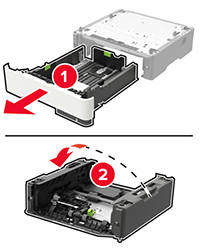
  3. Remove the tray.

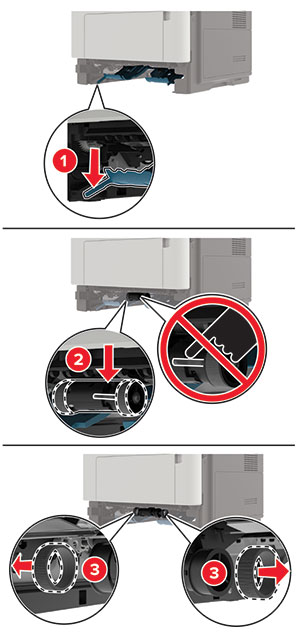
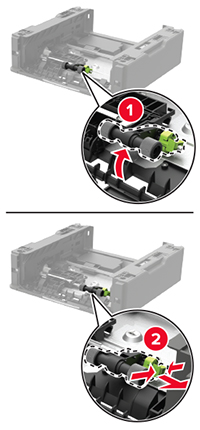
  4. Remove the used pick tires one after the other.

  5. Unpack the new pick tires.

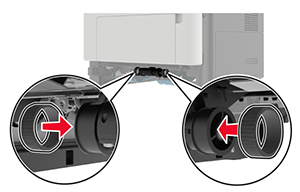
  6. Insert the new pick tires.

  7. Insert the tray.

  8. Connect the power cord to the printer, and then to the electrical outlet.

    standard caution icon CAUTION—POTENTIAL INJURY: To avoid the risk of fire or electrical shock, connect the power cord to an appropriately rated and properly grounded electrical outlet that is near the product and easily accessible.
  9. Turn on the printer.
Replacing the pick roller assembly

  1. Turn off the printer.

  2. Unplug the power cord from the electrical outlet, and then from the printer.

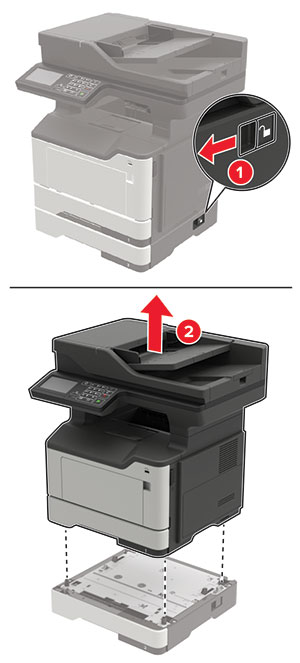
  3. Remove the optional tray.

    standard caution icon CAUTION—POTENTIAL INJURY: If the printer weight is greater than 20 kg (44 lb), then it may require two or more people to lift it safely.
  4. Remove the tray insert, and then flip the tray base.

  5. Remove the used pick roller assembly.

  6. Unpack the new pick roller assembly.

  7. Insert the new pick roller assembly.

  8. Flip the tray base, and then insert the tray insert.

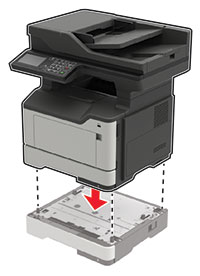
  9. Align the printer with the optional tray, and then lower the printer until it clicks into place.

  10. Connect the power cord to the printer, and then to the electrical outlet.

    standard caution icon CAUTION—POTENTIAL INJURY: To avoid the risk of fire or electrical shock, connect the power cord to an appropriately rated and properly grounded electrical outlet that is near the product and easily accessible.
  11. Turn on the printer.
Replacing the ADF separator roller

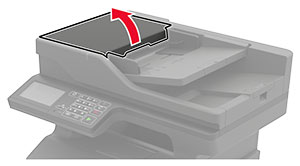
  1. Open the ADF cover.

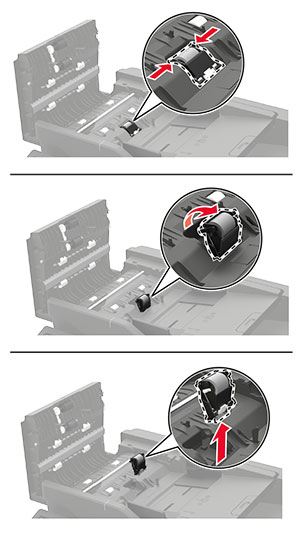
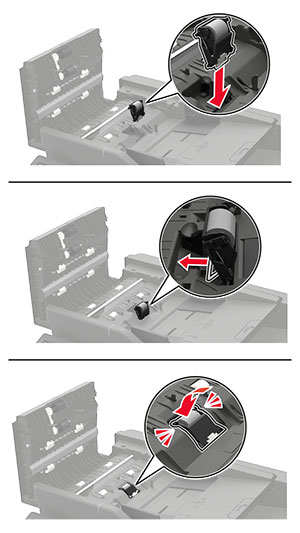
  2. Remove the used ADF separator roller.

  3. Unpack the new ADF separator roller.

    Warning—Potential Damage: To avoid damage and poor printer performance, handle this part with clean hands.
  4. Insert the new ADF separator roller until it clicks into place.

  5. Close the ADF cover.