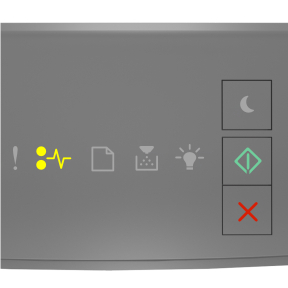
Paper jam in the front door

Paper jam light - On

start button light - On

If the sequence matches the light sequence in the preceding illustration, then press the start button twice to see the supplemental light sequence.
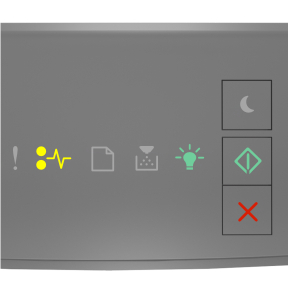
Paper jam light - On

Ready light - On

Start button light - On

If the supplemental light sequence matches the light sequence in the preceding illustration, then do the following.

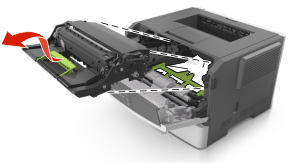
  1. Open the front door.

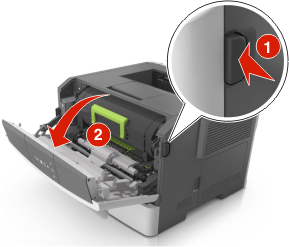
  2. Remove the toner cartridge.

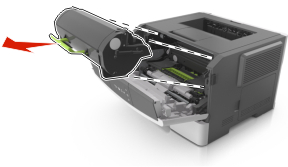
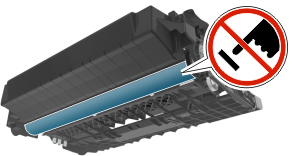
  3. Remove the imaging unit.

    Warning—Potential Damage: Do not expose the imaging unit to direct light for more than 10 minutes. Extended exposure to light may cause print quality problems.
    Warning—Potential Damage: Do not touch the photoconductor drum under the imaging unit. Doing so may affect the print quality of future print jobs.
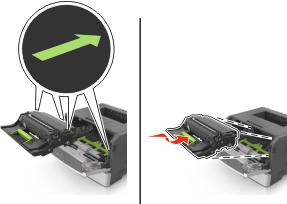
  4. Insert the imaging unit.

    Note: Use the arrow guides inside the printer.
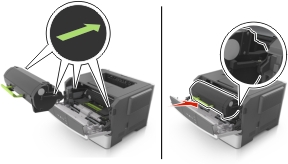
  5. Insert the toner cartridge.

  6. Close the front door.

  7. From the control panel, press the select button.