Replacing parts and supplies

Replacing the toner cartridge

  1. Open the front door.

    Warning—Potential Damage:  To prevent damage from electrostatic discharge, touch any exposed metal frame of the printer before accessing or touching interior areas of the printer.
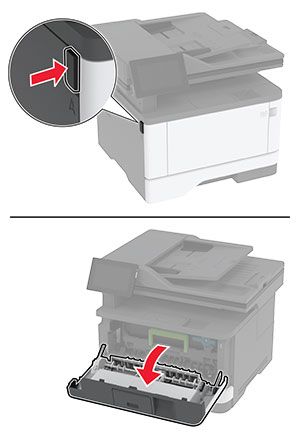
    The button on the left side of the printer is pushed, and then the door is opened.
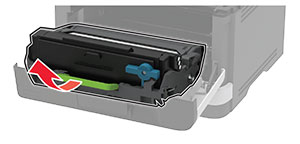
  2. Remove the imaging unit.

    The imaging unit is pulled out of the printer.
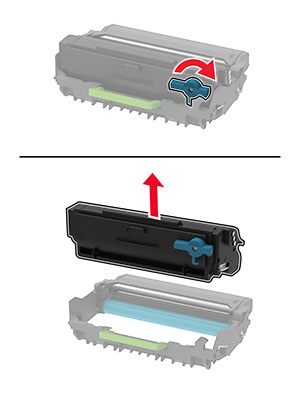
  3. Twist the blue latch, and then remove the used toner cartridge from the imaging unit.

    Warning—Potential Damage:  Do not expose the imaging unit to direct light for more than 10 minutes. Extended exposure to light may cause print quality problems.
    Warning—Potential Damage:  Do not touch the photoconductor drum. Doing so may affect the quality of future print jobs.
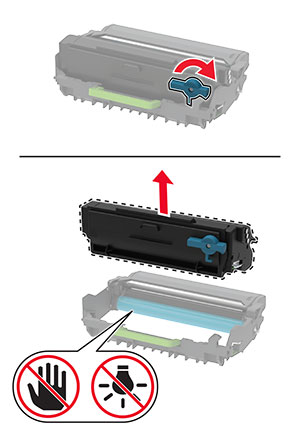
    The blue latch on the cartridge is twisted clockwise, and then the cartridge is removed from the imaging unit.
  4. Unpack the new toner cartridge.

  5. Shake the toner cartridge to redistribute the toner.
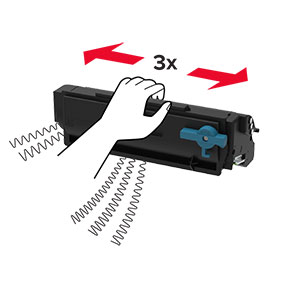
    The cartridge is shaken left to right three times.
  6. Insert the new toner cartridge into the imaging unit until it clicks into place.
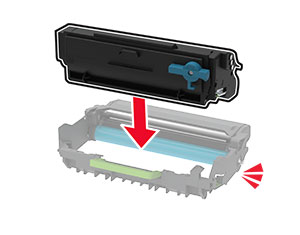
    The cartridge is inserted into the imaging unit.
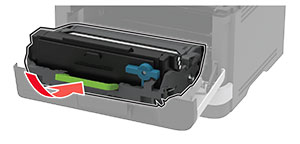
  7. Insert the imaging unit.

    The imaging unit is inserted into the printer.
  8. Close the door.

Replacing the imaging unit

  1. Open the front door.

    Warning—Potential Damage:  To prevent damage from electrostatic discharge, touch any exposed metal frame of the printer before accessing or touching interior areas of the printer.
    The button on the left side of the printer is pushed, and then the door is opened.
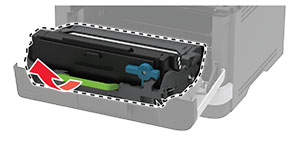
  2. Remove the used imaging unit.

    The imaging unit is pulled out of the printer.
  3. Twist the blue latch, and then remove the toner cartridge from the used imaging unit.

    The blue latch on the cartridge is twisted clockwise, and then the cartridge is removed from the imaging unit.
  4. Unpack the new imaging unit, and then insert the toner cartridge until it clicks into place.

    Warning—Potential Damage:  Do not expose the imaging unit to direct light for more than 10 minutes. Extended exposure to light may cause print quality problems.
    Warning—Potential Damage:  Do not touch the photoconductor drum. Doing so may affect the quality of future print jobs.
    The cartridge is inserted into the imaging unit.
  5. Insert the new imaging unit.

    The imaging unit is inserted into the printer.
  6. Close the door.

Replacing the tray

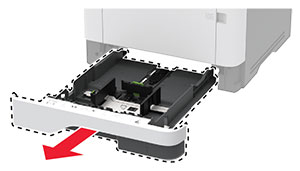
  1. Remove the used tray.

    The tray is pulled out of the printer.
  2. Unpack the new tray.

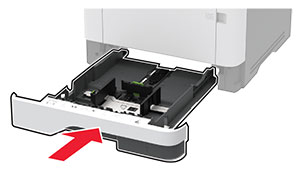
  3. Insert the new tray.

    The tray is inserted into the printer.

Replacing the pick roller assembly

  1. Turn off the printer.

  2. Unplug the power cord from the electrical outlet, and then from the printer.

  3. Open the front door.

    The button on the left side of the printer is pushed, and then the front door is opened.
  4. Remove the imaging unit.

    The imaging unit is pulled out of the printer.
  5. Close the front door.

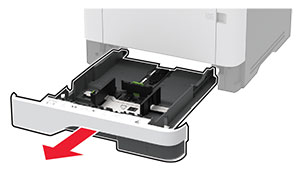
  6. Remove the tray.

    The tray is pulled out of the printer.
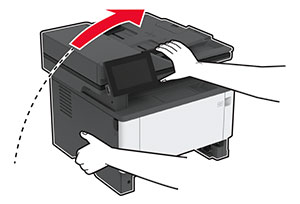
  7. Position the printer on its side.

    The printer is flipped to its side.
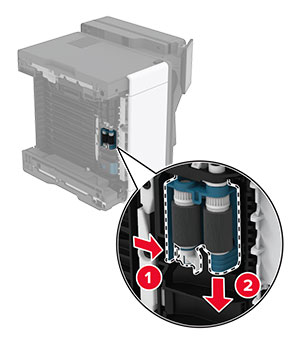
  8. Remove the used pick roller assembly.

    The tray pick roller assembly is removed from the printer.
  9. Unpack the new pick roller assembly.

    Note:  To avoid contamination, make sure that your hands are clean.
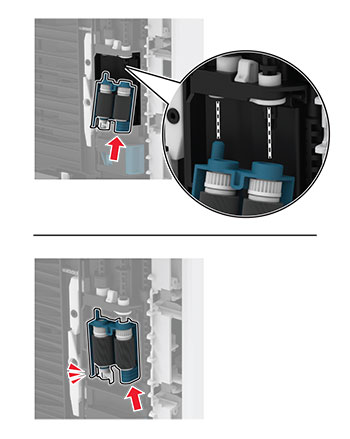
  10. Insert the new pick roller assembly.

    The pick roller assembly is aligned, and then inserted into the printer.
  11. Place the printer in its original position, and then insert the tray.

  12. Open the front door.

  13. Insert the imaging unit.

  14. Close the front door.

  15. Connect the power cord to the printer, and then to the electrical outlet.

    standard caution icon   CAUTION—POTENTIAL INJURY:  To avoid the risk of fire or electrical shock, connect the power cord to an appropriately rated and properly grounded electrical outlet that is near the product and easily accessible.
  16. Turn on the printer.

Replacing the tray separator roller

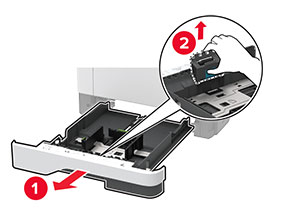
  1. Remove the tray, and then remove the used separator roller.

    The tray is pulled out of the printer, and then the separator roller is removed from the tray.
  2. Unpack the new separator roller.

    Note:  To avoid contamination, make sure that your hands are clean.
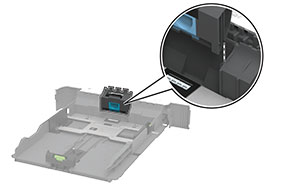
  3. Insert the new separator roller.

    The tray separator roller is aligned, and then inserted into the tray.
  4. Insert the tray.

    The tray is inserted into the printer.

Replacing the ADF separator pad

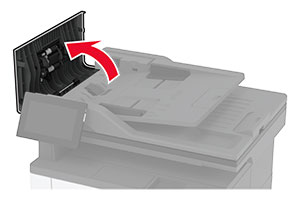
  1. Open door C.

    Door C is pulled up.
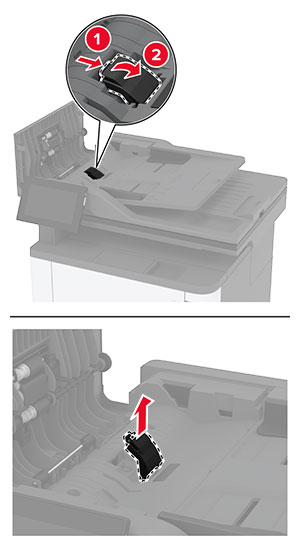
  2. Remove the used ADF separator pad.

    The ADF separator pad is unlocked, and then pulled out of the ADF.
  3. Unpack the new ADF separator pad.

  4. Insert the new separator pad until it clicks into place.

    The ADF separator pad is aligned, and then inserted into the ADF.
  5. Close the door.

Resetting the supply usage counters

  1. From the home screen, touch Settings > Device > Maintenance > Configuration Menu > Supply Usage And Counters .

  2. Select the counter that you want to reset.

Warning—Potential Damage:  Supplies and parts without Return Program agreement terms may be reset and remanufactured. However, the manufacturer’s warranty does not cover any damage caused by non-genuine supplies or parts. Resetting counters on the supply or part without proper remanufacturing can cause damage to your printer. After resetting the supply or part counter, your printer may display an error indicating the presence of the reset item.