更換碳粉匣
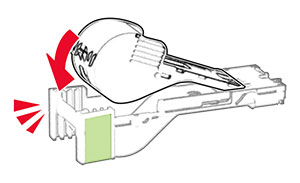
打開 A 門。
取出使用過的碳粉匣。
拆開新碳粉匣的包裝。
搖晃碳粉匣,使碳粉重新分佈均勻。
插入新的碳粉匣。
關上 A 門。
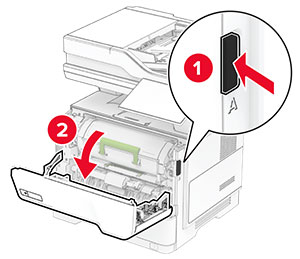
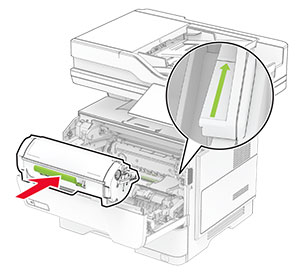
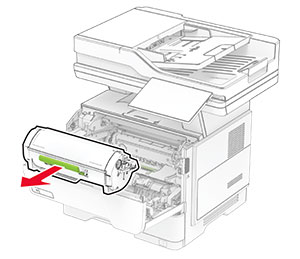
打開 A 門。
卸下碳粉匣。
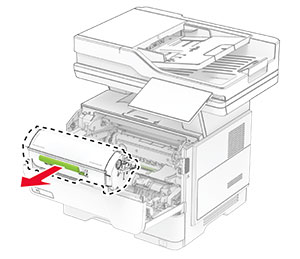
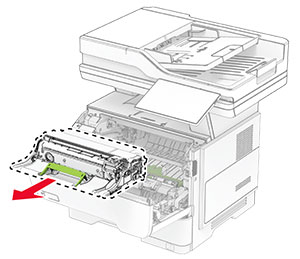
移除使用過的成像組件。
拆開新成像組件的包裝。
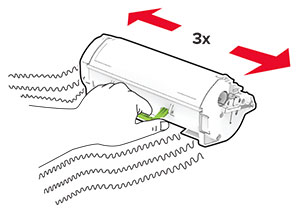
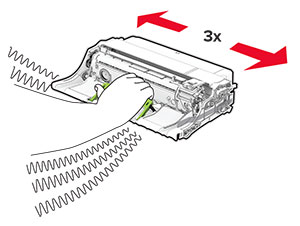
搖晃成像組件以利碳粉重新分佈。
插入新成像組件。
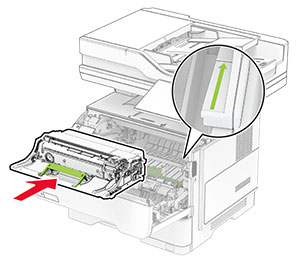
插入碳粉匣。
關上 A 門。
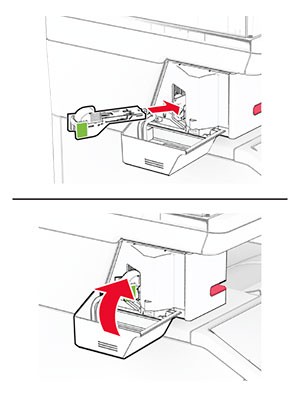
打開便利裝訂器存取門。
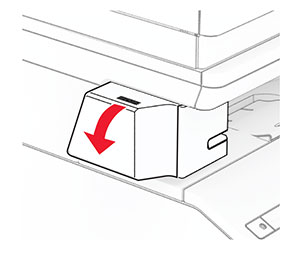
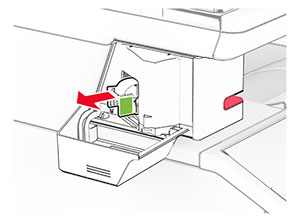
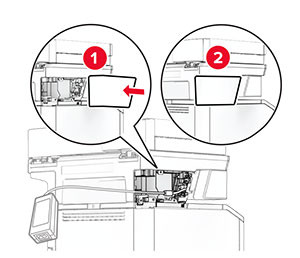
卸下裝釘匣。
卸下空裝釘匣填補釘排。

插入新的裝釘匣填補釘排,直到其卡入定位。
插入裝釘匣,然後關閉便利裝訂器存取門。
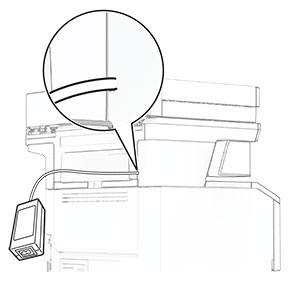
關閉印表機電源。
從電源插座拔除電源線,然後再從印表機拔除。
從電源插座拔掉電源供應器。
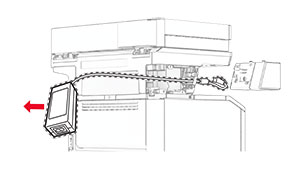
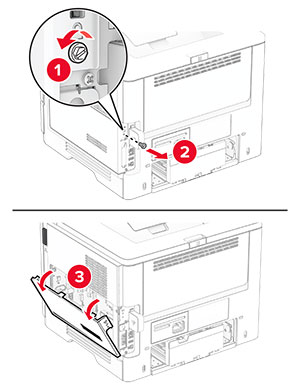
卸下柱狀蓋板和電源供應器電纜。
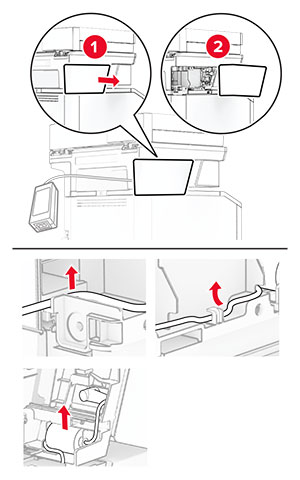
卸下便利裝訂器。
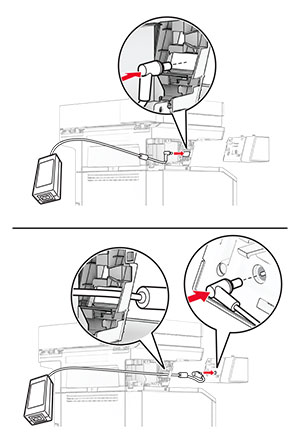
卸下使用過的電源供應器。
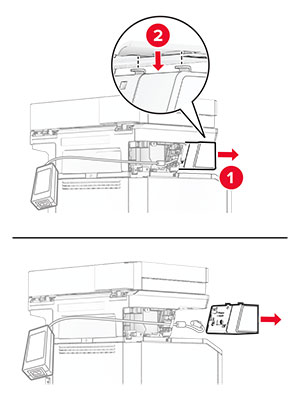
打開新電源供應器的包裝。
穿過印表機插入新電源供應器,然後將其連接至便利裝釘器。
安裝便利裝訂器。
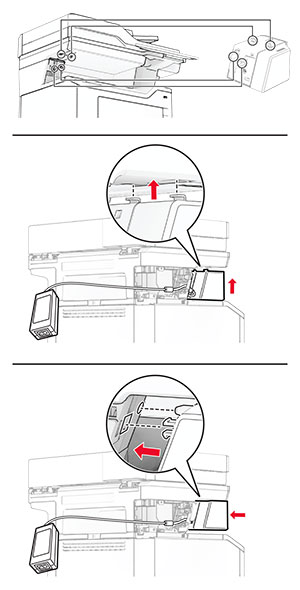
使電源供應器正確就位。

裝上柱形蓋板。
將便利裝訂器電源線的一端連接到電源,然後將另一端連接到電源插座。
將印表機電源線的一端連接到印表機,然後將另一端連接到電源插座。
 請當心—潛在受傷危險性: 為避免發生火災或觸電的危險,請將電源線連接至產品附近額定電壓相符且正確接地的電源插座,以便於使用。
開啟印表機電源。
 請當心—觸電危險: 為避免發生電擊的風險,若您是在安裝印表機之後,才要取用控制板或安裝選購性硬體或記憶裝置,請先關閉印表機電源,並從電源插座拔除電源線,再繼續作業。若您有任何其他裝置連接至印表機,請同時關閉它們的電源,並拔下所有連接到印表機的電纜。
關閉印表機電源。
從電源插座拔除電源線,然後再從印表機拔除。
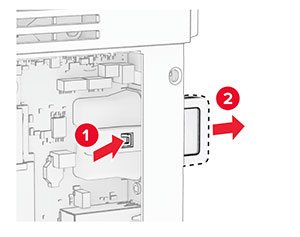
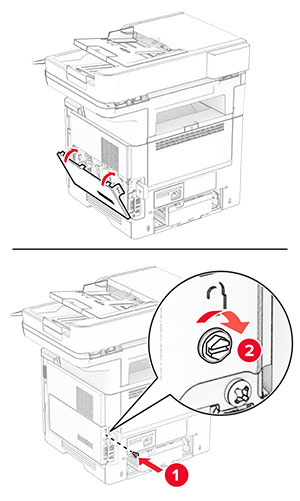
打開控制板蓋板。
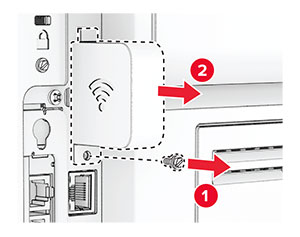
卸下無線列印伺服器蓋板。
卸下傳真卡。
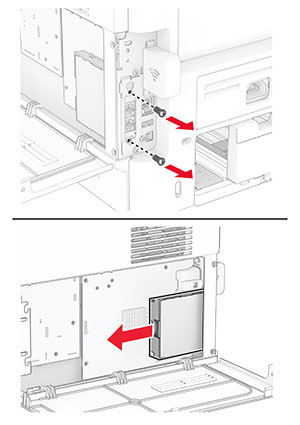
取出使用過的無線列印伺服器。
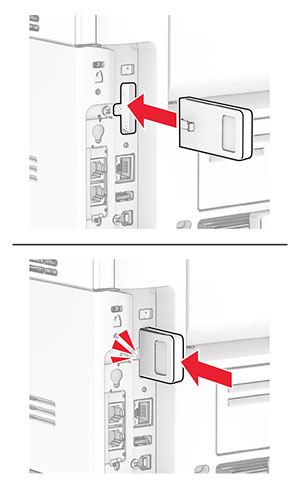
打開無線列印伺服器的包裝。
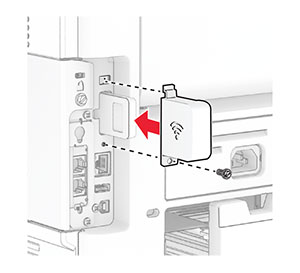
插入新的無線列印伺服器,直到其卡入定位。
連接傳真卡,然後安裝螺絲。
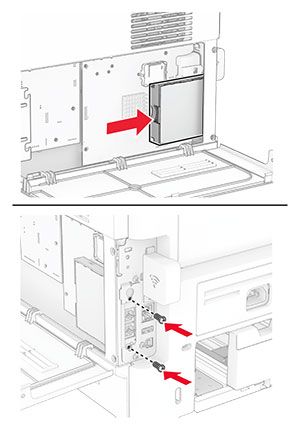
連接無線列印伺服器蓋板,然後安裝螺絲。
關閉控制板蓋板,然後安裝螺絲。
將電源線連接至印表機,然後再連接至電源插座。
請當心—潛在受傷危險性: 為避免發生火災或觸電的危險,請將電源線連接至產品附近額定電壓相符且正確接地的電源插座,以便於使用。開啟印表機電源。
關閉印表機電源。
從電源插座拔除電源線,然後再從印表機拔除。
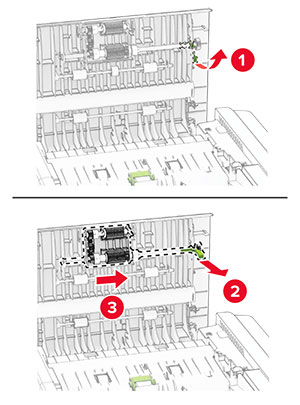
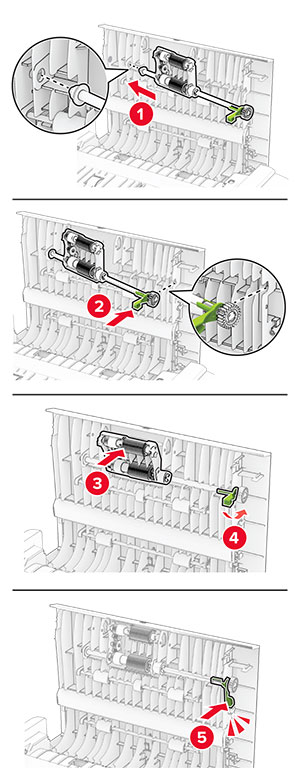
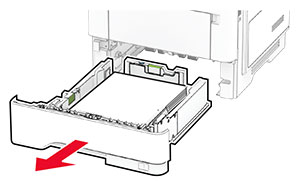
取出紙匣組件。
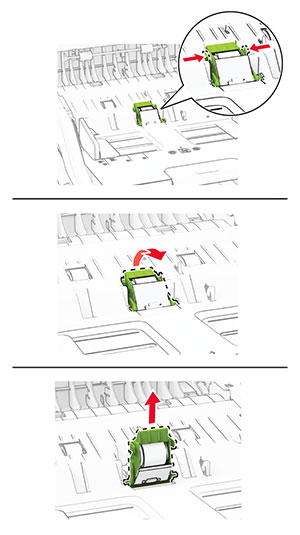
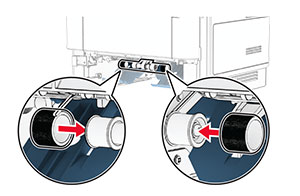
取出用過的分頁器滾輪。

拆封新的分頁器滾輪。
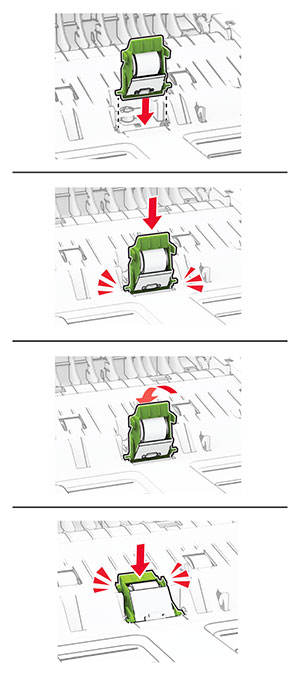
插入新的分頁器滾輪。
插入紙匣組件。
將電源線連接至印表機,然後再連接至電源插座。
請當心—潛在受傷危險性: 為避免發生火災或觸電的危險,請將電源線連接至產品附近額定電壓相符且正確接地的電源插座,以便於使用。開啟印表機電源。
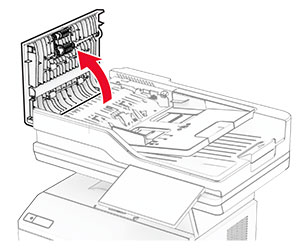
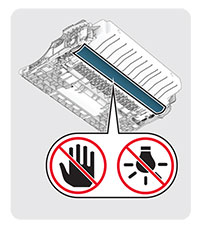
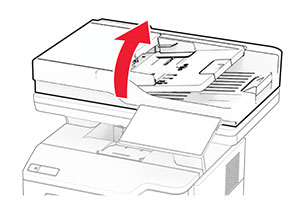
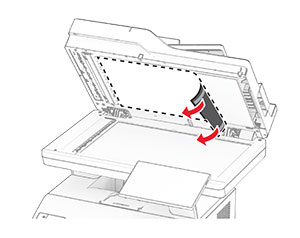
打開掃描器蓋板。
卸下使用過的掃描器玻璃面板墊。
拆開新掃描器玻璃面板墊的包裝。
將新的掃描器玻璃面板墊對齊掃描器玻璃面板。
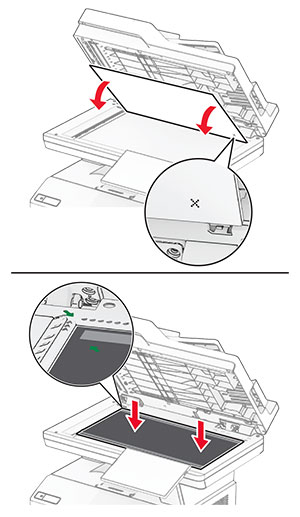
關上掃描器蓋板以連接新的掃描器玻璃面板墊。
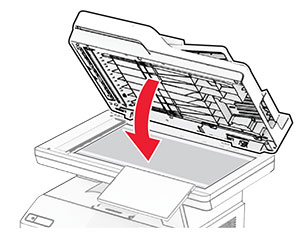
打開掃描器蓋板。
對新的掃描器玻璃面板墊施力以固定它。
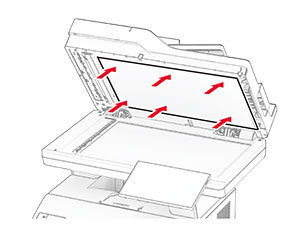
關上掃描器蓋板。