Cleaning printer parts

Cleaning the printer

shock hazard caution icon CAUTION—SHOCK HAZARD: To avoid the risk of electrical shock when cleaning the exterior of the printer, unplug the power cord from the electrical outlet and disconnect all cables from the printer before proceeding.

Notes:

  1. Turn off the printer, and then unplug the power cord from the electrical outlet.

  2. Remove paper from the standard bin and multipurpose feeder.

  3. Remove any dust, lint, and pieces of paper around the printer using a soft brush or vacuum.

  4. Wipe the outside of the printer with a damp, soft, lint-free cloth.

    Notes:

    • Do not use household cleaners or detergents, as they may damage the finish of the printer.
    • Make sure that all areas of the printer are dry after cleaning.
  5. Connect the power cord to the electrical outlet, and then turn on the printer.

    standard caution icon CAUTION—POTENTIAL INJURY: To avoid the risk of fire or electrical shock, connect the power cord to an appropriately rated and properly grounded electrical outlet that is near the product and easily accessible.

Cleaning the touch screen

shock hazard caution icon CAUTION—SHOCK HAZARD: To avoid the risk of electric shock when cleaning the exterior of the printer, unplug the power cord from the electrical outlet and disconnect all cables from the printer before proceeding.
  1. Turn off the printer, and then unplug the power cord from the electrical outlet.

  2. Using a damp, soft, lint-free cloth, wipe the touch screen.

    Notes:

    • Do not use household cleaners or detergents, as they may damage the touch screen.
    • Make sure that the touch screen is dry after cleaning.
  3. Connect the power cord to the electrical outlet, and then turn on the printer.

    standard caution icon CAUTION—POTENTIAL INJURY: To avoid the risk of fire or electrical shock, connect the power cord to an appropriately rated and properly grounded electrical outlet that is near the product and easily accessible.
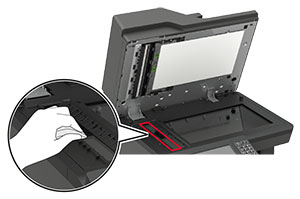
Cleaning the scanner

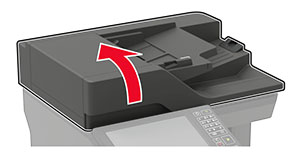
  1. Open the scanner cover.

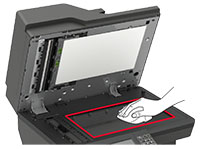
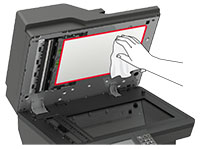
  2. Using a damp, soft, lint-free cloth, wipe the following areas:

    • ADF glass

    • ADF glass pad

    • Scanner glass

    • Scanner glass pad

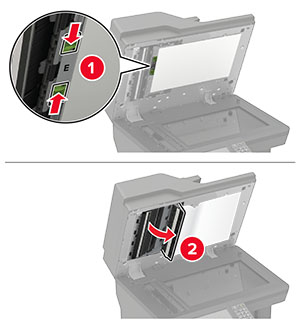
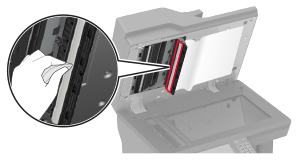
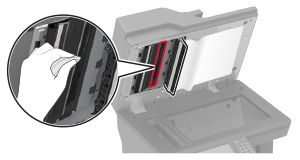
  3. Open door E.

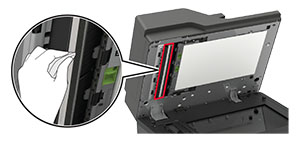
  4. Using a damp, soft, lint-free cloth, wipe the following areas:

    • ADF glass pad in door E

    • ADF glass in door E

  5. Close door E, and then close the scanner cover.

Cleaning the pick tires

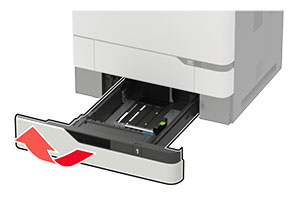
  1. Turn off the printer.

  2. Remove the tray.

    Warning—Potential Damage: To prevent damage from electrostatic discharge, touch any exposed metal frame of the printer before accessing or touching interior areas of the printer.
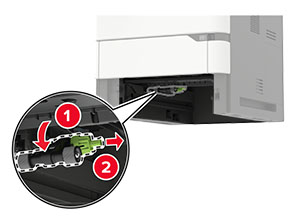
  3. Remove the pick roller.

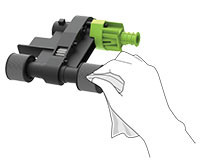
  4. Using a damp, soft, lint-free cloth, wipe the pick tires.

    Note: Apply isopropyl alcohol to the cloth.
  5. Insert the pick roller.

  6. Insert the tray.

Cleaning the pick roller in the multipurpose feeder

  1. Turn off the printer.

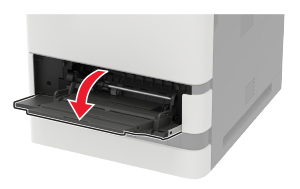
  2. Open the multipurpose feeder.

    Warning—Potential Damage: To prevent damage from electrostatic discharge, touch any exposed metal frame of the printer before accessing or touching interior areas of the printer.
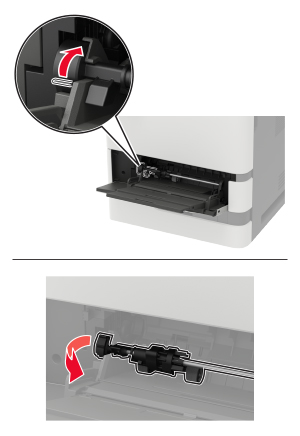
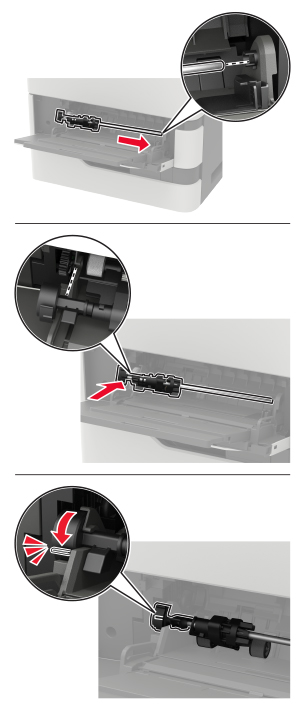
  3. Remove the pick roller.

  4. Apply isopropyl alcohol to a soft, lint-free cloth, and then wipe the pick roller.

  5. Insert the pick roller.

  6. Close the multipurpose feeder.

  7. Turn on the printer.

Cleaning the ADF pick roller

  1. Turn off the printer.

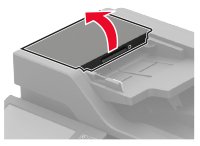
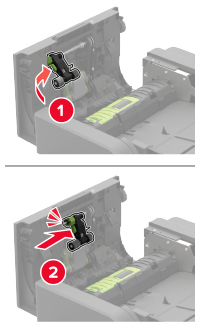
  2. Open door D.

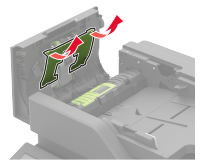
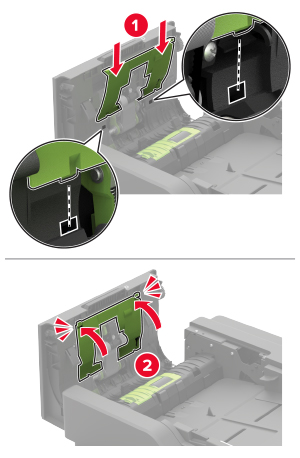
  3. Remove the ADF pick roller cover.

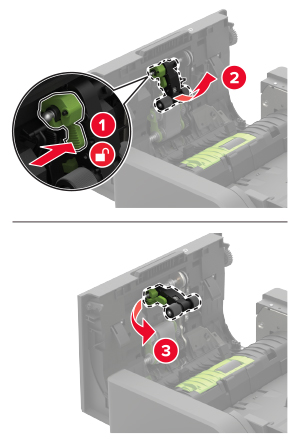
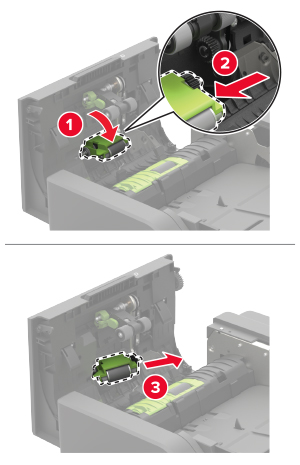
  4. Remove the ADF pick roller.

    Warning—Potential Damage: Some parts of the printer are easily damaged by static electricity. Before touching any parts or components in an area marked with the static-sensitive symbol, touch a metal surface in an area away from the symbol.
  5. Apply isopropyl alcohol to a soft, lint-free cloth, and then wipe the ADF pick roller..

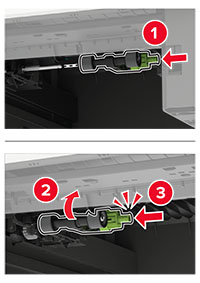
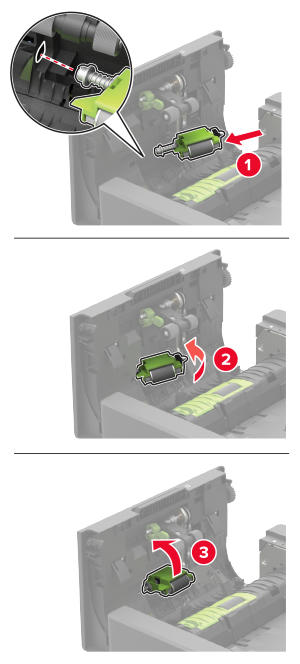
  6. Insert the ADF pick roller until it clicks into place.

    Warning—Potential Damage: Some parts of the printer are easily damaged by static electricity. Before touching any parts or components in an area marked with the static-sensitive symbol, touch a metal surface in an area away from the symbol.
  7. Insert the ADF pick roller cover until it clicks into place.

  8. Close door D.

  9. Turn on the printer.

Cleaning the ADF feed roller

  1. Turn off the printer.

  2. Open door D.

  3. Remove the ADF pick roller cover.

  4. Remove the ADF feed roller.

    Warning—Potential Damage: Some parts of the printer are easily damaged by static electricity. Before touching any parts or components in an area marked with the static-sensitive symbol, touch a metal surface in an area away from the symbol.
  5. Apply isopropyl alcohol to a soft, lint-free cloth, and then wipe the ADF feed roller.

  6. Insert the ADF feed roller until it clicks into place.

  7. Insert the ADF pick roller cover until it clicks into place.

  8. Close door D.

  9. Turn on the printer.

Emptying the hole punch box

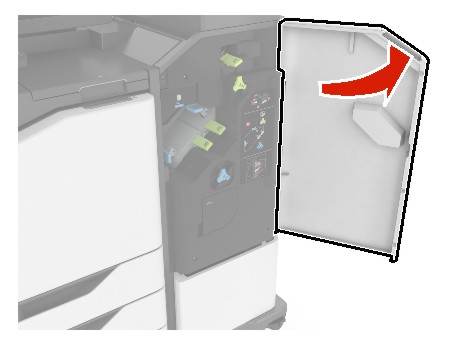
  1. Open door J.

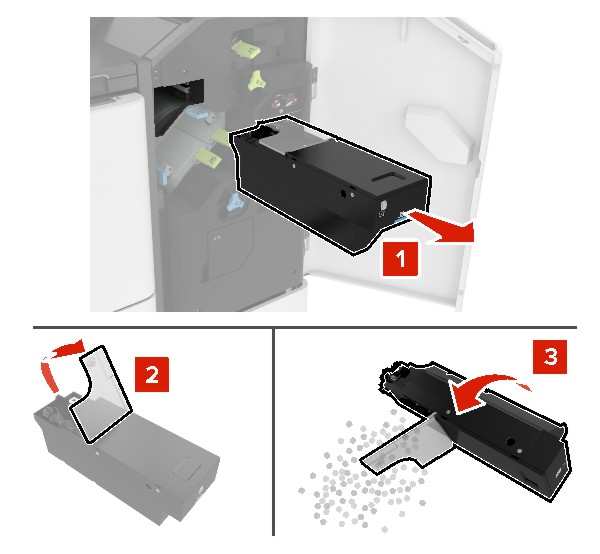
  2. Remove and empty the hole punch box.

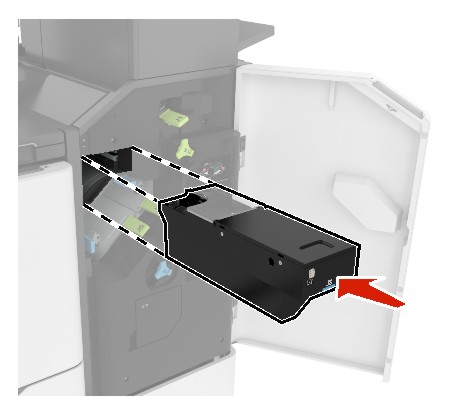
  3. Insert the hole punch box.

  4. Close door J.