Erasing non-volatile memory
This procedure erases individual settings, device and network settings, security settings, and embedded solutions.
For printers with LED display
Turn off the printer.
Open the front door.
Press and hold  while turning on the printer.
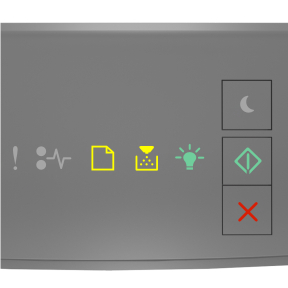
Release only when the control panel light sequence matches the light sequence in the following illustration.
 - Solid yellow
 - Solid yellow
 - Solid green
- Solid green
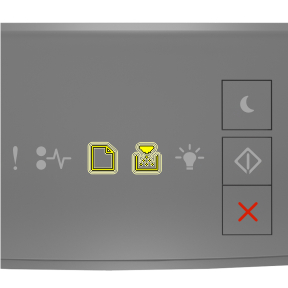
Press  until the control panel light sequence matches the light sequence in the following illustration, and then press .
- Blinking yellow
- Blinking yellow
Note: The printer restarts several times during this process.
Close the door.
For printers with touch- or non-touch-screen display
Turn off the printer.
From the control panel, press and hold the 2 and 6 buttons while turning on the printer.
Release the buttons only when the progress bar appears on the display. The printer performs a power-on reset (POR) sequence, and then the Configuration Menu appears.
Select Restore Settings > Out of Service Erase > Erase Memory.
For non-touch-screen printer models, press  or
or  to navigate through the settings.
The printer performs a POR sequence.