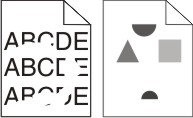
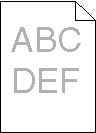
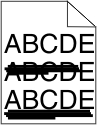
To help isolate print quality problems, print the print quality test pages:
Turn the printer off.
Load Letter- or A4-size paper in the tray.
Hold down
and
while turning the printer on.
Release the buttons when the screen with the progress bar appears.
The printer performs a power-on sequence, and then the Configuration menu appears.
Touch the down arrow until appears.
Touch Print Quality Pages.
The print quality test pages print.
Touch Back.
Touch Exit Configuration.

These are possible solutions. Try one or more of the following:
Remove the toner cartridge and make sure the packing material is properly removed. Reinstall the toner cartridge.
When appears, order a new toner cartridge.
If the problem continues, the printer may need to be serviced. For more information, contact Customer Support.
Try one or more of the following:
Move the width and length guides in the tray to the correct positions for the paper size loaded.
Make sure the paper size setting matches the paper loaded in the tray:
From the printer control panel Paper menu, check the Paper Size setting.
Before sending the job to print, specify the correct size setting:
For Windows users, specify the size from Print Properties.
For Macintosh users, specify the size from the Page Setup dialog.

Make sure the paper type setting matches the paper loaded in the tray:
From the printer control panel Paper menu, check the Paper Type setting.
Before sending the job to print, specify the correct type setting:
For Windows users, specify the type from Print Properties.
For Macintosh users, specify the type from the Print dialog.

These are possible solutions. Try one or more of the following:
Move the guides in the tray to the correct positions for the paper size loaded.
Make sure the paper size setting matches the paper loaded in the tray:
From the printer control panel Paper menu, check the Paper Size setting.
Before sending the job to print, specify the correct size setting:
For Windows users, specify the size from Print Properties.
For Macintosh users, specify the size from the Page Setup dialog.
These are possible solutions. Try one or more of the following:
Make sure the paper type setting matches the paper loaded in the tray:
From the printer control panel Paper menu, check the Paper Type setting.
Before sending the job to print, specify the correct type setting:
For Windows users, specify the type from Print Properties.
For Macintosh users, specify the type from the Print dialog.
Load paper from a fresh package.
Store paper in its original wrapper until you use it.

These are possible solutions. Try one or more of the following:
Load paper from a fresh package.
Store paper in its original wrapper until you use it.
Make sure the paper type setting matches the paper loaded in the tray:
From the printer control panel Paper menu, check the Paper Type setting.
Before sending the job to print, specify the correct type setting:
For Windows users, specify the type from Print Properties.
For Macintosh users, specify the type from the Print dialog.
Avoid textured paper with rough finishes.
When appears or when the print becomes faded, replace the toner cartridge.
Replace the fuser.

These are possible solutions. Try one or more of the following:
The Toner Darkness setting is too dark, the Brightness setting is too dark, or the Contrast setting is too high.
Change these settings from the printer control panel Quality menu.
For Windows users, change these settings from Print Properties.
For Macintosh users, change these settings from the Print dialog and pop-up menus.
Load paper from a fresh package.
Store paper in its original wrapper until you use it.
Avoid textured paper with rough finishes.
Make sure the paper type setting matches the paper loaded in the tray:
From the printer control panel Paper menu, check the Paper Type setting.
Before sending the job to print, specify the correct type setting:
For Windows users, specify the type from Print Properties.
For Macintosh users, specify the type from the Print dialog.
Replace the toner cartridge.

These are possible solutions. Try one or more of the following:
The Toner Darkness setting is too light, the Brightness setting is too light, or the Contrast setting is too low.
Change these settings from the printer control panel Quality menu.
For Windows users, change these settings from Print Properties.
For Macintosh users, change these settings from the Print dialog and pop-up menus.
Load paper from a fresh package.
Store paper in its original wrapper until you use it.
Avoid textured paper with rough finishes.
Make sure the paper type setting matches the paper loaded in the tray:
From the printer control panel Paper menu, check the Paper Type setting.
Before sending the job to print, specify the correct type setting:
For Windows users, specify the type from Print Properties.
For Macintosh users, specify the type from the Print dialog.
When appears, order a new toner cartridge.
Replace the toner cartridge.

These are possible solutions. Try one or more of the following:
Replace the transfer roller if the defects occur every:
58.7 mm (2.31 in.)
Replace the photoconductor if the defects occur every:
44 mm (1.73 in.)
Replace the fuser if the defects occur every:
78.5 mm (3.09 in.)
94.2 mm (3.71 in.)
![]() | ![]() |
These are possible solutions. Try one or more of the following:
If the fill pattern is incorrect, choose a different fill pattern from your software program.
Try a different type of paper.
Use only the recommended transparencies.
Ensure that the Paper Type setting matches what is loaded in the tray or feeder.
Ensure that the Paper Texture setting is correct for the type of paper or specialty media loaded in the tray or feeder.
Remove the toner cartridge and shake it from side to side to redistribute the toner, and then reinstall it.
Replace the used toner cartridge with a new one.

These are possible solutions. Try one or more of the following:
Select another tray or feeder to feed the paper for the job:
From the printer control panel Paper Menu, select the Default Source.
For Windows users, select the paper source from Print Properties.
For Macintosh users, select the paper source from the Print dialog and pop-up menus.
Replace the toner cartridge.
Check the paper path around the toner cartridge.
| CAUTION—HOT SURFACE: The inside of the printer might be hot. To reduce the risk of injury from a hot component, allow the surface to cool before touching. |
Clear any paper you see.
Contact Customer Support.

These are possible solutions. Try one or more of the following:
Select another tray or feeder to feed paper for the job:
From the printer control panel Paper Menu, select the Default Source.
For Windows users, select the paper source from Print Properties.
For Macintosh users, select the paper source from the Print dialog and pop-up menus.
Replace the toner cartridge.
Check the paper path around the toner cartridge.
| CAUTION—HOT SURFACE: The inside of the printer might be hot. To reduce the risk of injury from a hot component, allow the surface to cool before touching. |
Clear any paper you see.
Contact Customer Support.

These are possible solutions. Try one or more of the following:
Make sure the paper type setting matches the paper loaded in the tray:
From the printer control panel Paper menu, check the Paper Type setting.
Before sending the job to print, specify the correct type setting:
For Windows users, specify the type from Print Properties.
For Macintosh users, specify the type from the Print dialog.
From the printer control panel Paper menu, make sure the Paper Texture setting matches the paper loaded in the tray.
Try one or more of the following:
Use only transparencies recommended by the printer manufacturer.
Make sure the paper type setting matches the paper loaded in the tray:
From the printer control panel Paper menu, check the Paper Type setting.
Before sending the job to print, specify the correct type setting:
For Windows users, specify the type from Print Properties.
For Macintosh users, specify the type from the Print dialog.