This section provides information on federating Lexmark Cloud Services with Microsoft Azure Active Directory. For more information, contact the Lexmark Professional Services team.
Before you begin, make sure that you have administrator access to the following portals:
Microsoft Azure Active Directory
Lexmark Cloud Services
Federation is the process of creating a trust relationship between a customer’s identity provider (IdP) and an external service, such as Lexmark Cloud Services. The following are examples of an IdP:
Microsoft Azure Active Directory
Google Identity
Any SAML 2.0-compliant identity management system
After establishing a trust relationship, users can access Lexmark Cloud Services using the same user name and password for other internal sites and services. The customer’s IdP manages all aspects of credential management, such as password validation, complexity requirements, expiration, and potential use of multifactor authentication. The IdP also supports single sign-on (SSO), which reduces the number of times users are required to authenticate as they switch between services.
The first time a user accesses Lexmark Cloud Services, an e-mail address prompt appears, and then the user is redirected to the IdP.
If the user has already signed in to the IdP and it supports SSO, then the user is not required to enter the password. Multifactor authentication challenges are prevented. This process creates a quick sign-in experience for the end user.
If the user has not signed in to the IdP, then the user name and password prompts appear. Multifactor authentication challenges are encountered. After logging in, the user is redirected to Lexmark Cloud Services.
Lexmark Cloud Services requests the user’s e-mail address. This information lets Lexmark Cloud Services determine the user’s organization within Lexmark Cloud Services.
Lexmark Cloud Services redirects the user to the IdP. Lexmark Cloud Services passes an
field.The IdP uses the
to determine which settings apply to this login attempt. Depending on the settings, the IdP authenticates the user name and password, and may perform multifactor authentication. If the IdP supports SSO, and the user is already logged in to the IdP, then the user is logged in automatically.The IdP redirects the user to Lexmark Cloud Services and passes the following predefined claims:
User name
E-mail address
Organization
Optional information, such as the user’s department and cost center
The IdP signs these claims using a private certificate.
Lexmark Cloud Services has been pre-configured with the public certificate and uses it to verify that this information came from the expected source. This process lets Lexmark Cloud Services trust the information that the IdP passes and completes the login process.
The images below may vary in practice.
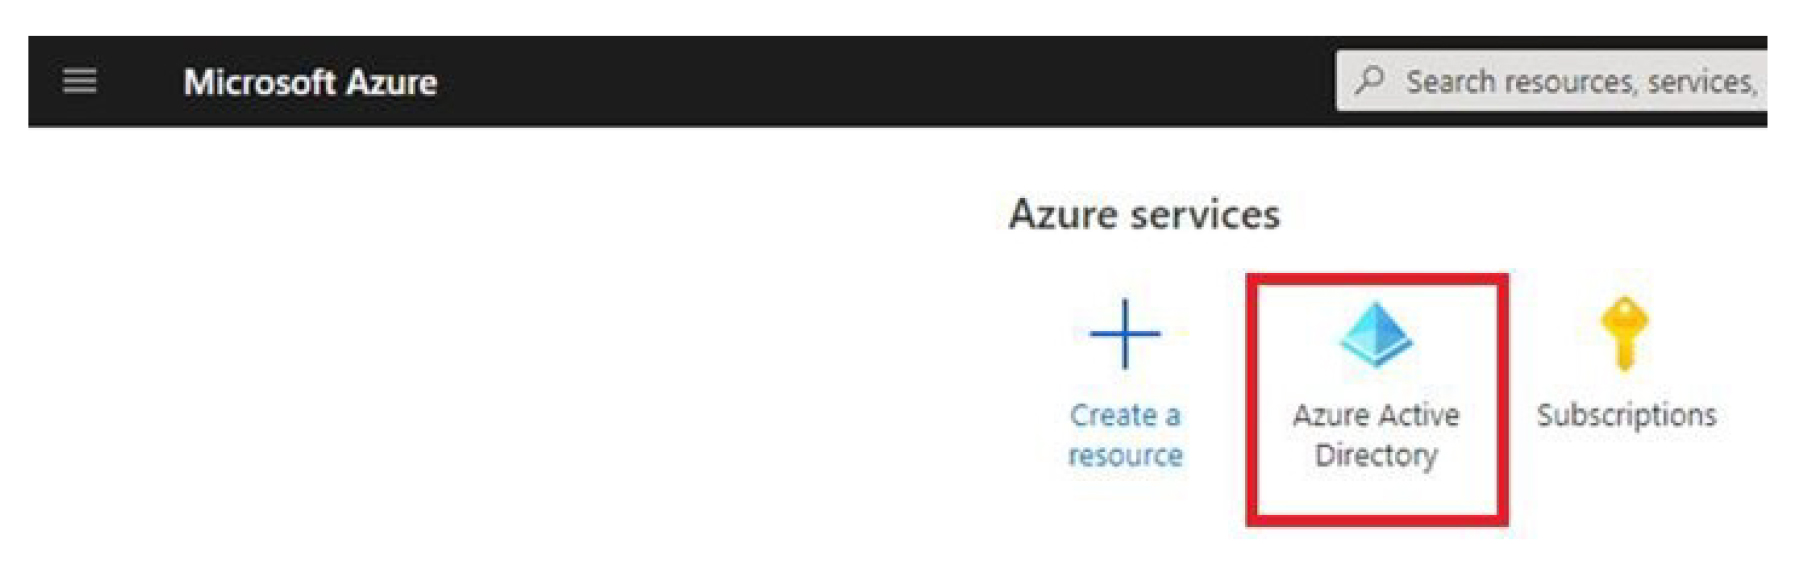
From the Azure portal, navigate to the Azure Active Directory.
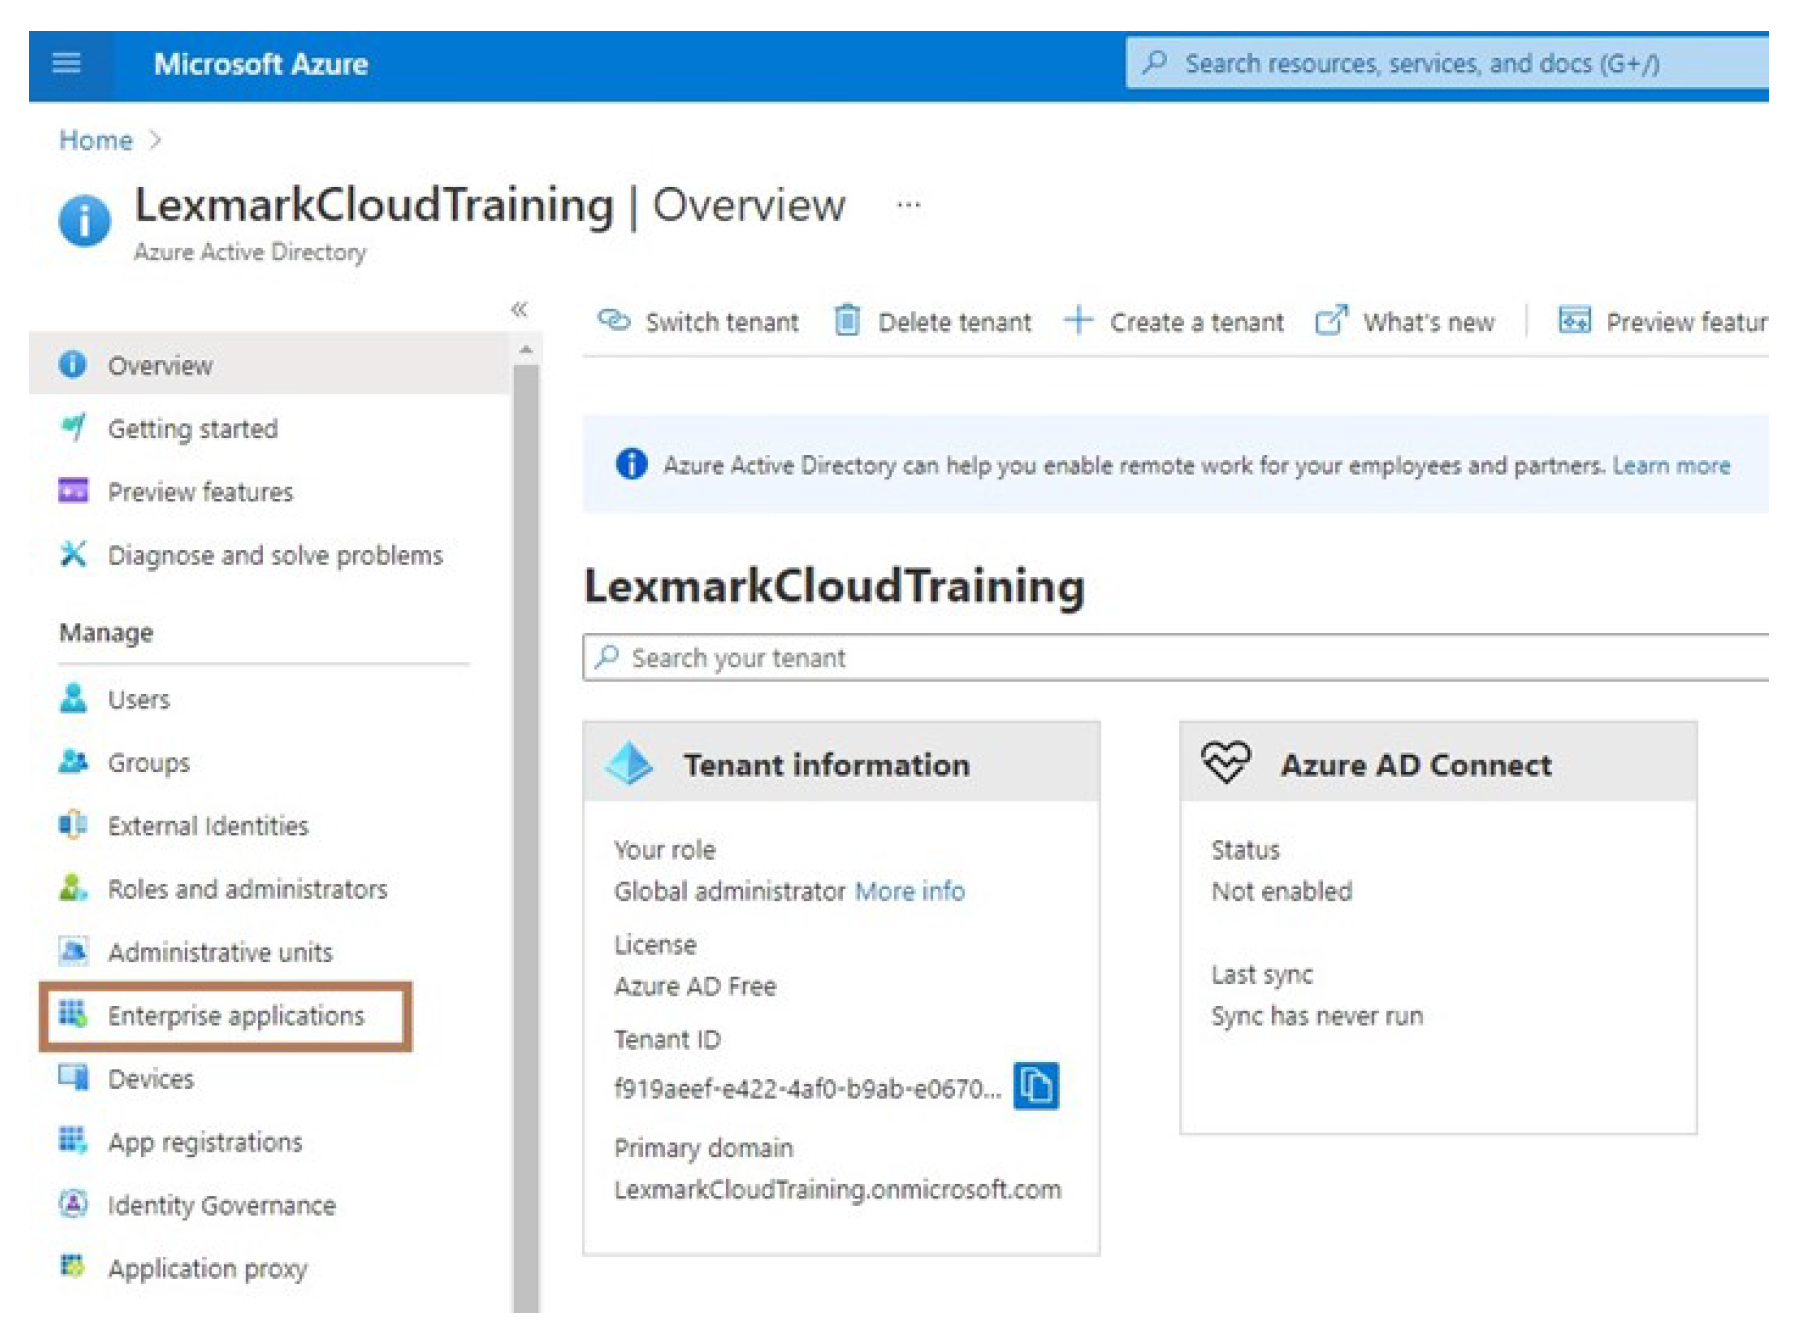
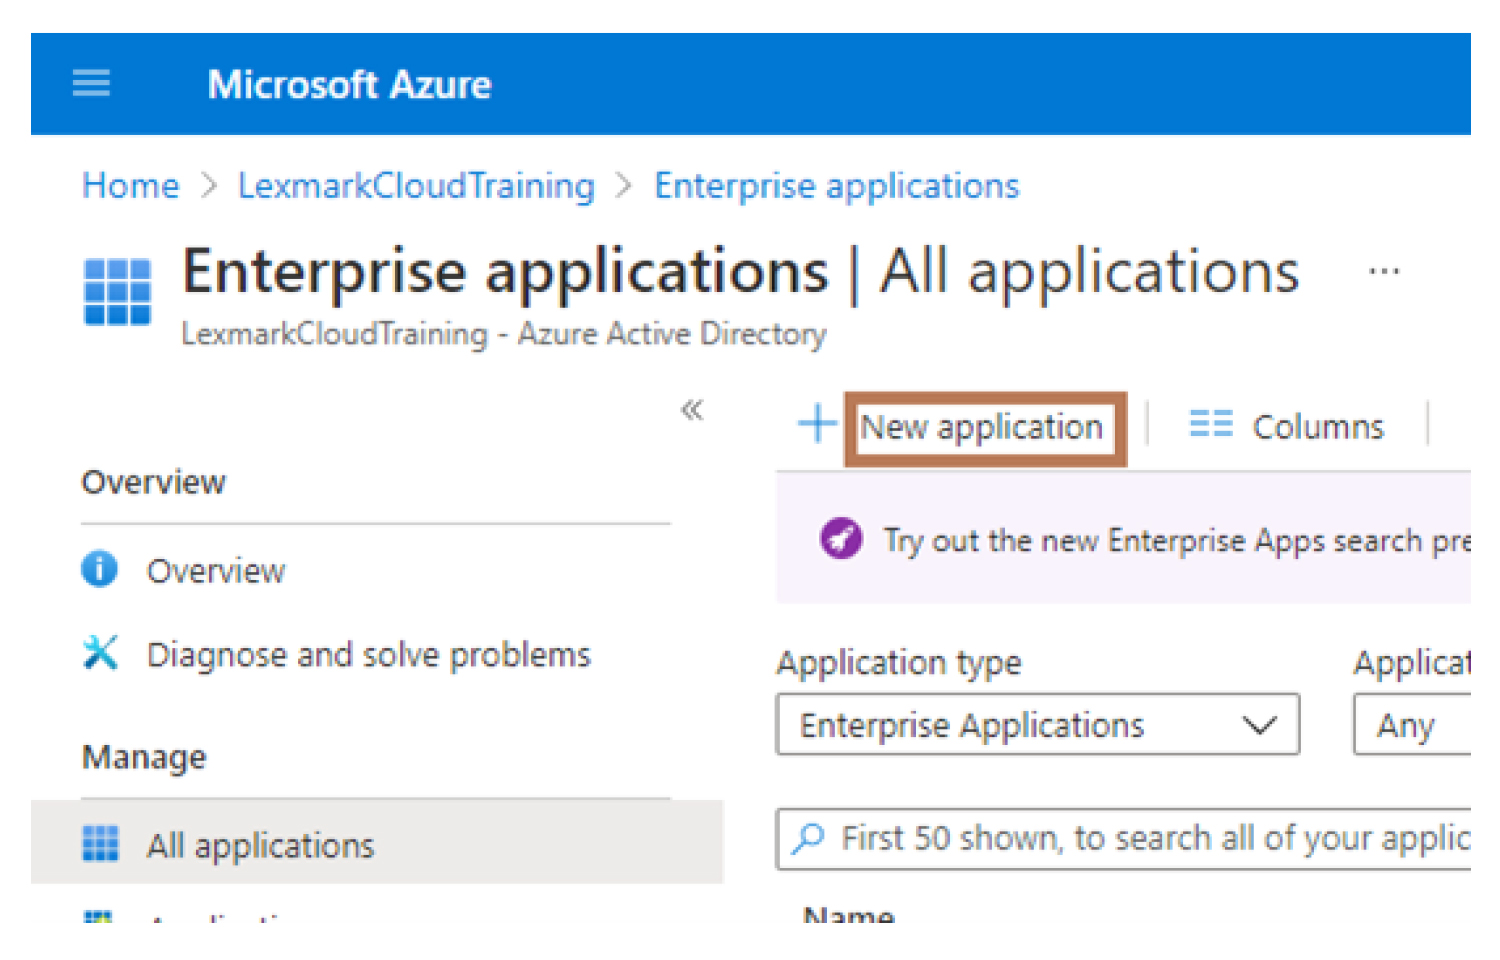
Click Enterprise applications > New application.
Click Create your own application > Integrate any other application you don’t find in the gallery (Non-gallery).
Type an application name.
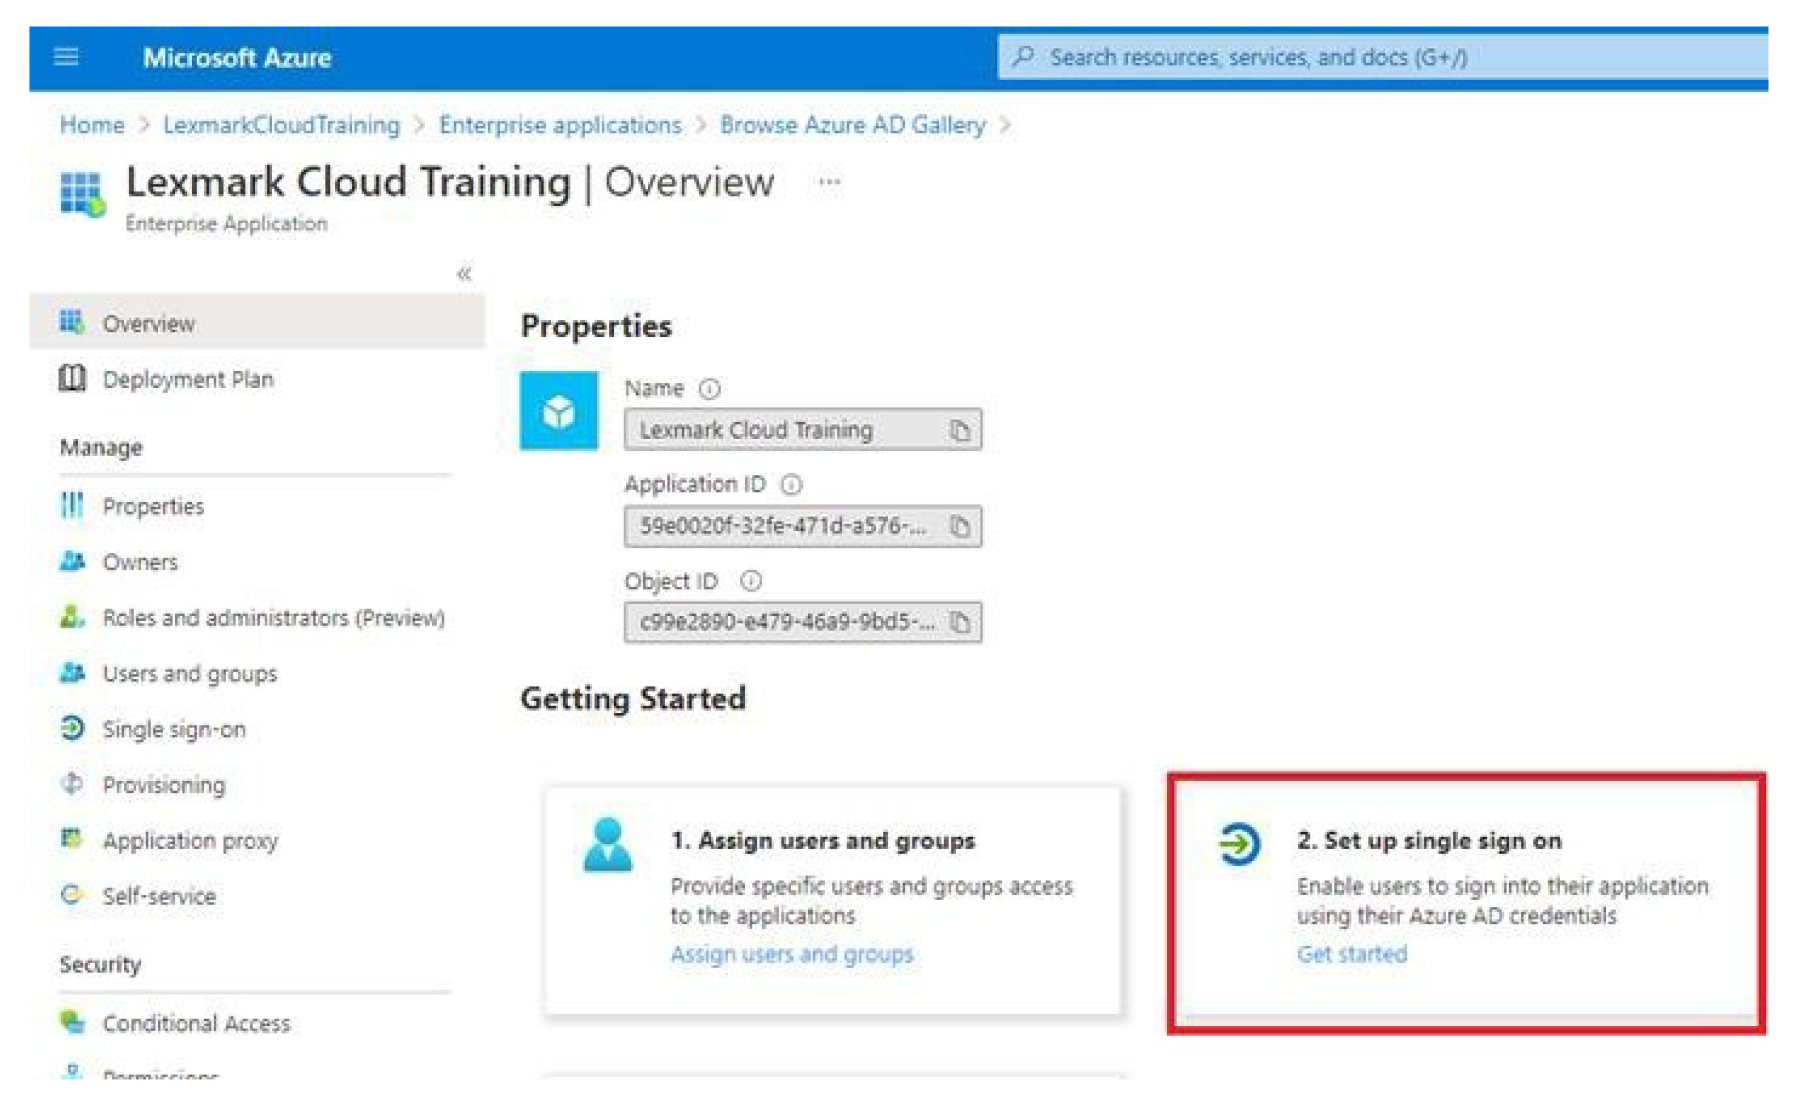
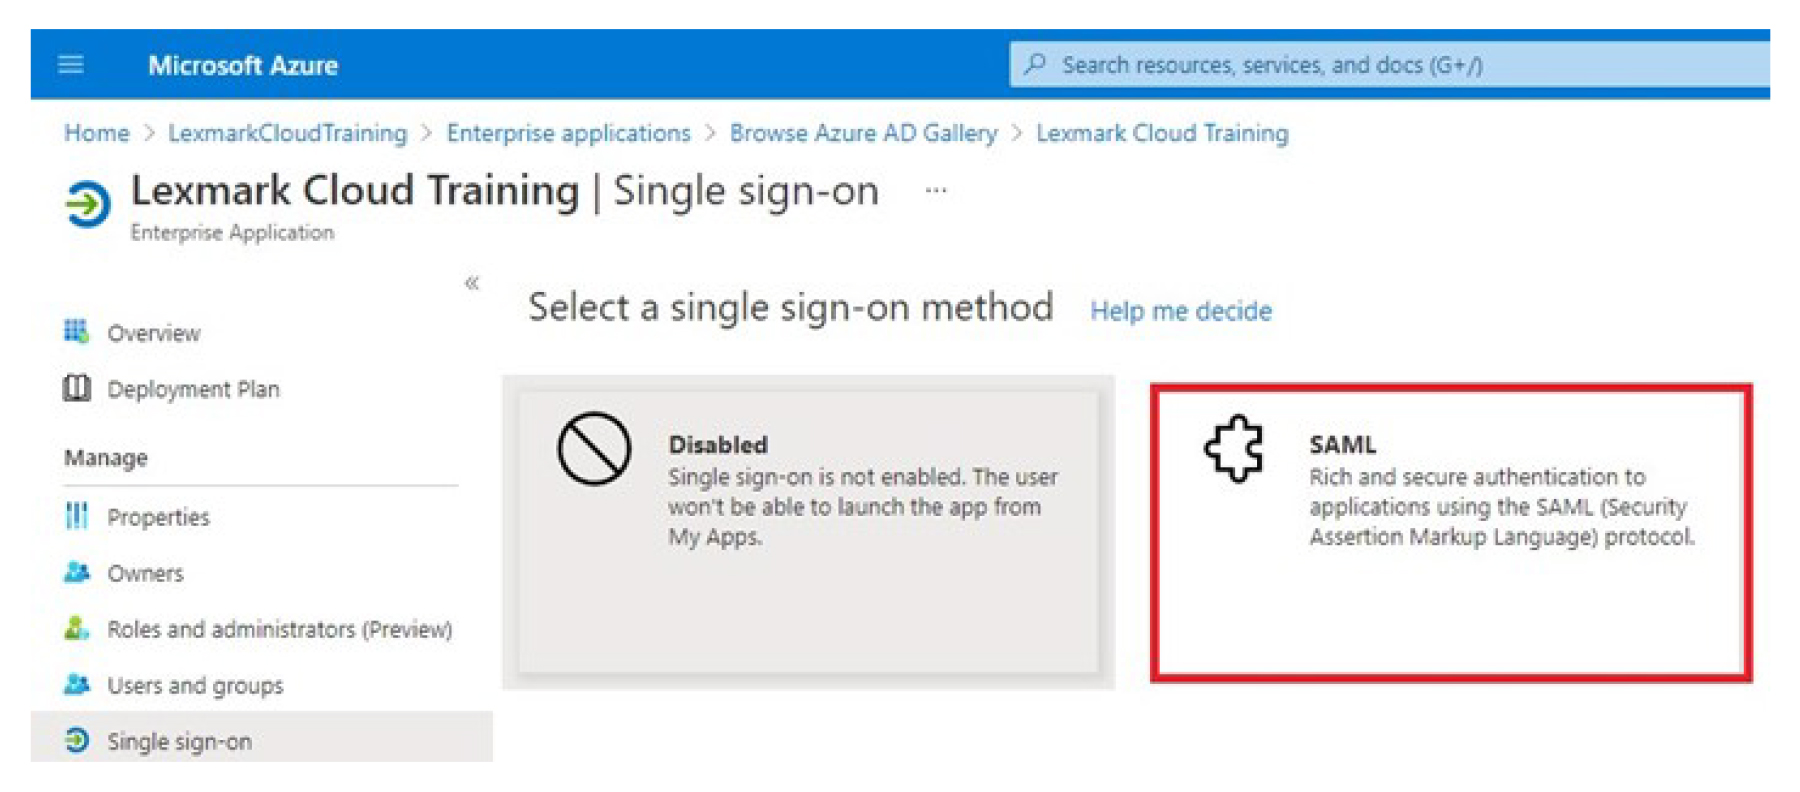
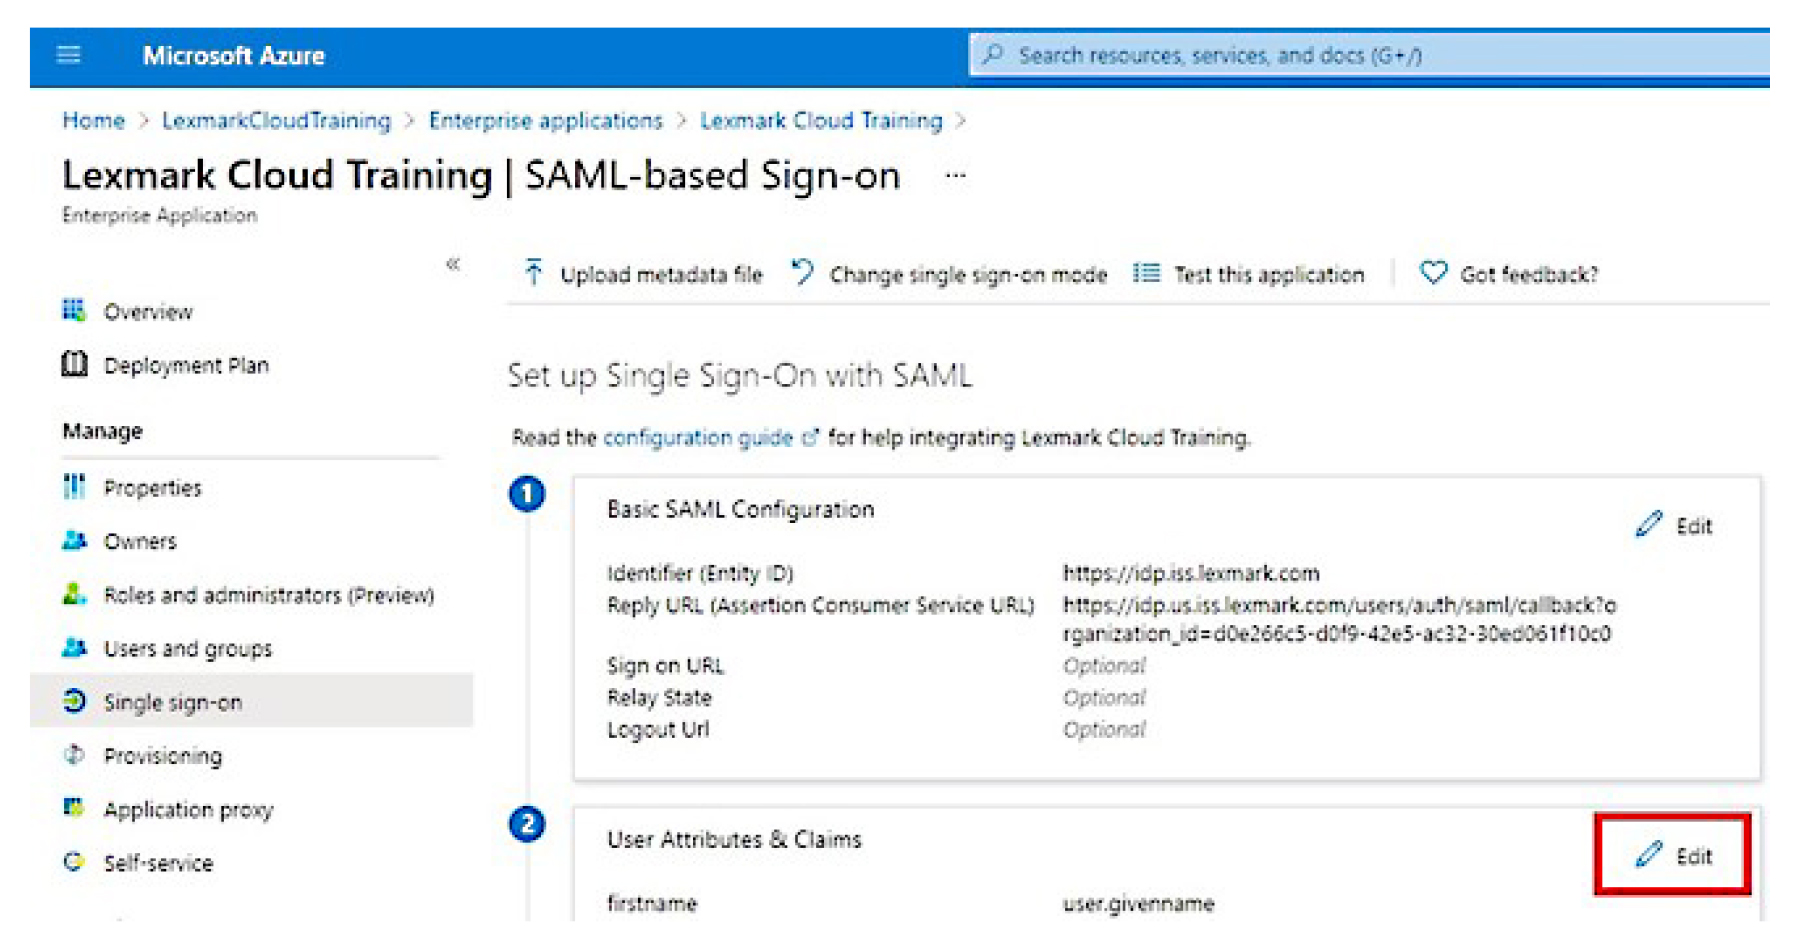
From the Enterprise Applications Overview screen, click Set up single sign on, and then select SAML.
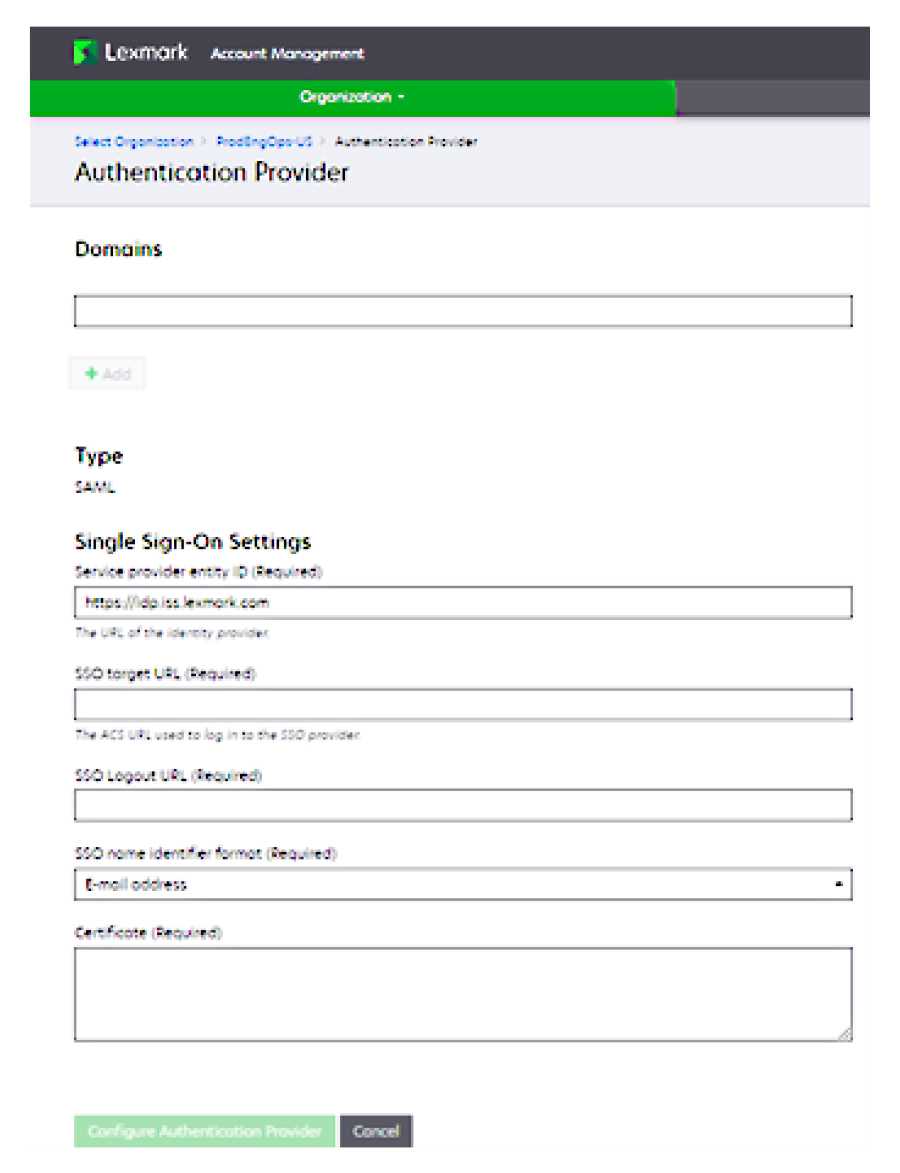
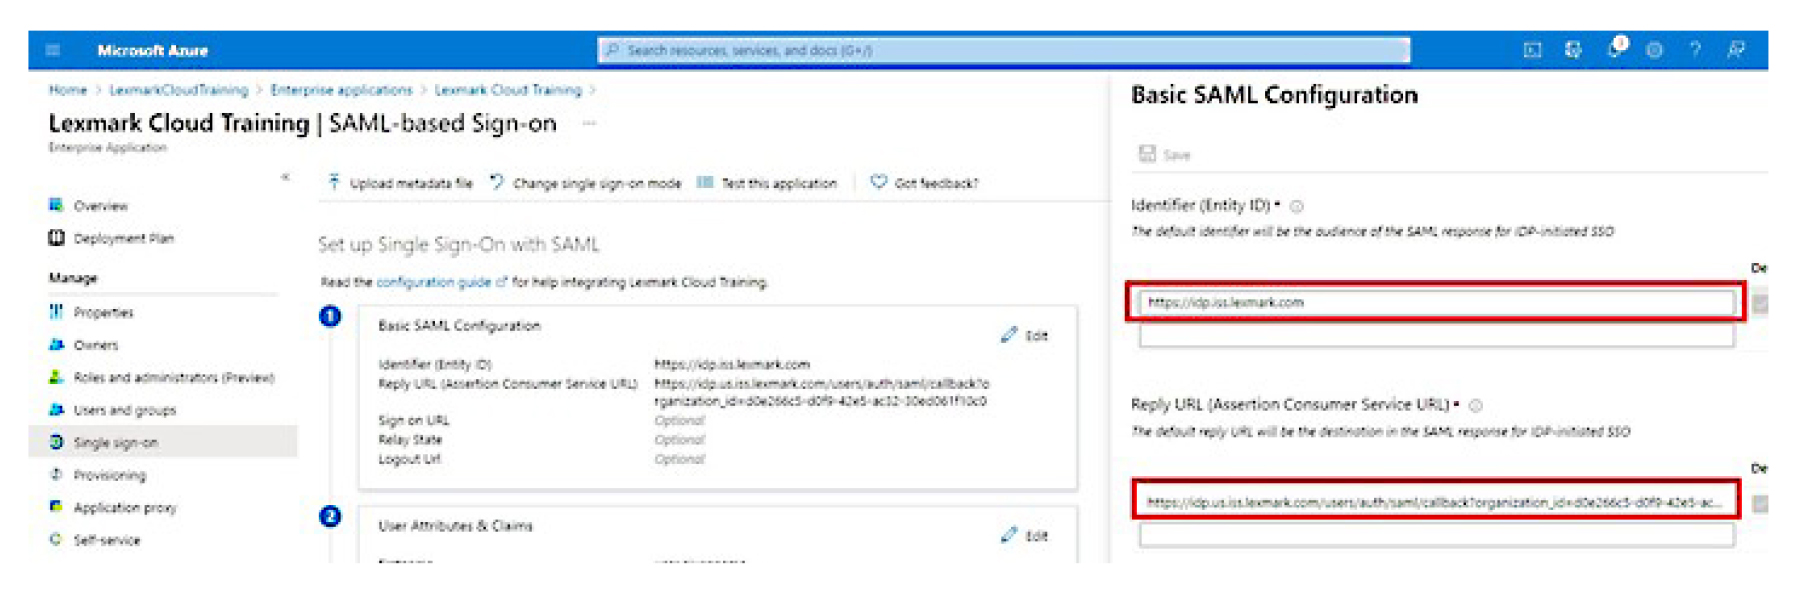
From the Basic SAML Configuration section, configure the following settings:
Identifier (Entity ID)
Reply URL (Assertion Consumer Service URL)
Depending on your location, the following are examples of a full reply URL:
https://idp.us.iss.lexmark.com/users/auth/saml/callback?organization_id=XXXXXXXX-XXXX-XXXX-XXXX-XXXXXXXXXXXXX
https://idp.eu.iss.lexmark.com/users/auth/saml/callback?organization_id=XXXXXXXX-XXXX-XXXX-XXXX-XXXXXXXXXXXXX
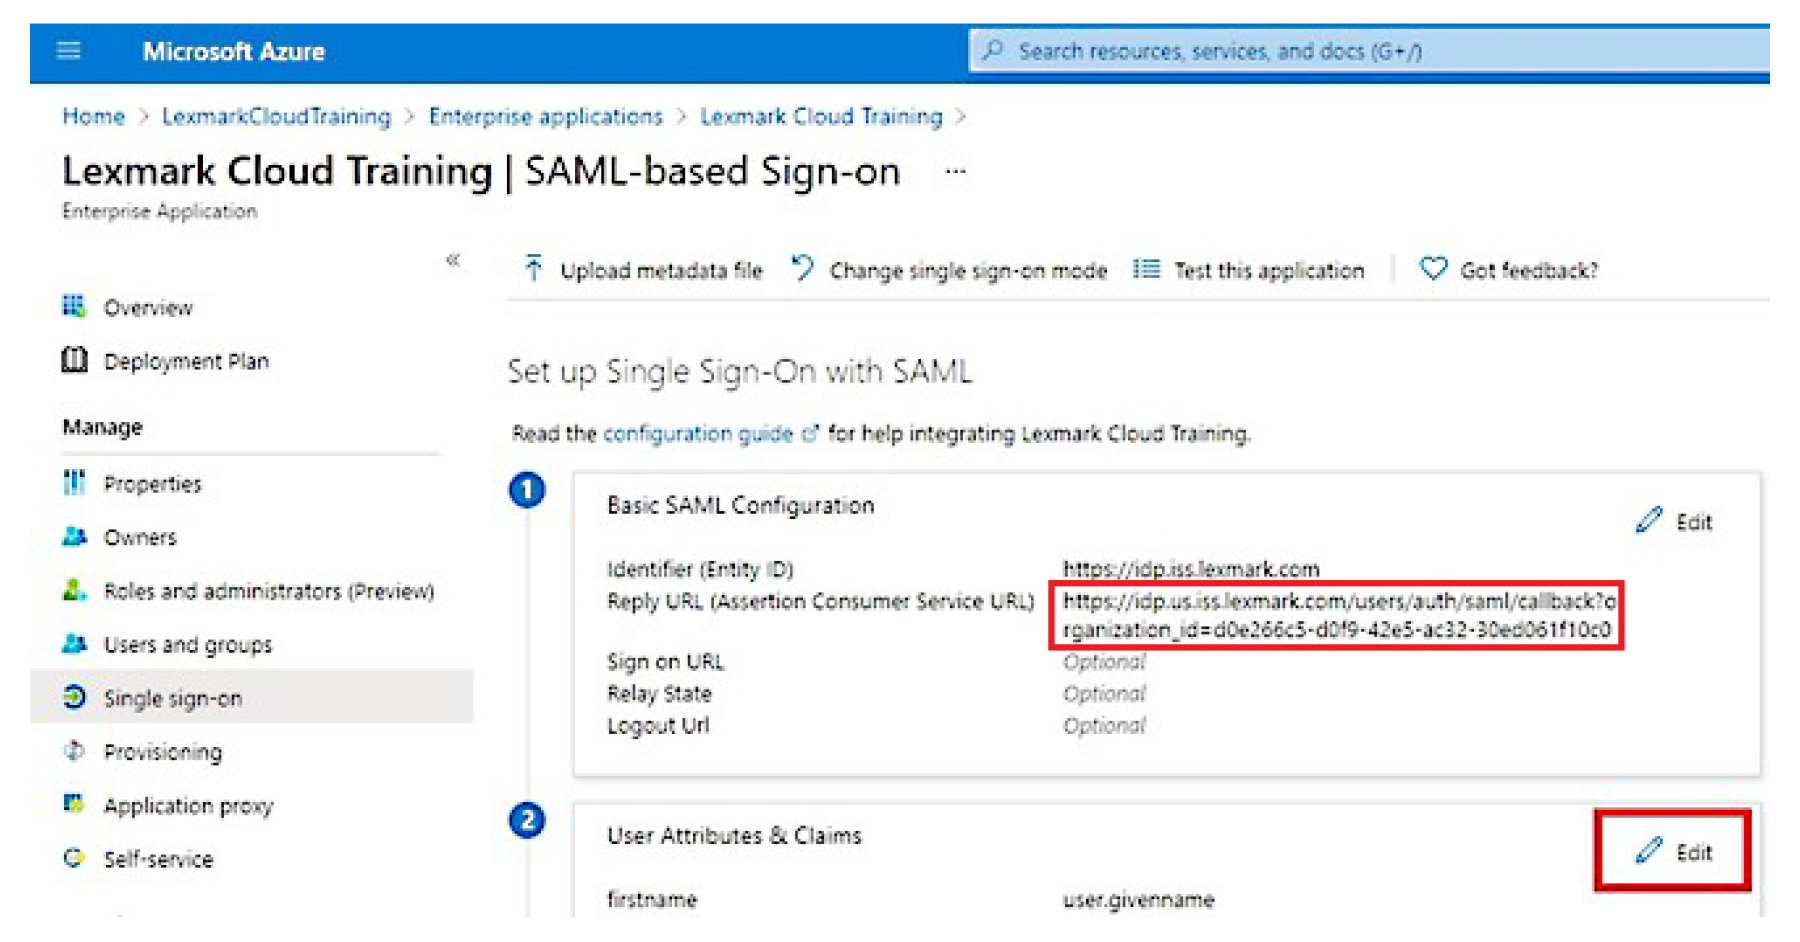
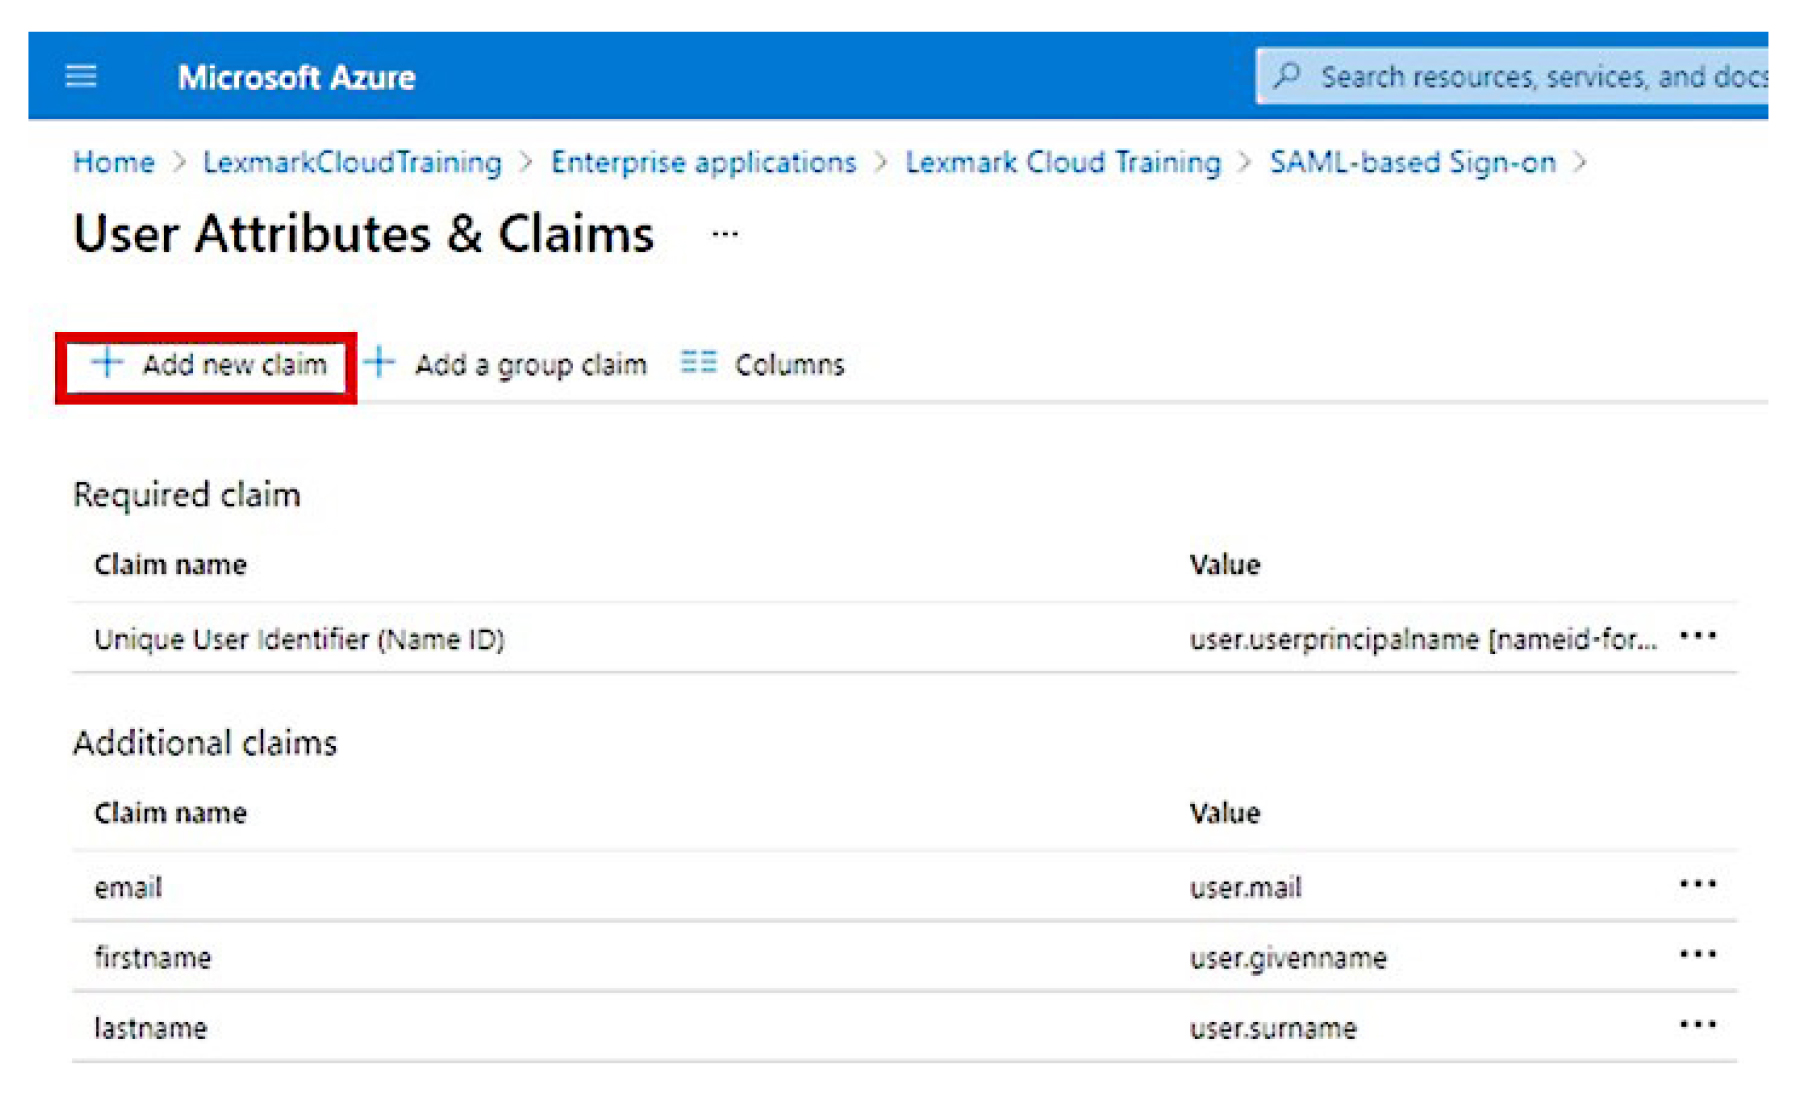
From the User Attributes & Claims section, click Edit.
Click Add new claim, and then type the name and source for each claim.
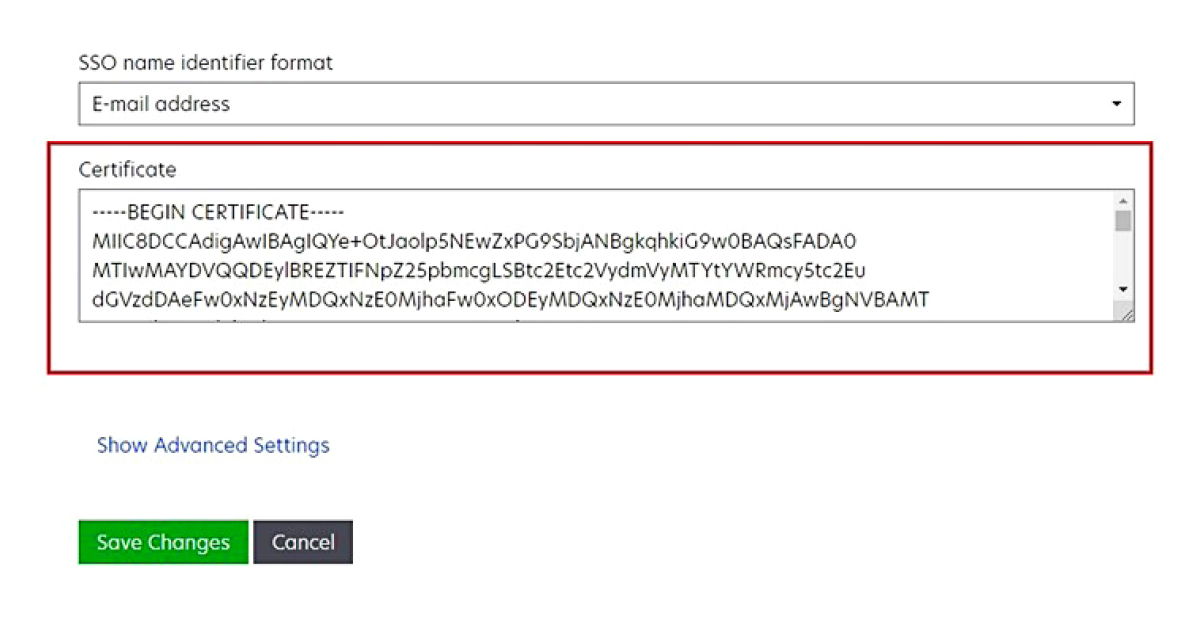
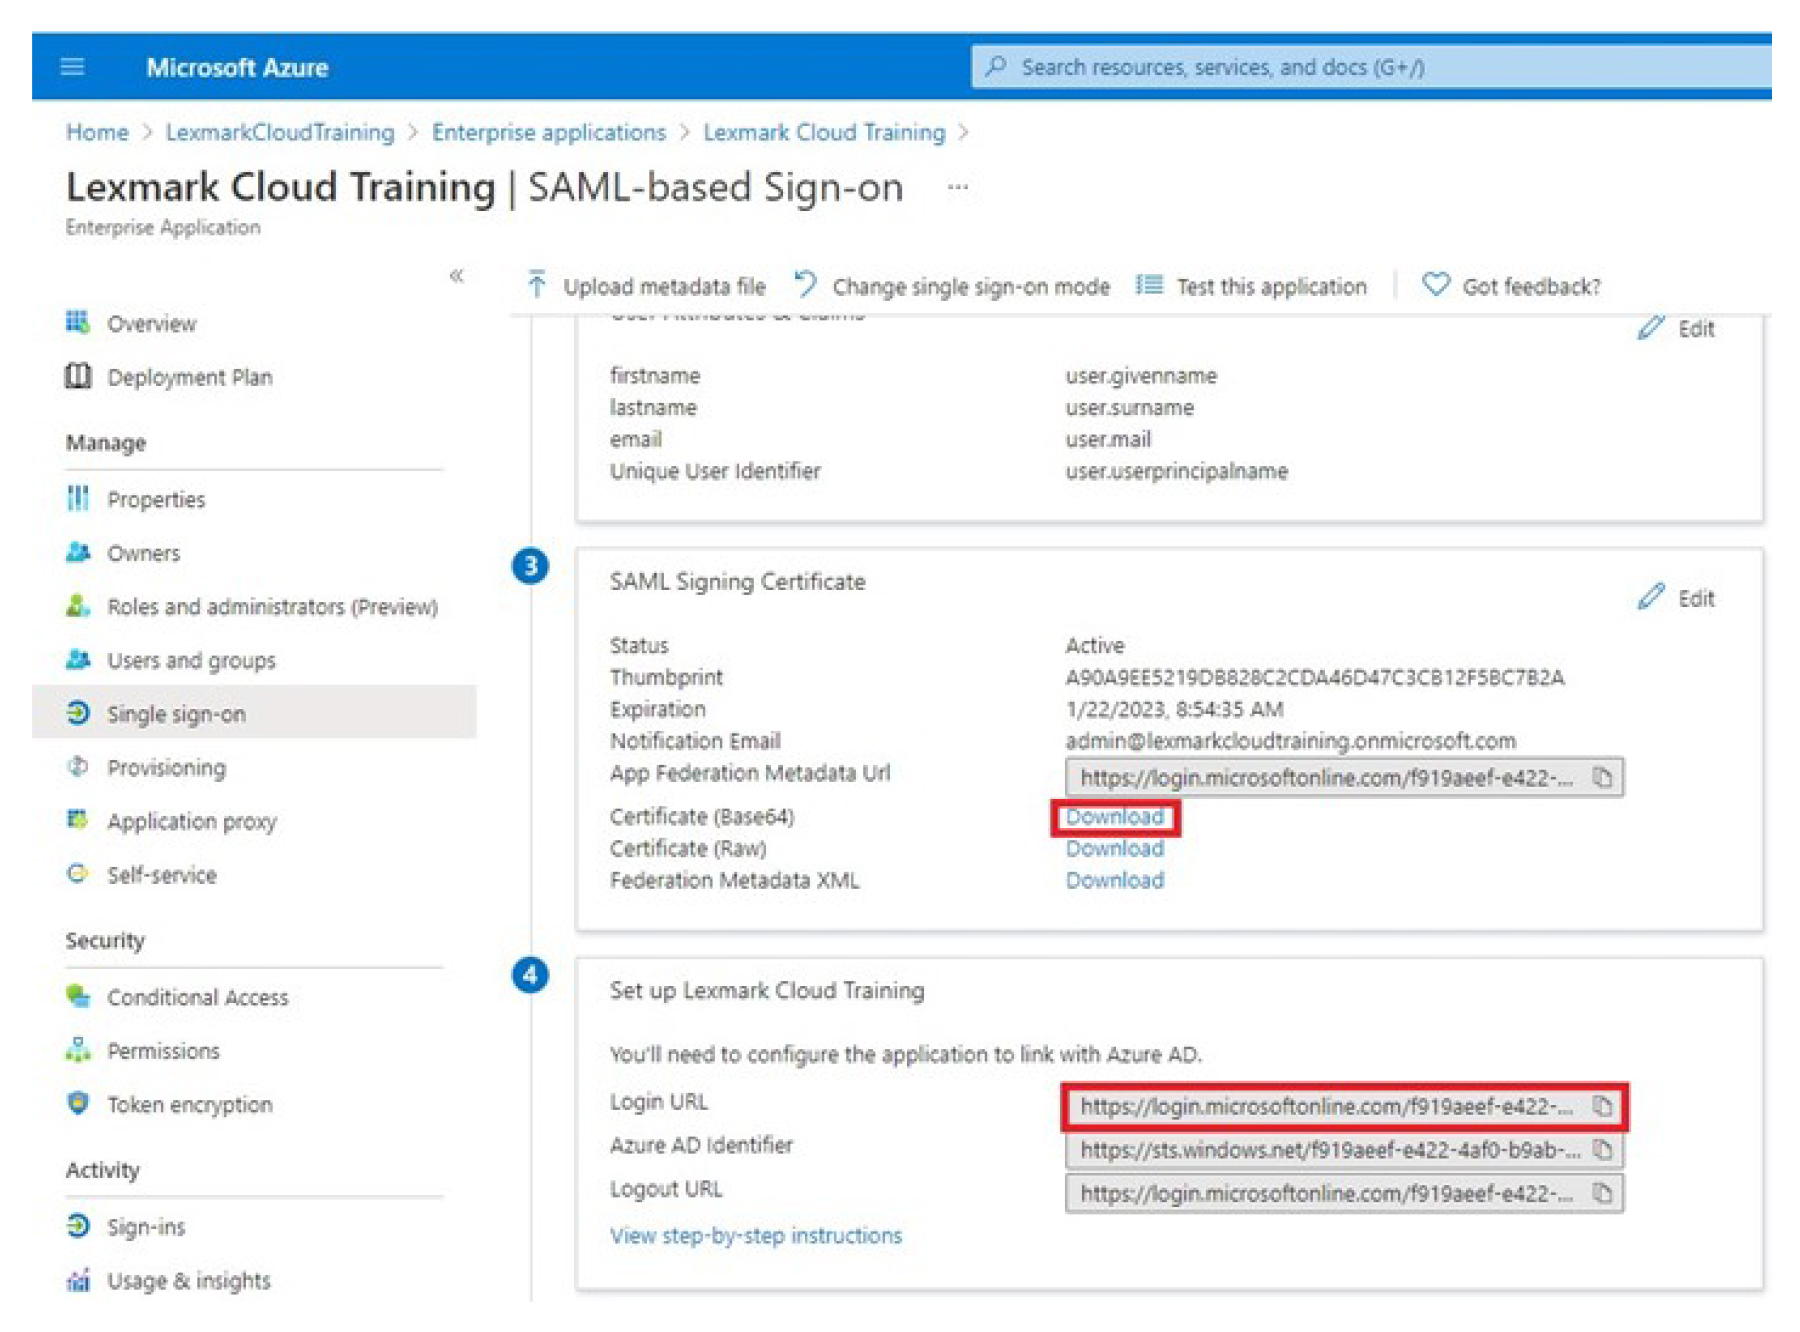
From the SAML Signing Certificate section, do the following:
Download the Base64 certificate.
Copy the login and logout URLs.
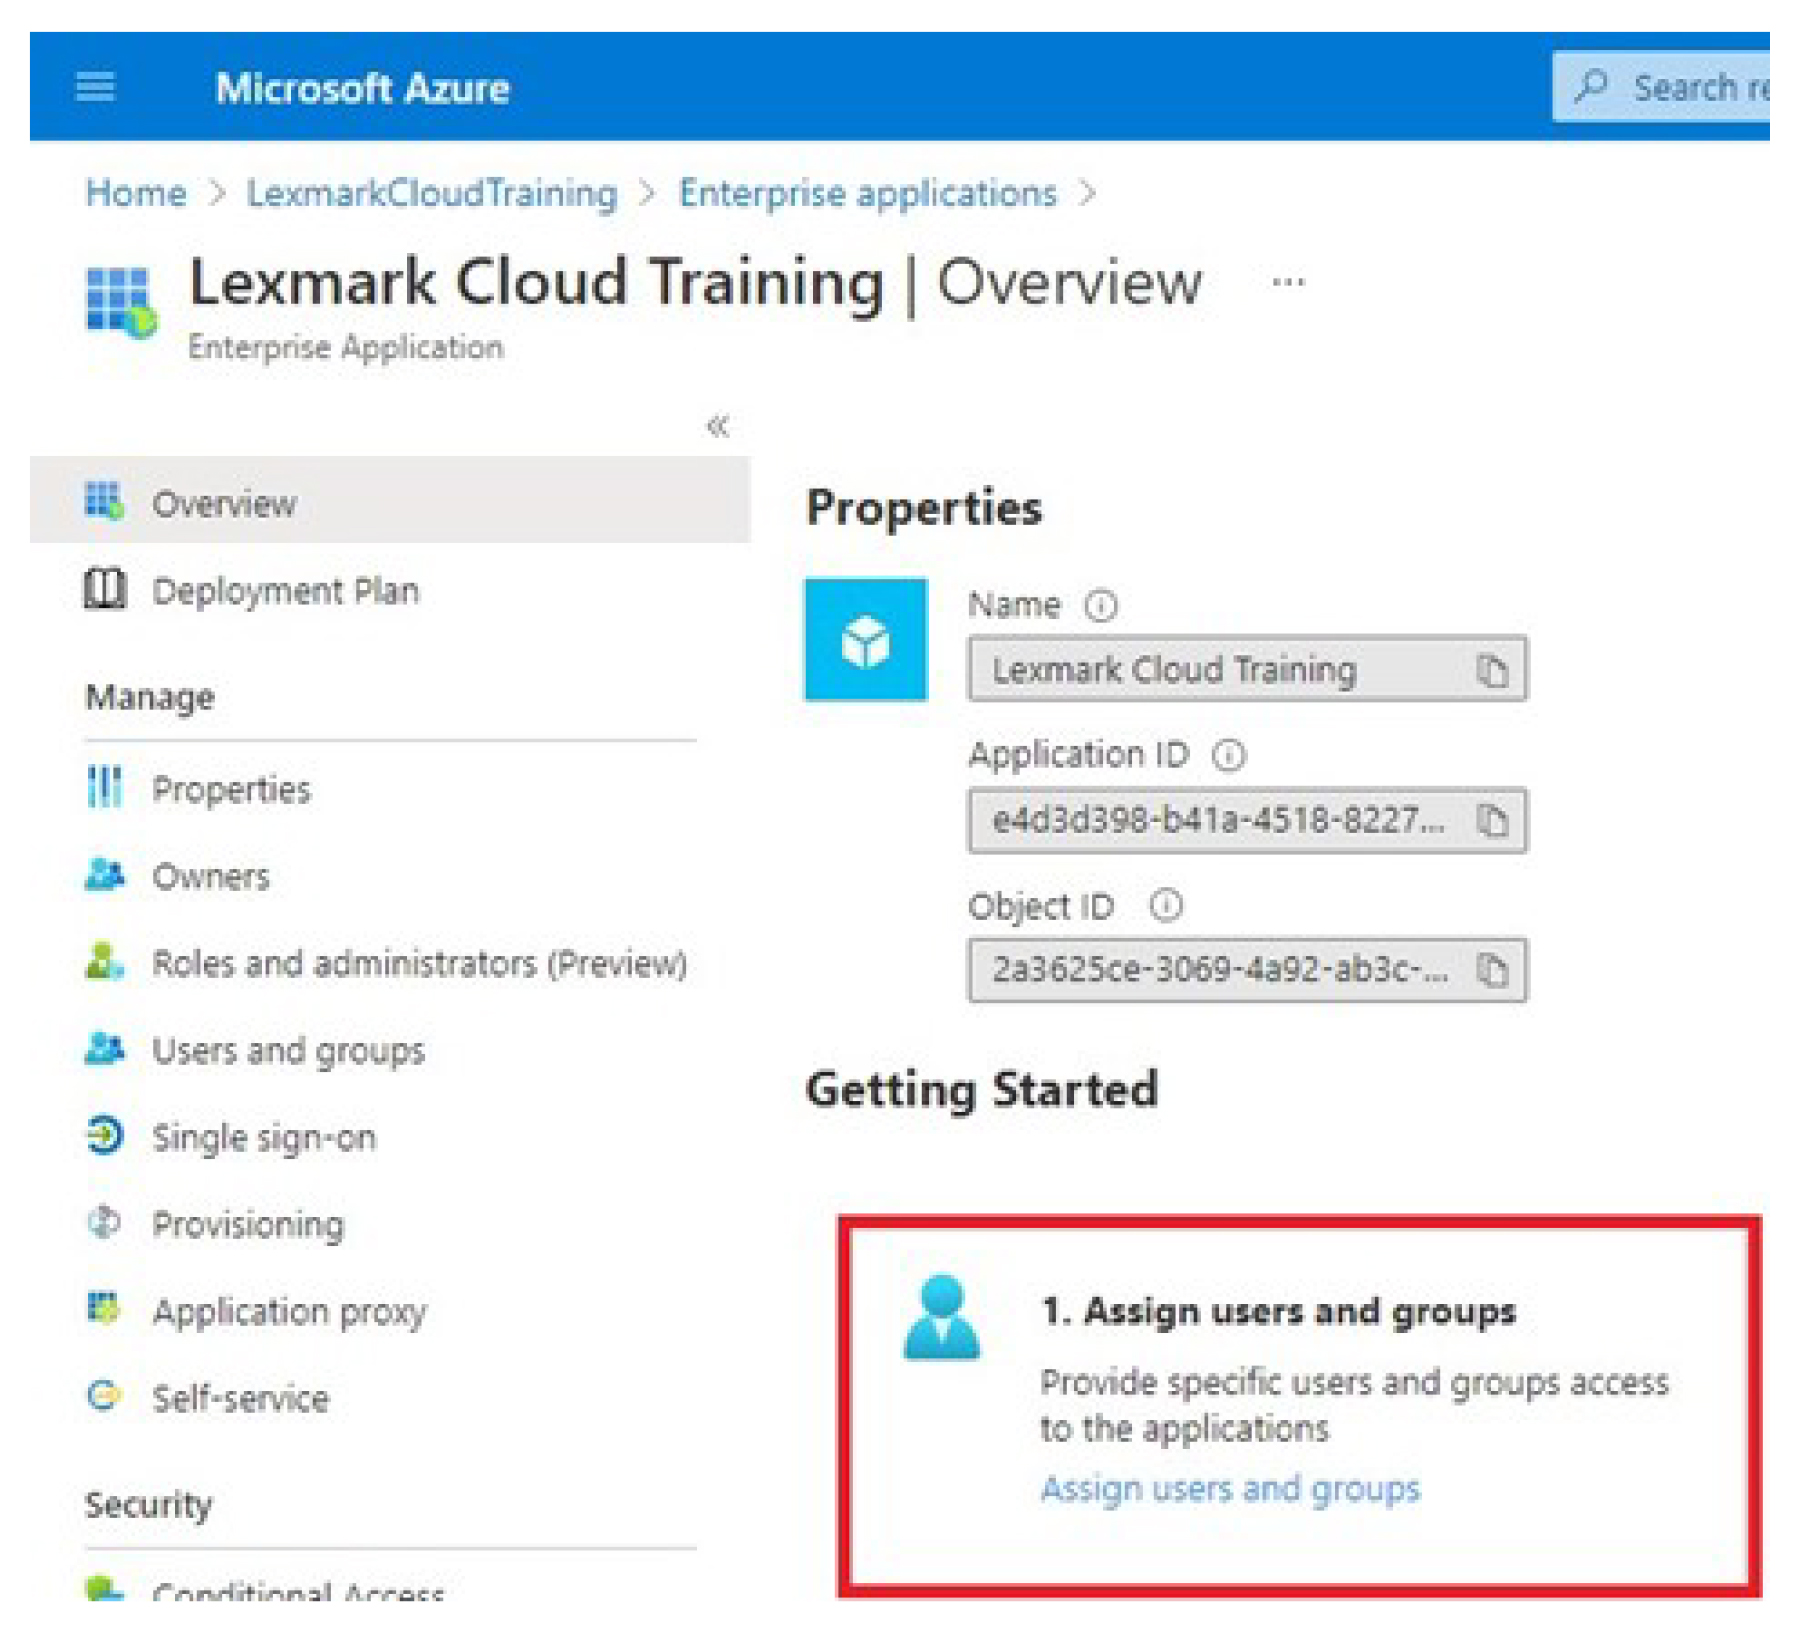
Depending on your Azure configuration, assign users to the created enterprise application.
Save the settings.
From the Account Management web portal, click Organization > Authentication Provider > Configure an Authentication Provider.
From the Domains section, type the domain of the identity provider, and then click Add.
From the Authentication Provider Type menu, select SAML.
From the SAML Authentication Provider section, select Without Metadata URL.
From the Single Sign-On Settings section, type the correct information in the following fields:
Service provider entity ID
SSO target URL—The login URL of the Azure enterprise application that you created.
SSO Logout URL—This URL determines the behavior when a user logs out of the Lexmark Cloud Services portal.
If you want the user logged out of your Azure tenant completely, then type the logout URL of the Azure enterprise application that you created.
If you want the user to be signed out only of Lexmark Cloud Services, then type another URL. The URL can point to a page that you maintain (“You have successfully logged out”) or you can use the appropriate Lexmark Cloud Services login page for your organization. Depending on your location, the URL can be https://idp.us.iss.lexmark.com or https://idp.eu.iss.lexmark.com.
From the SSO name identifier format menu, select E-mail address.
In the Certificate field, copy and paste the base-64 certificate key from the token-signing certificate of the identity provider.
If you instead have a metadata.xml file containing the URLs and certificate data, add the header and footer manually.
-----BEGIN CERTIFICATE---- MIIC8DCCAdigAwIBAgIQdzA… -----END CERTIFICATE-----
Click Configure Authentication Provider.
Test the federation settings by having any user log in using one of the following methods:
Log in from a different browser on the same workstation.
Log in from a private or incognito browser window on the same workstation.
Have another user log in from their workstation.
Access Lexmark Cloud Services using the correct URL that is provided by your Lexmark representative.
From the identity provider, type your user name and password.