Lexmark Publishing Authenticator is a component used for the Single Sign-On (SSO) environment. It uses the Open ID Connect (OIDC) and Open Authorization (OAuth) protocols. User must install and configure this installer to enable SSO for Publishing Platform Manager and Publishing Solutions portals.
You can install Publishing Authenticator on a supported Microsoft SQL Server that runs on any of the following operating systems:
Windows Server 2022
Windows Server 2019
Windows Server 2016
Windows Server 2012
Before you begin, make sure that the following applications are installed on the server:
Microsoft ODBC Driver 17 for SQL Server
Microsoft .NET 7.0 Runtime Hosting Bundle
Microsoft Visual C++ 2017 Redistributable
Make sure that the required server roles and features are installed or enabled.
From the Server Manager dashboard, click Add roles and features , and then click Next .
From the Installation Type section, select Role-based or feature-based installation , and then click Next .
Select a server, and then click Next .
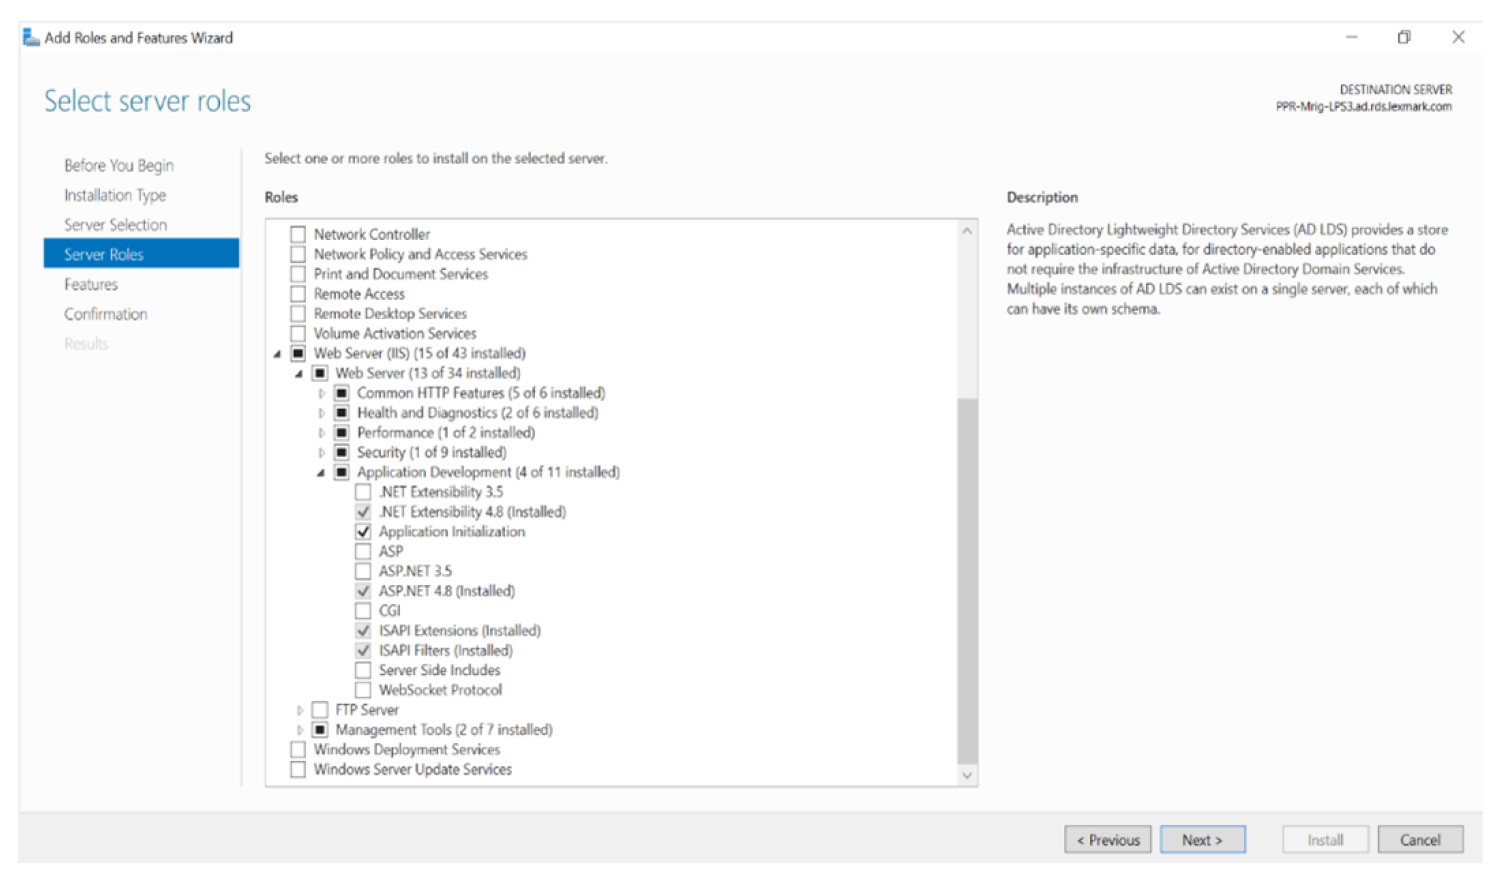
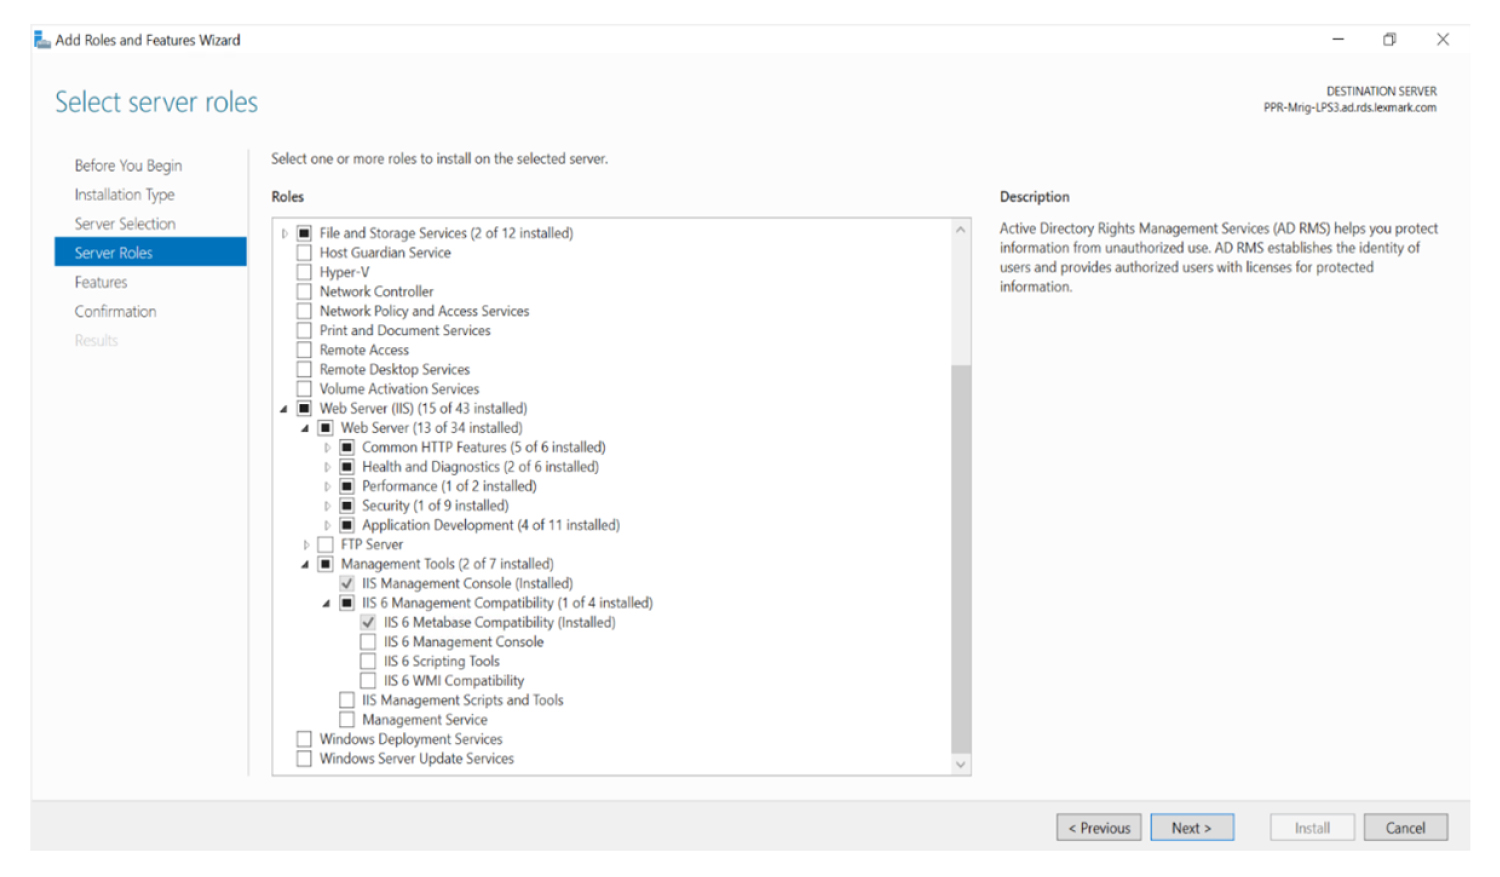
From the Server Roles section, expand Web Server (IIS) .
From the Web Server section, do the following:
Expand Common HTTP Features , and then enable Default Document , Directory Browsing , HTTP Errors , and Static Content .
Expand Health and Diagnostics , and then enable HTTP Logging and Request Monitor .
Expand Performance , and then enable Static Content Compression .
Expand Security , and then enable Request Filtering .
Expand Application Development , and then enable the following options.
.NET Extensibility 4.5
Application Initialization
ASP.NET4.5
ISAPI Extensions
ISAPI Filters
From the Management Tools section, do the following:
Enable IIS Management Console .
Expand IIS 6 Management Compatibility , and then enable IIS 6 Metabase Compatibility options.
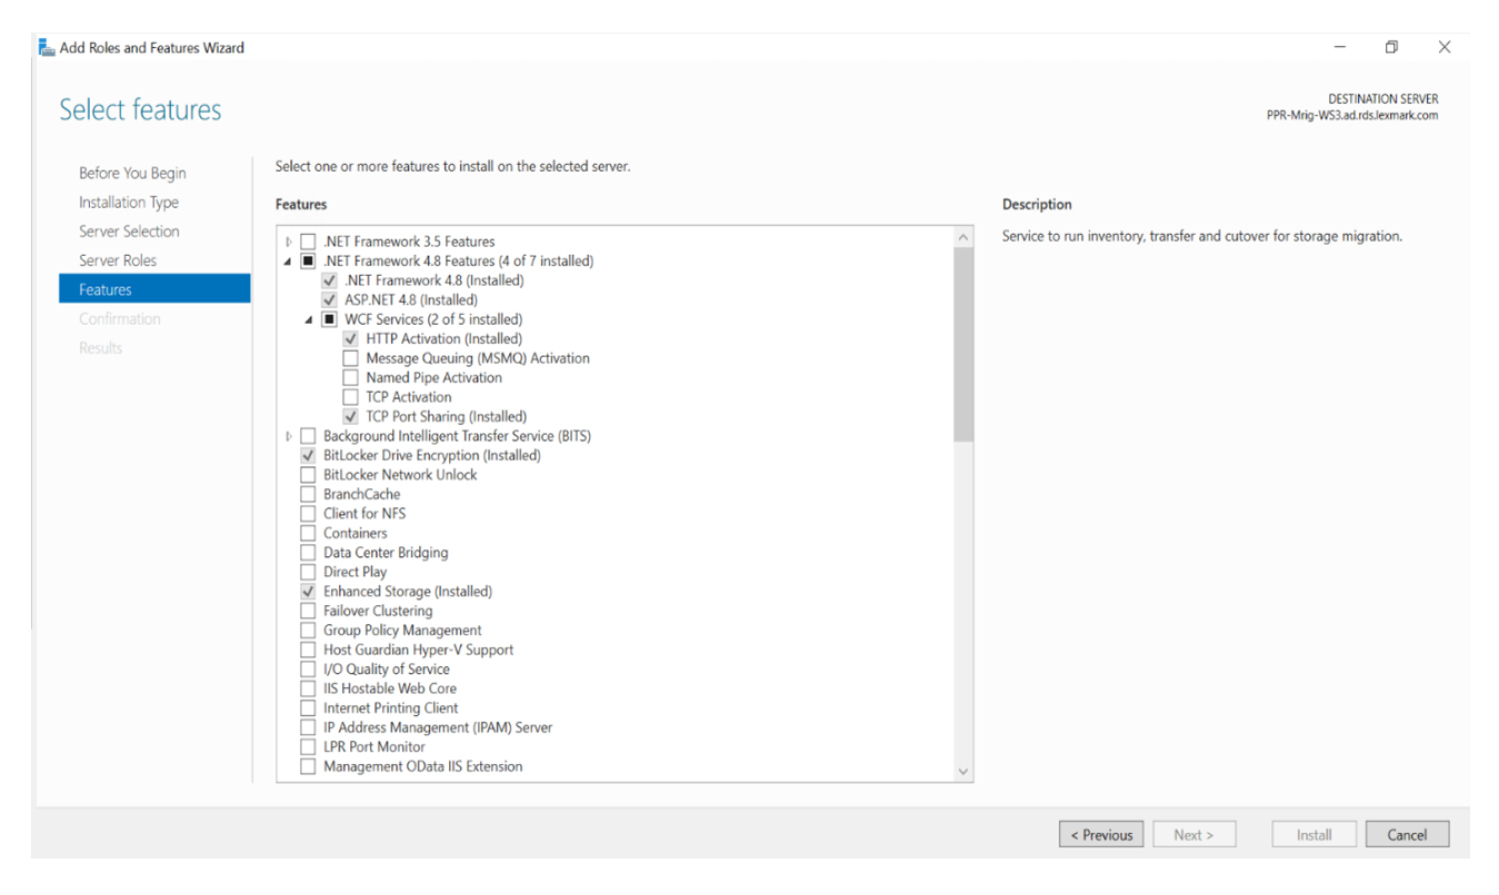
From the Features section, enable HTTP Activation and TCP Port Sharing .
Obtain the Publishing Authenticator installer.
Run the LexmarkPublishingAuthenticator.exe file as an administrator.
Read and accept the End-User License Agreement (EULA) , and then click Install .
Click Next .
Provide the fully qualified domain name (FQDN) or IP address of the SQL database server.
Provide the database server login ID and password.
Select a database.
In the Lexmark Publishing Auth Provider Configuration page, type the client ID and authority URL.
Notes:
Browse to a folder where you want to save the Publishing Authenticator files.
Install Publishing Authenticator.
How do I change the database connection strings after installation?
The Database connection strings are stored in the encrypted form in the appsetting.json file, located at C:\inetpub\wwwroot\Lexmark_Publishing_Platform_Authenticator inside the ConnectionStrings:DataConnection key. Do the following to encrypt a connection string:
Go to C:\inetpub\wwwroot\Lexmark_Publishing_Platform_Authenticator\ProtectConfigData.
At the command prompt, type
.Run the ProtectConfigData.exe file.
Replace the existing encrypted connection string inside the appsetting.json file with the newly encrypted connection string from the command prompt.