Engine

The PPR Engine installer installs the required software to render signs. It also installs a sample database containing templates and images.

This section shows how to install this component.

Deployment readiness checklist

You can install the PPR Engine on a supported Microsoft SQL Server (2016–2022) that runs on any of the following operating systems:

Before you begin, make sure that the following applications are installed on the server:

Setting up IIS

Make sure that the required server roles and features are installed or enabled.

  1. From the Server Manager dashboard, click Add roles and features, and then click Next.

  2. From the Installation Type section, select Role-based or feature-based installation, and then click Next.

  3. Select a server, and then click Next.

  4. From the Server Roles section, expand Web Server (IIS).

  5. From the Web Server section, do the following:

    A screenshot showing one of the steps in setting up IIS.
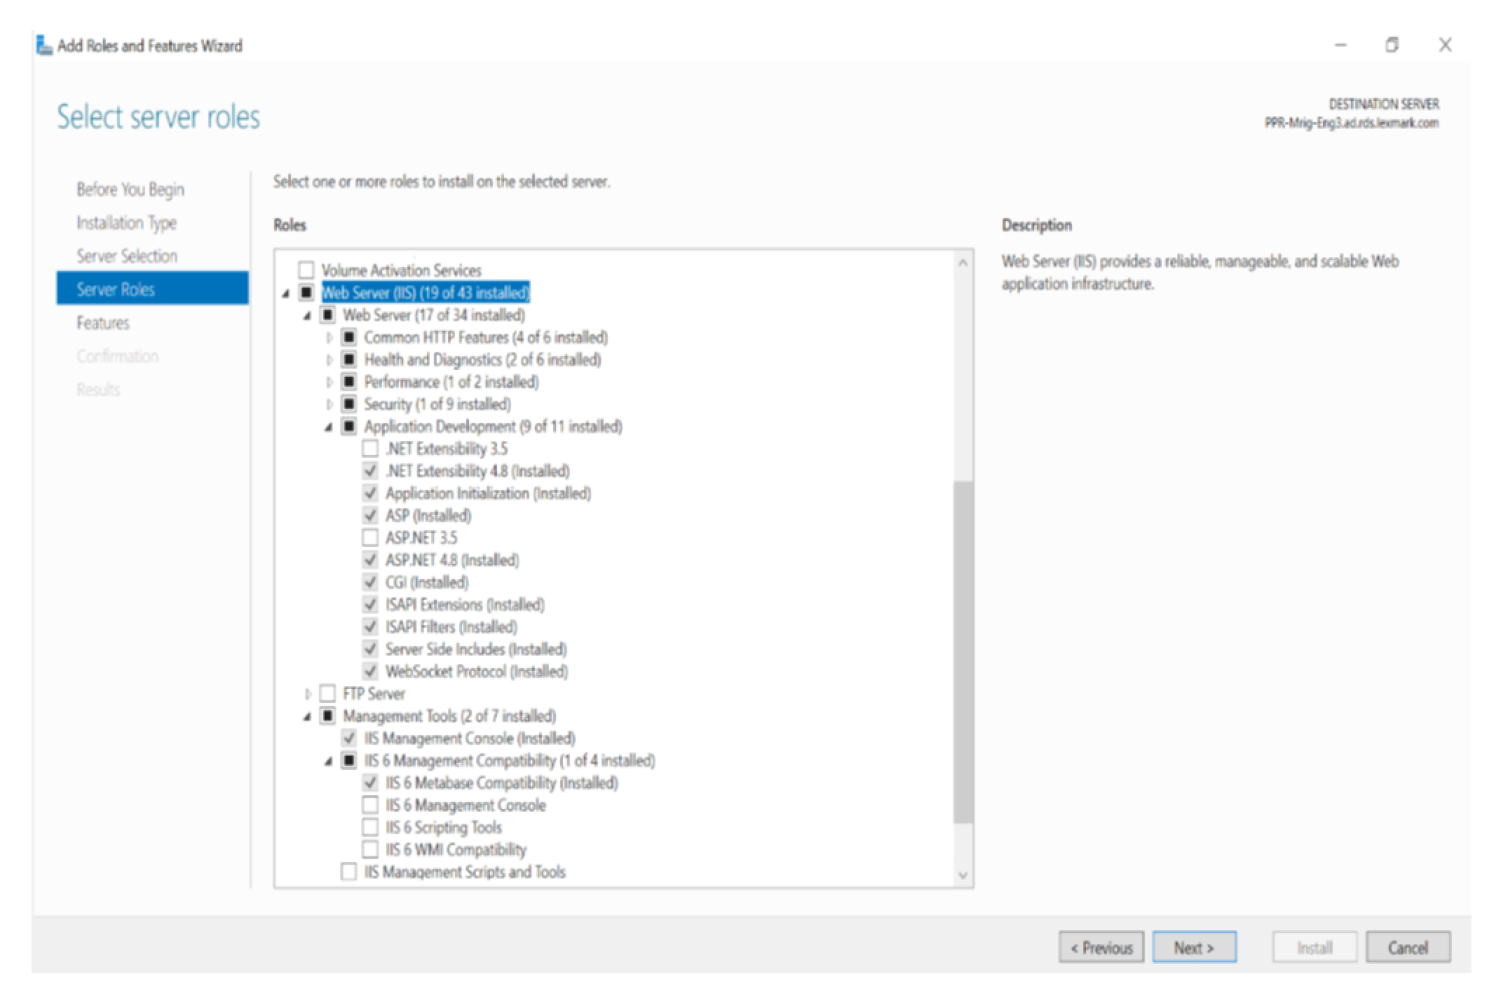
    1. Expand Common HTTP Features, and then enable Default Document, Directory Browsing, HTTP Errors, and Static Content.

    2. Expand Health and Diagnostics, and then enable HTTP Logging and Request Monitor.

    3. Expand Performance, and then enable Static Content Compression.

    4. Expand Security, and then enable Request Filtering.

    5. Expand Application Development, and then enable the following options:

      • .NET Extensibility 4.8

      • Application Initialization

      • ASP

      • ASP.NET4.8

      • CGI

      • SAPI Extensions

      • SAPI Filters

      • Server Side Includes

      • WebSocket Protocol

  6. From the Management Tools section, do either of the following:

    • Enable IIS Management Console.

    • Expand IIS 6 Management Compatibility, and then enable IIS 6 Metabase Compatibility.

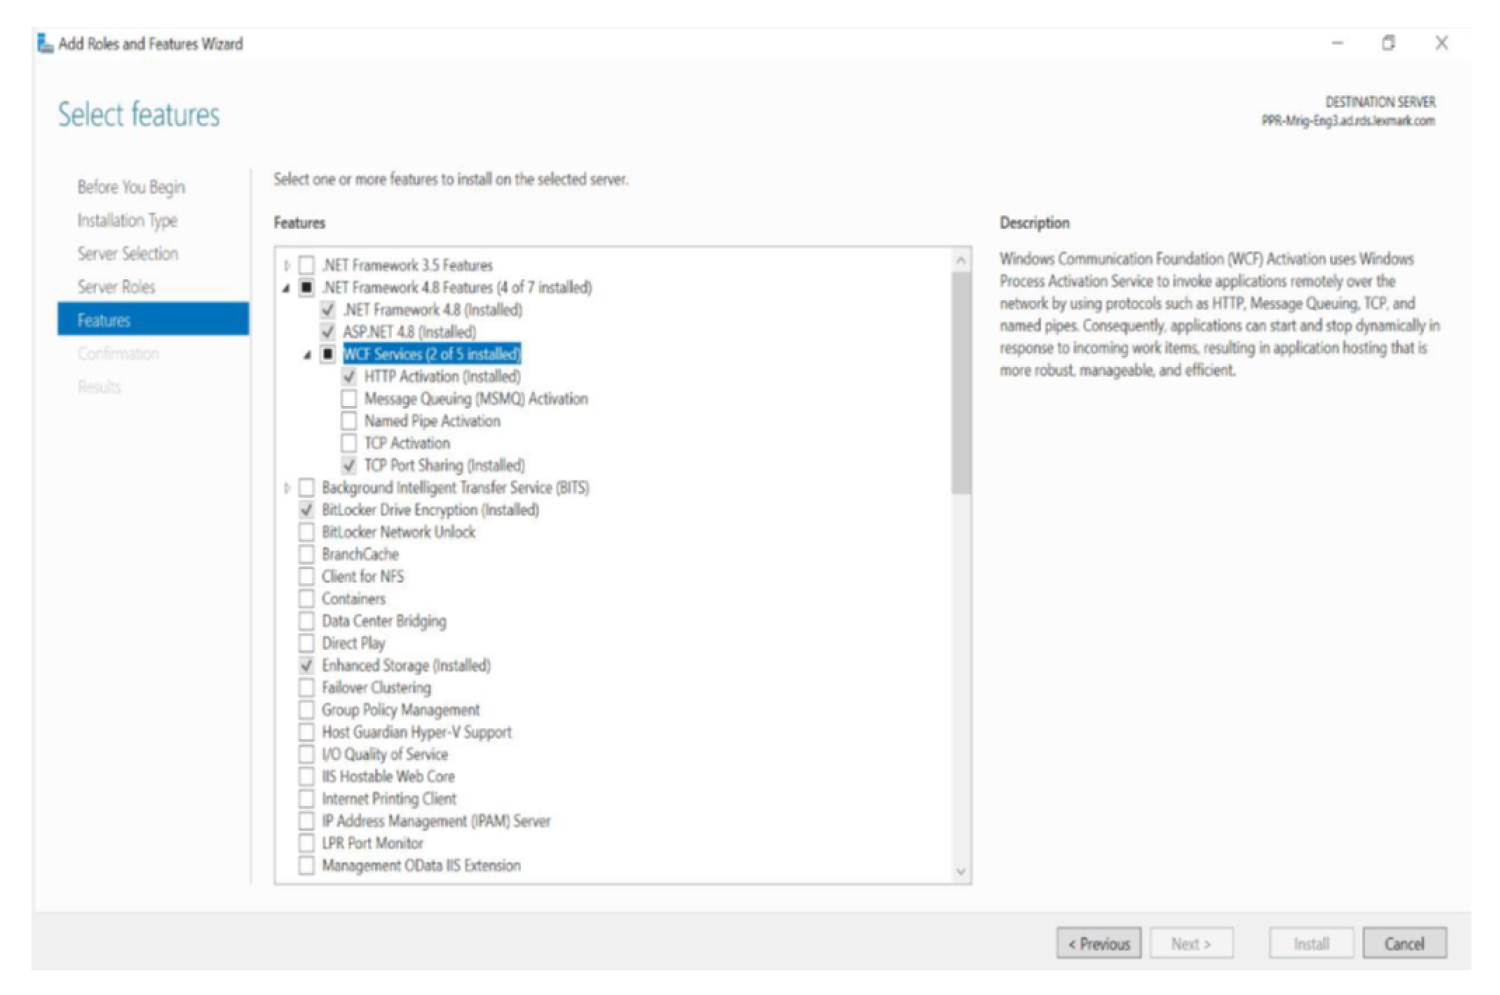
  7. From the Features section, enable .NET Framework 4.8 or higher.

    A screenshot showing how to enable the .NET framework.

Installing the engine

  1. Obtain the PPR engine installer.

  2. Run the EngineInstall.exe file as an administrator.

  3. Read and accept the End-User License Agreement (EULA), and then click Install.

  4. Provide the fully qualified domain name or IP address of the SQL database server.

    Note: If the database is running on a non-default instance name and non-default port, then provide the instance name.
  5. Provide the database server login ID and password.

  6. Select a database.

    Note: By default, the existing AVPUBLISH database which is created during database installation is selected.
    A screenshot showing how to select a database in installing the engine.
  7. Browse to a folder where you want to save the database files.

    Note: We recommend keeping the default directory.
    A screenshot showing the destination folder where the database files are stored.
  8. Browse to a folder where you want to save the engine files.

    Note: We recommend keeping the default directory.
    A screenshot showing the destination folder where the installation files of the engine are stored.
  9. Install the PPR engine.

Notes: