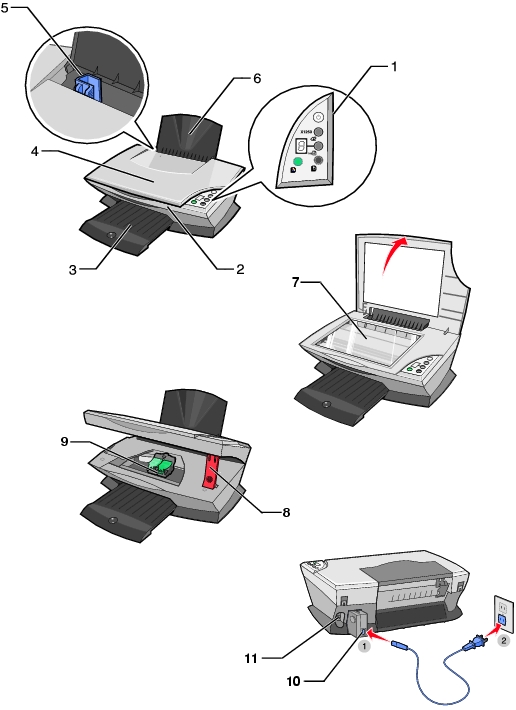
1 | Copy documents or images without a computer. Scan documents or images. Your All-In-One must be attached to the computer before you can use the control panel for scanning. Turn your All-In-One on or off. Cancel print, scan, or copy jobs. Feed paper through your All-In-One. Increment the number of copies. | |
2 | Scanner unit | Access the print cartridges |
3 | Paper exit tray | Stack paper as it exits the All-In-One. |
4 | Scanner lid | Place an item on or remove an item from the scanner glass. |
5 | Paper guide | Slide next to paper to ensure proper feeding. |
6 | Paper support | Load paper and specialty media. For information on the paper support capacity, see Paper support capacity. |
7 | Scanner glass | Load originals for scanning and copying. |
8 | Scanner unit support | Hold the scanner unit open when checking cartridges. |
9 | Print cartridge carrier | Access the print cartridges. |
10 | Power connector | Connect your All-In-One to a power source using a power supply cord. |
11 | USB connector | Connect your All-In-One to your computer using a USB cable. |
| Note: | Insert the power supply cord into the All-In-One before connecting into the wall outlet. |
Follow the instructions on your All-In-One setup documentation to install the hardware. For help, see Setting up your All-In-One.