If you are installing new print cartridges, remove the sticker and tape from the back and bottom of the cartridges.
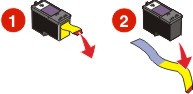
| Warning: Do not touch the gold contact area on the back or the metal nozzles on the bottom of the cartridges. |
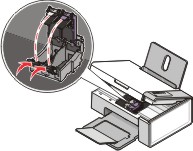
Press down on the cartridge carrier levers to raise the cartridge carrier lids.
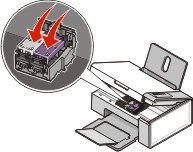
Insert the black cartridge or the photo cartridge in the left carrier. Insert the color cartridge in the right carrier.

Close the lids.
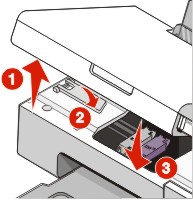
Lift the scanner unit, gently push the scanner support towards the cartridge carriers, and carefully lower the scanner unit until it is completely closed.
Load paper.
Press and hold  for three seconds to print an alignment page.
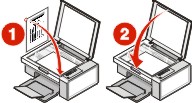
Load the printed alignment page facedown on the scanner glass in the lower right corner, and close the top cover.
Press again to align the cartridge(s).
| Note: The scanner unit must be closed to start a new scan, print, copy, or fax job. |