Make sure the printer is off.
Make sure paper is not loaded in the printer.
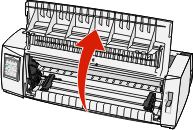
Pull the front cover up and out of the way.
Hold down the latching levers while you lift and pull the tractor unit out of the printer.
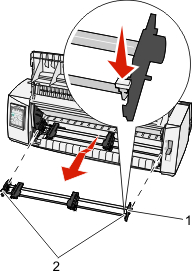
1 | Tractor unit |
2 | Latching levers |
Remove the ribbon access cover.
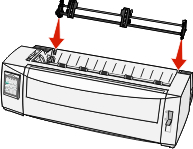
Turn the tractor unit around so that the latching levers are upright, facing you.
Place the tractor against the back slant of the printer along the tractor guides.
To slide the tractor feeder into the printer:
Hold down the latching levers and gently push the tractor feeder into the printer until it stops.
Continue holding down the latching levers, and tilt the tractor feeder toward the front of the printer until the hooks at the end of the latching levers fit around the posts on the printer frame.
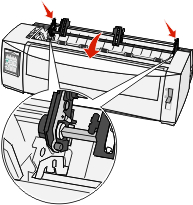
Release the latching levers.
Note: The tractor unit fits into place at a 40° angle.