Loading a cut form or envelope manually
| Note: If you have installed the optional Auto Sheet Feeder or Tractor 2 Feeder, see the documentation that came with the option, for paper loading instructions. |
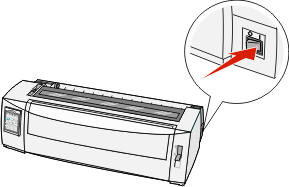
Turn the printer on.
Make sure the paper path is clear.
If continuous forms are currently loaded, tear off the leading edge of the continuous form, and then press Load/Unload to park the continuous forms.
The Paper Out light blinks.
Set the forms thickness lever to a corresponding setting for the type of paper you are using.
Move the paper select lever up to the
 position.
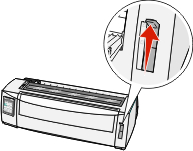
Open the manual feeder.

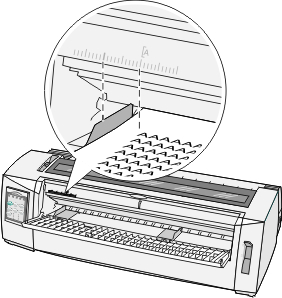
Move the left paper guide so that the print start position you want aligns with the [A symbol printed on the margin guide.
The distance from the left paper guide to the [A symbol determines the width of the left margin.
Place a cut form or an envelope against the left paper guide.
Note: If you are loading a preprinted form or envelope, put the top edge in first with the printed side up. Move the right paper guide so the guide aligns with the right edge of the cut form or envelope.
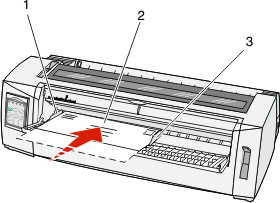
1
Left paper guide
2
Cut form or envelope
3
Right paper guide
Insert the cut form or envelope into the printer until the Paper Out light stops blinking.
Notes:
- If Auto Cut Sheet Load is set to On, the paper feeds automatically to the Top-Of-Form.
- If Auto Cut Sheet Load is set to Off, press FormFeed.
Make sure the printer is online, and the Ready light is on solid.
Note: If not, press Start/Stop until the Ready light is on solid.
