Loading continuous forms using the push tractor
You can load continuous paper utilizing four different paper paths, depending on whether you have the push tractor or the pull tractor installed. The factory default setting for your printer is the push tractor position.
| Note: If you have installed the optional Auto Sheet Feeder or Tractor 2, then see the documentation that came with the option for paper loading instructions. |
Plug the printer power cord to a properly grounded electrical outlet, and then press Start/Stop.
Make sure the paper path is clear.
Note: If a cut form or envelope is loaded in the printer, then press FormFeed to remove it. Set the forms thickness lever to a setting corresponding with the paper thickness you are using.
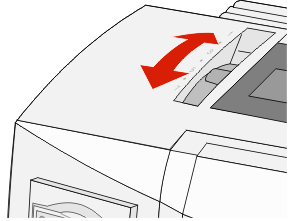
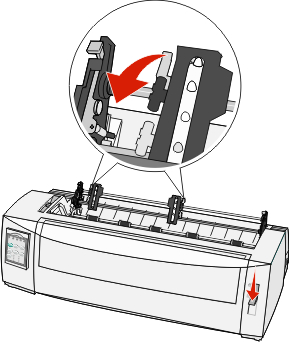
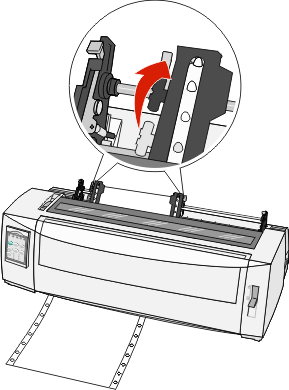
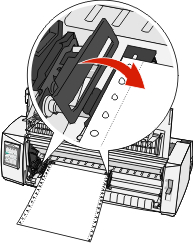
Pull up the front cover.
Move down the paper select lever to the
 position.
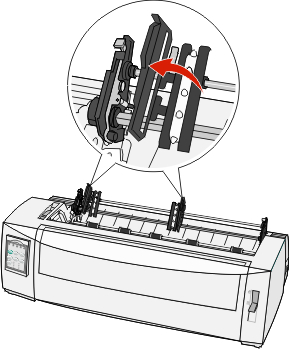
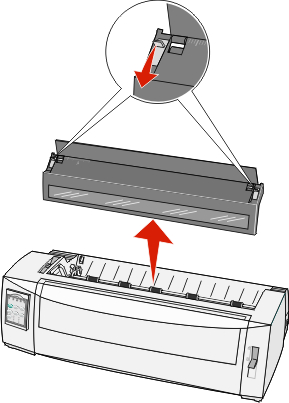
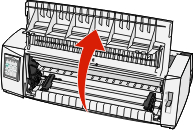
Pull up the left and right tractor locking levers to unlock the tractors.
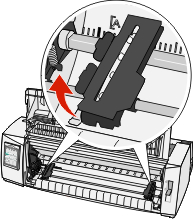
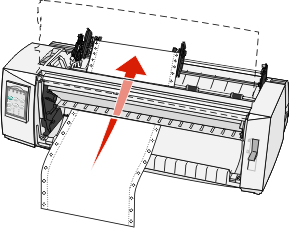
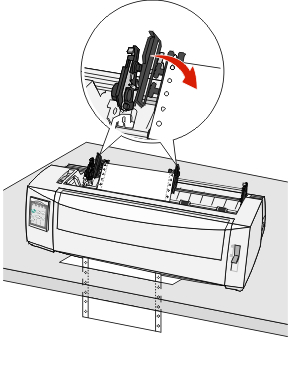
Open the left and right tractor doors, and then place the paper holes over the second or third pins of the tractor unit.
Notes:
- If necessary, move the left or right tractor to adjust the tractors to the paper width.
- Keeping the left tractor positioned to the left of the rubber tractor stop keeps your paper within the paper sensor area.
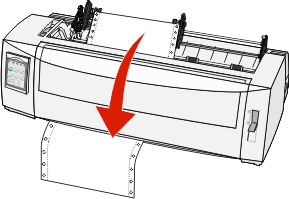
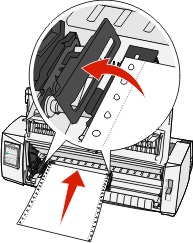
Close the left and right tractor doors.
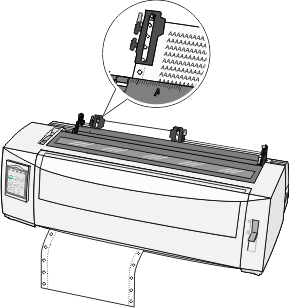
Move the tractor to align the left margin on your paper with the [A symbol printed on the rear plate.
Note: The distance from the [A symbol to the left edge of the paper determines the width of the left margin. Push down the left tractor locking lever to lock the tractor in place.
Remove slack from the paper, and then lock the right locking lever.
Close the front cover.
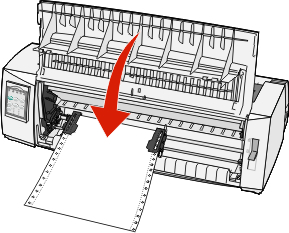
Press Start/Stop to load the paper to Top-Of-Form, and then put the printer online.
Notes:
- If Auto Tear Off is set to On, then the printer moves the paper to the Tear Off bar.
- When you use the push tractor to print continuous forms, line spacing within the first 1.5 inches of the first form may not be uniform.