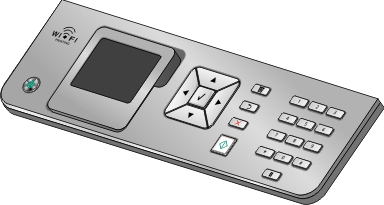
The control panel contains:
Power on/off button
60.96 mm (2.4 inch) display capable of showing color graphics
23 buttons
The following diagrams explain the sections of the control panel:
Item | Description | |
|---|---|---|
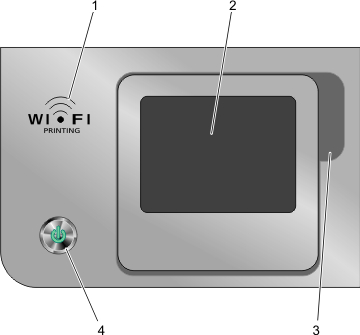
1 | Check wireless status:
| |
2 | Display Note: The display screen is turned off in Power Saver Mode. | Shows:
|
3 | Finger groove | Lets you reach under the display in order to adjust it to a comfortable viewing position. |
4 |  Note: The power button is lit when the printer is on and remains lit in Power Saver Mode. | Use to:
|
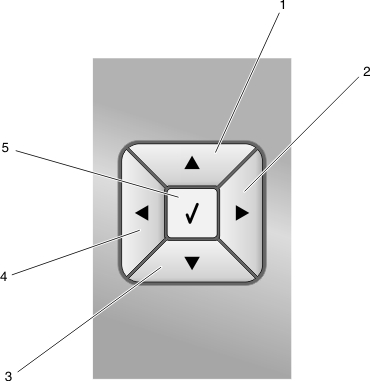
Press | To | |
|---|---|---|
1 |  |
|
2 |
| |
3 |  |
|
4 |
| |
5 |  |
|
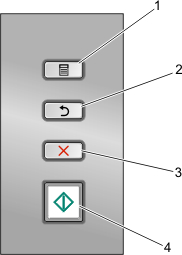
Press | To | |
|---|---|---|
1 |  |
Note: If you are in a submenu, pressing this button has no effect. |
2 |  |
|
3 |
| |
4 |  | Start a copy, scan, fax, or photo print job, depending on which mode is selected. |
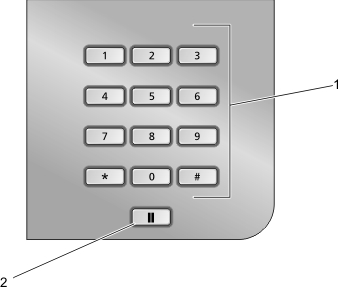
Press | To | |
|---|---|---|
1 | A keypad number or symbol | In Copy mode or Photo mode: Enter the number of copies or prints you want to make. In Fax mode:
|
2 |  | In Fax mode:
|