
| | CAUTION—SHOCK HAZARD: If you are accessing the system board or installing optional hardware or memory devices sometime after setting up the printer, then turn the printer off, and unplug the power cord from the wall outlet before continuing. If you have any other devices attached to the printer, then turn them off as well, and unplug any cables going into the printer. |
You can customize your printer connectivity and memory capacity by adding optional cards. The instructions in this section explain how to install the available cards; you can also use them to locate a card for removal.
| Note: Options are available only for some printer models. |
| Note: Certain options are not available on selected printer models. |
Printer memory
Flash memory
Font cards
| | CAUTION—SHOCK HAZARD: If you are accessing the system board or installing optional hardware or memory devices sometime after setting up the printer, then turn the printer off, and unplug the power cord from the wall outlet before continuing. If you have any other devices attached to the printer, then turn them off as well, and unplug any cables going into the printer. |
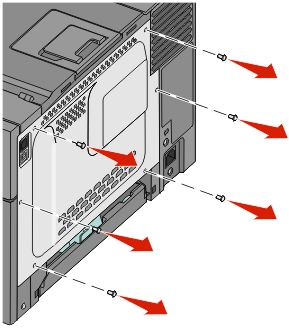
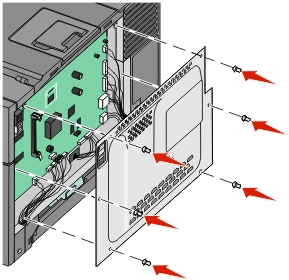
Access the system board at the back of the printer.
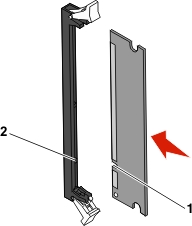
Turn the screws counterclockwise to remove them.
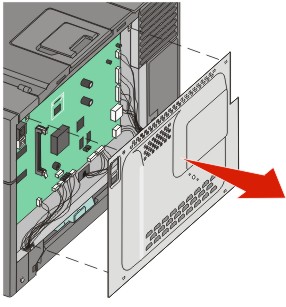
Gently pull the cover away from the printer, and then remove it.
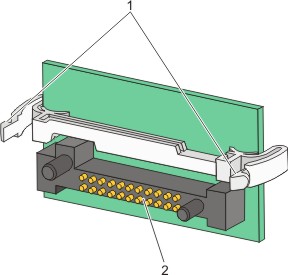
Locate the appropriate connector on the system board.
| Warning—Potential Damage: System board electrical components are easily damaged by static electricity. Touch something metal on the printer before touching any system board electronic components or connectors. |
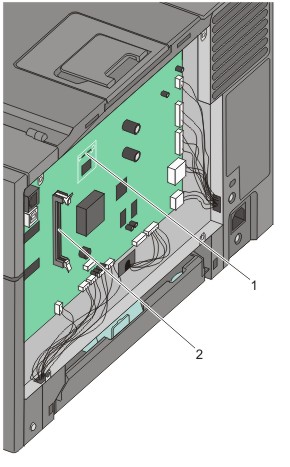
1 | Flash memory card connector |
2 | Memory card connector |
The system board has one connector for an optional memory card.
| | CAUTION—SHOCK HAZARD: If you are accessing the system board or installing optional hardware or memory devices sometime after setting up the printer, then turn the printer off, and unplug the power cord from the wall outlet before continuing. If you have any other devices attached to the printer, then turn them off as well, and unplug any cables going into the printer. |
Access the system board.
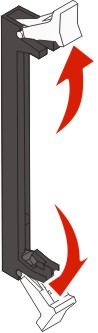
Open both latches on the connector completely.
Unpack the memory card.
| Note: Avoid touching the connection points along the edge of the card. |
Align the notch on the memory card with the ridge on the connector.
Push the memory card straight into the connector until it snaps into place. Make sure each latch fits over the notch located on either side of the memory card.
1 | Notch |
2 | Ridge |
Reinstall the system board access cover.
| | CAUTION—SHOCK HAZARD: If you are accessing the system board or installing optional hardware or memory devices sometime after setting up the printer, then turn the printer off, and unplug the power cord from the wall outlet before continuing. If you have any other devices attached to the printer, then turn them off as well, and unplug any cables going into the printer. |
Access the system board.
Unpack the memory card.
| Note: Avoid touching the connection points along the edge of the card. |
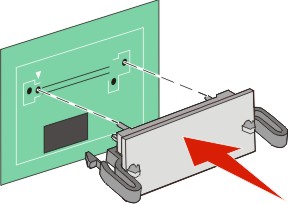
Holding the card by its sides, align the plastic pins on the card with the holes on the system board. This ensures the metal pins line up correctly as well.
1 | Plastic pins |
2 | Metal pins |
Push the card firmly into place.
Notes:
Reinstall the system board cover.