Installing the printer on a wireless network (Windows)
Before installing the printer on a wireless network, make sure:
Your wireless network is set up and is working properly.
The computer you are using is connected to the same wireless network where you want to set up the printer.
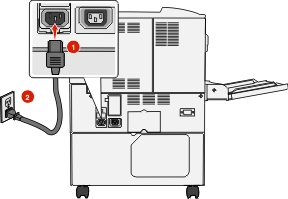
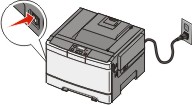
Connect the power cord to the printer, then to a properly grounded electrical outlet, and then turn on the printer.
Note: Make sure the printer and the computer are fully on and ready. Warning—Potential Damage: Do not connect the USB cable until instructed to do so on the computer screen. 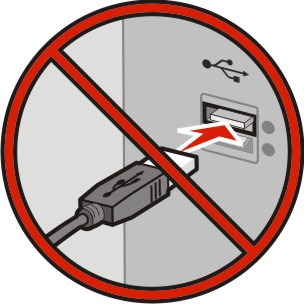
Obtain a copy of the software installer package.
From the Software and Documentation CD that came with your printer.
From our Web site:
Go to http://support.lexmark.com, and then navigate to:
SUPPORT & DOWNLOAD > select your printer > select your operating system
Double-click the software installer package.
Wait for the installation dialog to appear.
If you are using the Software and Documentation CD and the installation dialog does not appear, then do the following:
In Windows 8
From the Search charm, type , and then navigate to:
Apps list > Run > type > OK
In Windows 7 or earlier
Click
 or click Start, and then click Run.
In the Start Search or Run dialog, type .
Press Enter or click OK.
Note: is the letter of your CD or DVD drive. Click Install, and then follow the instructions on the computer screen.
Select Wireless connection when asked to choose a connection type.
From the Wireless Configuration dialog, select Guided Setup (Recommended).
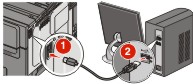
Note: Choose Advanced Setup only if you want to customize your installation. Temporarily connect a USB cable between the computer on the wireless network and the printer.
Note: After the printer is configured, the software will instruct you to disconnect the temporary USB cable so you can print wirelessly. Follow the instructions on the computer screen.
| Note: For more information on allowing other computers on the network to use the wireless printer, see the Networking Guide. |
 > Reports >
  > Network Setup Page >
  > Reports > Network Setup Page