Solving print quality problems

Isolating print quality problems

To help isolate print quality problems, print the print quality test pages:

  1. Turn the printer off.

  2. From the printer control panel, press and hold the select button and the right arrow button while turning the printer on.

  3. Release both buttons when the clock animation appears.

    The printer performs its power-on sequence, and then Config Menu appears.

  4. Press the arrow buttons until Prt Quality Pgs appears, and then press the select button.

    The pages are formatted, Printing Quality Test Pages appears, and then the pages print. The message remains on the display until all the pages print.

  5. After the print quality test pages print, press the arrow buttons until Exit Config Menu appears, and then press the select button.

The information in the following topics may help you solve print quality problems. If these suggestions still do not correct the problem, then call for service. You may have a printer part that requires adjustment or replacement.

Blank pages

graphic of a blank page

These are possible solutions. Try one or more of the following:

Packing material may be on the toner cartridge

Remove the toner cartridge and make sure the packing material is properly removed. Reinstall the toner cartridge.


The toner may be low

When 88 Cartridge Low appears, order a new toner cartridge.

If the problem continues, the printer may need to be serviced. For more information, contact Customer Support.

Clipped images

Try one or more of the following:

Check the guides

Move the width and length guides in the tray to the correct positions for the paper size loaded.


Check the paper size setting

Make sure the paper size setting matches the paper loaded in the tray:

  1. From the printer control panel Paper menu, check the Paper Size setting.

  2. Before sending the job to print, specify the correct size setting:

    • For Windows users, specify the size from Print Properties.

    • For Macintosh users, specify the size from the Page Setup dialog.

Characters have jagged or uneven edges

graphic of page with with distorted text

These are possible solutions. Try one or more of the following:

Check the print quality settings


Make sure downloaded fonts are supported

If you are using downloaded fonts, then verify that the fonts are supported by the printer, the host computer, and the software program.

Dark lines

The imaging kit may be defective.

If Black and color imaging kit life warning orBlack imaging kit life warning appears, replace the imaging kit.

Gray background

Check the Toner Darkness setting

Select a lighter Toner Darkness setting:

Incorrect margins

graphic of page with incorrect margins

These are possible solutions. Try one or more of the following:

Check the paper guides

Move the guides in the tray to the correct positions for the paper size loaded.


Check the paper size setting

Make sure the paper size setting matches the paper loaded in the tray:

  1. From the printer control panel Paper menu, check the Paper Size setting.

  2. Before sending the job to print, specify the correct size setting:

    • For Windows users, specify the size from Print Properties.

    • For Macintosh users, specify the size from the Page Setup dialog.

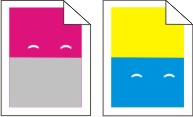
Light colored line, white line, or incorrectly colored line

images of colored and light line defects on printed pages

These are possible solutions. Try one or more of the following:

A toner cartridge may be defective

Replace the defective toner cartridge.


The imaging kit may be defective

Replace the imaging kit.

Note: The printer has two types of imaging kits: a black and color imaging kit, and a black imaging kit. The black and color imaging kit contains cyan, magenta, yellow, and black. The black imaging kit contains black only.

Paper curl

These are possible solutions. Try one or more of the following:

Check the paper type setting

Make sure the paper type setting matches the paper loaded in the tray:

  1. From the printer control panel Paper menu, check the Paper Type setting.

  2. Before sending the job to print, specify the correct type setting:

    • For Windows users, specify the type from Print Properties.

    • For Macintosh users, specify the type from the Print dialog.


The paper has absorbed moisture due to high humidity

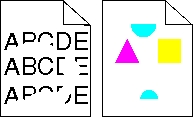
Print irregularities

graphic of two pages with irregular text and art

These are possible solutions. Try one or more of the following:

The paper may have absorbed moisture due to high humidity


Check the paper type setting

Make sure the paper type setting matches the paper loaded in the tray:

  1. From the printer control panel Paper menu, check the Paper Type setting.

  2. Before sending the job to print, specify the correct type setting:

    • For Windows users, specify the type from Print Properties.

    • For Macintosh users, specify the type from the Print dialog.


Check the paper

Avoid textured paper with rough finishes.


The toner may be low

When 88 <color> cartridge low appears or when the print becomes faded, replace the toner cartridge.


The fuser may be worn or defective

Replace the fuser.

Print is too dark

graphic of printed text that is too dark

These are possible solutions. Try one or more of the following:

Calibrate the color

The printer automatically calibrates the colors whenever a new imaging kit is detected. If a cartridge is replaced, then you can calibrate the colors manually:

  1. From the printer control panel, press the menu button.

  2. From the Admin menu, press the arrow buttons until Settings appears, and then press the menu button.

  3. Press the arrow buttons until Quality menu appears, and then press the menu button.

  4. Press the arrow buttons until Color Adjust appears, and then press the menu button.

    Calibrating appears.


Check the darkness, brightness, and contrast settings

The Toner Darkness setting is too dark, the RGB Brightness setting is too dark, or the RGB Contrast setting is too high.


The paper has absorbed moisture due to high humidity


Check the paper

Avoid textured paper with rough finishes.


Check the paper type setting

Make sure the paper type setting matches the paper loaded in the tray:

  1. From the printer control panel Paper menu, check the Paper Type setting.

  2. Before sending the job to print, specify the correct type setting:

    • For Windows users, specify the type from Print Properties.

    • For Macintosh users, specify the type from the Print dialog.


The imaging kit may be worn or defective

Replace the imaging kit.

Note: The printer has two types of imaging kits: a black and color imaging kit, and a black imaging kit. The black and color imaging kit contains cyan, magenta, yellow, and black. The black imaging kit contains black only.

Print is too light

graphic of text that is too light

These are possible solutions. Try one or more of the following:

Calibrate the color

The printer automatically calibrates the colors whenever a new imaging kit is detected. If a cartridge is replaced, then you can calibrate the colors manually:

  1. From the printer control panel, press the menu button.

  2. From the Admin menu, press the arrow buttons until Settings appears, and then press the select button.

  3. Press the arrow buttons until Quality menu appears, and then press the select button.

  4. Press the arrow buttons until Color Adjust appears, and then press the select button.

    Calibrating appears.


Check the darkness, brightness, and contrast settings

The Toner Darkness setting is too light, the RGB Brightness setting is too light, or the RGB Contrast setting is too low.


The paper has absorbed moisture due to high humidity


Check the paper

Avoid textured paper with rough finishes.


Check the paper type setting

Make sure the paper type setting matches the paper loaded in the tray.

  1. From the printer control panel Paper menu, check the Paper Type setting.

  2. Before sending the job to print, specify the correct type setting:

    • For Windows users, specify the type from Print Properties.

    • For Macintosh users, specify the type from the Print dialog.


Make sure Color Saver is set to Off

Color Saver may be set to On.


The toner may be low

When 88 <color> Cartridge Low appears or when the print becomes faded, replace the toner cartridge.


A toner cartridge may be defective

Replace the toner cartridge.


The imaging kit may be worn or defective

Replace the imaging kit.

Note: The printer has two types of imaging kits: a black and color imaging kit, and a black imaging kit. The black and color imaging kit contains cyan, magenta, yellow, and black. The black imaging kit contains black only.

Repeating defects

Repeating marks occur repeatedly only in one color and multiple times on a page

Replace the developer unit if the defects occur every 43.9 mm (1.7 in.)

Replace the imaging kit if the defects occur every:

Notes:

Skewed print

Check the paper guides

Move the guides in the tray to the correct positions for the paper size loaded.


Check the paper

Make sure you are using paper that meets the printer specifications.

Solid color pages

graphic of a mostly black page

The printer may need to be serviced. For more information, contact Customer Support.

Toner fog or background shading appears on the page

These are possible solutions. Try one or more of the following:

The imaging kit may be worn or defective

Replace the imaging kit.

Note: The printer has two types of imaging kits: a black and color imaging kit, and a black imaging kit. The black and color imaging kit contains cyan, magenta, yellow, and black. The black imaging kit contains black only.

Is there toner in the paper path?

Contact Customer Support.

Toner rubs off

graphic of page with toner streaks

These are possible solutions. Try one or more of the following:

Check the paper type setting

Make sure the paper type setting matches the paper loaded in the tray:

  1. From the printer control panel, check the Paper Type setting from the Paper menu.

  2. Before sending the job to print, specify the correct type setting:

    • For Windows users, specify the type from Print Properties.

    • For Macintosh users, specify the type from the Print dialog.


Check the Paper Texture setting

From the printer control panel Paper menu, make sure the Paper Texture setting matches the paper loaded in the tray.

Toner specks

graphic of page with toner specks

These are possible solutions. Try one or more of the following:

The imaging kit may be worn or defective

Replace the imaging kit.

Note: The printer has two types of imaging kits: a black and color imaging kit, and a black imaging kit. The black and color imaging kit contains cyan, magenta, yellow, and black. The black imaging kit contains black only.

Is there toner in the paper path?

Contact Customer Support.

Transparency print quality is poor

Check the transparencies

Use only transparencies recommended by the printer manufacturer.


Check the paper type setting

Make sure the paper type setting matches the paper loaded in the tray:

  1. From the printer control panel, check the Paper Type setting from the Paper menu.

  2. Before sending the job to print, specify the correct type setting:

    • For Windows users, specify the type from Print Properties.

    • For Macintosh users, specify the type from the Print dialog.

Uneven print density

Replace the black and color imaging kit.