The multipurpose feeder accommodates a variety of media types, including envelopes. Media not kept in a tray can be loaded into the multipurpose feeder.
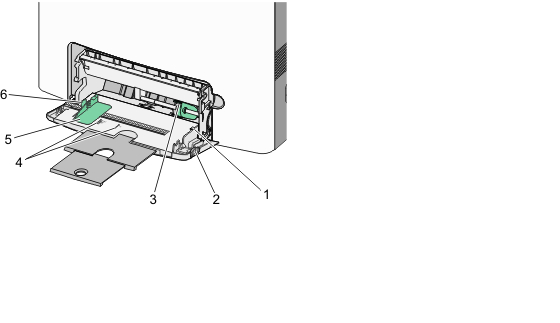
1 | Stack height limiter |
2 | Tray release latch |
3 | Paper release lever |
4 | Size indicators |
5 | Width guide |
6 | Width guide release tab |
Press the tray release latch to the left, and then pull the multipurpose feeder down.

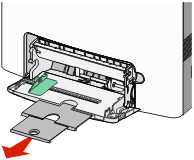
Gently pull the extension out until it is fully extended.
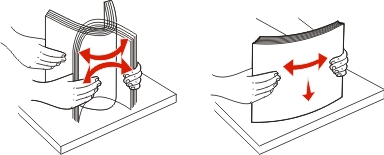
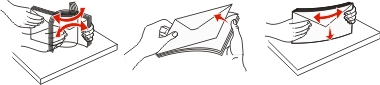
Prepare a media stack for loading.
Flex sheets of paper back and forth to loosen them, and then fan them. Do not fold or crease the paper. Straighten the edges on a level surface.
Hold transparencies by the edges, and then fan them. Straighten the edges on a level surface.
| Note: Avoid touching the print side of the transparencies. Be careful not to scratch them. |
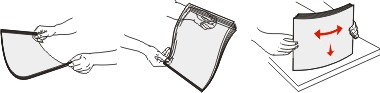
Flex a stack of envelopes back and forth to loosen them, and then fan them. Straighten the edges on a level surface.
Load the media stack with the recommended print side facedown and the top edge entering the printer first.
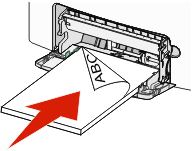
| Note: Load only one size and type of media at a time. |
Load envelopes with the flap side up and the return address edge entering the printer first.
| Warning—Potential Damage: Never use envelopes with stamps, clasps, snaps, windows, coated linings, or self-stick adhesives. These envelopes may severely damage the printer. |
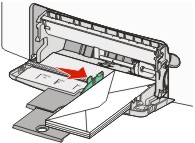
Make sure the media is as far into the multipurpose feeder as it will go with very gentle pushing. Media should lie flat and fit loosely in the multipurpose feeder.
| Note: If the media is pushed too far into the multipurpose feeder, you must press the paper release lever to remove it. |
From the printer control panel, set the Paper Size and Paper Type, and then press  .
.
The multipurpose feeder can be closed when not in use.