Replacing a toner cartridge
When 88 Replace <color> cartridge, 88 <color> cartridge nearly low, or 88 <color> cartridge low appears on the printer control panel, or when print becomes faded, try to extend the life of the specified cartridge.
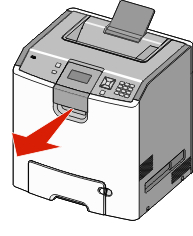
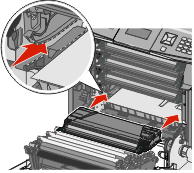
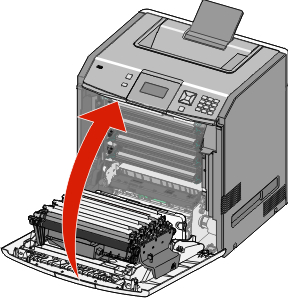
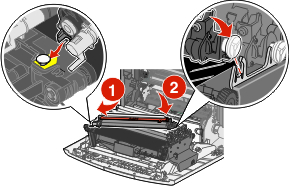
Open the front door.
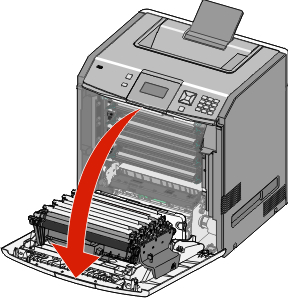
| Warning—Potential Damage: Make sure the printer is not open for 10 minutes or more to avoid overexposing the photoconductor units to light. |
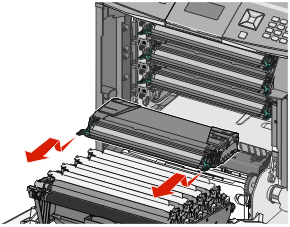
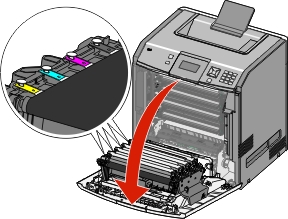
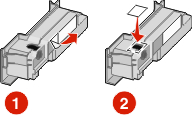
Pull up and out on the green tabs of the specified cartridge to remove it from the printer.
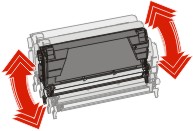
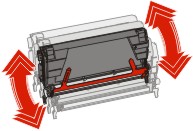
Shake the cartridge front to back and side to side to redistribute the toner.
Reinsert the cartridge to continue printing.
Repeat this process multiple times until printed text and graphics remain faded.
When printed text and graphics remain faded, replace the specified cartridge. Repeat steps 1 and 2, and then follow the steps below.
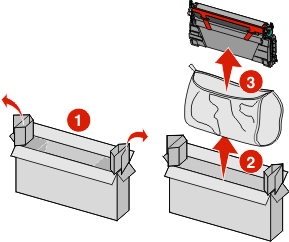
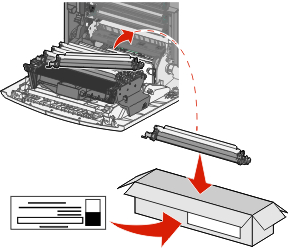
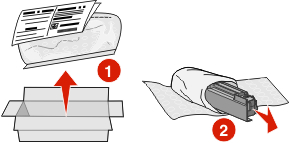
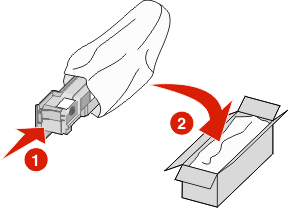
Unpack a new cartridge.
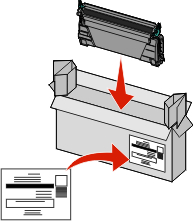
Place the old cartridge in the replacement cartridge shipping box, and then attach the return label to the box for shipping.
Shake the new cartridge front to back and side to side to evenly distribute the toner.
Remove the red packing strip from the new cartridge.
Insert the new cartridge into the printer.
Close the front door.
| Note: Make sure each cartridge is fully pushed in. If a cartridge is not installed correctly, the printer may issue a <color> Cartridge Missing message, where <color> is Black, Cyan, Magenta, or Yellow. The printer may also issue the message Close front door. |
If either of these messages appears, follow these steps to clear the printer control panel message and continue printing:
Open the front door.
Remove the specified cartridge.
Reinstall the specified cartridge.
Close the front door.
Check the printer control panel to see if it is clear of messages.
Repeat as needed for additional toner cartridge replacement.
Replacing a photoconductor
There are three different display messages that may appear when a photoconductor replacement is necessary: 84 Replace <color> photoconductor, 84 <color> photoconductor nearly low, or 84 <color> photoconductor low.
| Note: A replacement photoconductor can be used with any color. |
Replacing a photoconductor is a two-part process. First, complete the illustrated steps to replace the photoconductor, and then reset the life count and clear printer messages.
Open the front door.
| Warning—Potential Damage: To avoid overexposing the photoconductors , do not leave the door open for more than 10 minutes. |
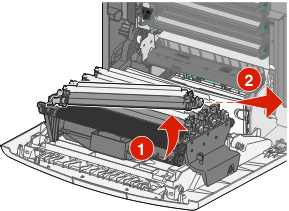
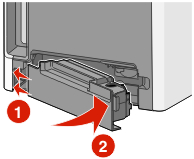
Pull the specified photoconductor up, and then slide it to the right to remove it from the printer.
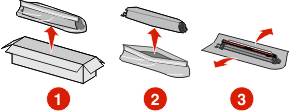
Unpack the replacement photoconductor.
| Warning—Potential Damage: Do not touch the shiny area on the photoconductor drum. Touching it could damage the photoconductor. |
Align and insert the left end of the photoconductor, and then press the right end until it clicks into place.
Remove the red packing strip from the top of the photoconductor.
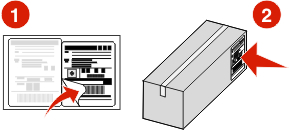
Place the old photoconductor into the replacement photoconductor box, and then place the return label on the box for shipping to Lexmark for recycling.
Close the front door.
If you see 84 Replace <color> photoconductor, 84 <color> photoconductor nearly low, or 84 <color> photoconductor low on the display, then press the up or down arrow button until  Supply Replaced appears, and then press
  .
.
| Note: Failure to reset the life count may result in degraded print quality. |
Replaced <color> photoconductor appears.
Yes appears.
Press to clear the message.
If you are prompted to replace only one photoconductor, then the Ready screen appears, and the task is complete. If you are prompted to replace additional photoconductors, repeat steps 1 to 9 for each additional photoconductor. After all photoconductors have been replaced, Ready appears, and the task is complete.
If you see Ready on the printer display after you have replaced a photoconductor, continue with steps 1–7:
To specify the replaced photoconductor, press  .
.
Supplies Menu appears.
Press .
Replace Supply appears.
Press .
Press the up or down arrow button until All, Cyan photoconductor, Magenta photoconductor, Yellow photoconductor, or Black photoconductor appears, depending on the photoconductor you just replaced.
Press .
<color> photoconductor replaced appears.
Yes appears.
Press .
Press  until Ready appears.