
| | CAUTION—SHOCK HAZARD: If you are accessing the system board or installing optional hardware or memory devices sometime after setting up the printer, then turn the printer off, and unplug the power cord from the wall outlet before continuing. If you have other devices attached to the printer, then turn them off as well, and unplug any cables going into the printer. |
You can customize your printer connectivity and memory capacity by adding optional cards. The instructions in this section explain how to install the available cards; you can also use them to locate a card for removal.
Printer memory
Flash memory
Fonts
Forms and Barcode Card
PrintCryptionTM
| | CAUTION—SHOCK HAZARD: If you are accessing the system board or installing optional hardware or memory devices sometime after setting up the printer, then turn the printer off, and unplug the power cord from the wall outlet before continuing. If you have other devices attached to the printer, then turn them off as well, and unplug any cables going into the printer. |
As you face the printer, the system board door is on the right side. Open the system board door.
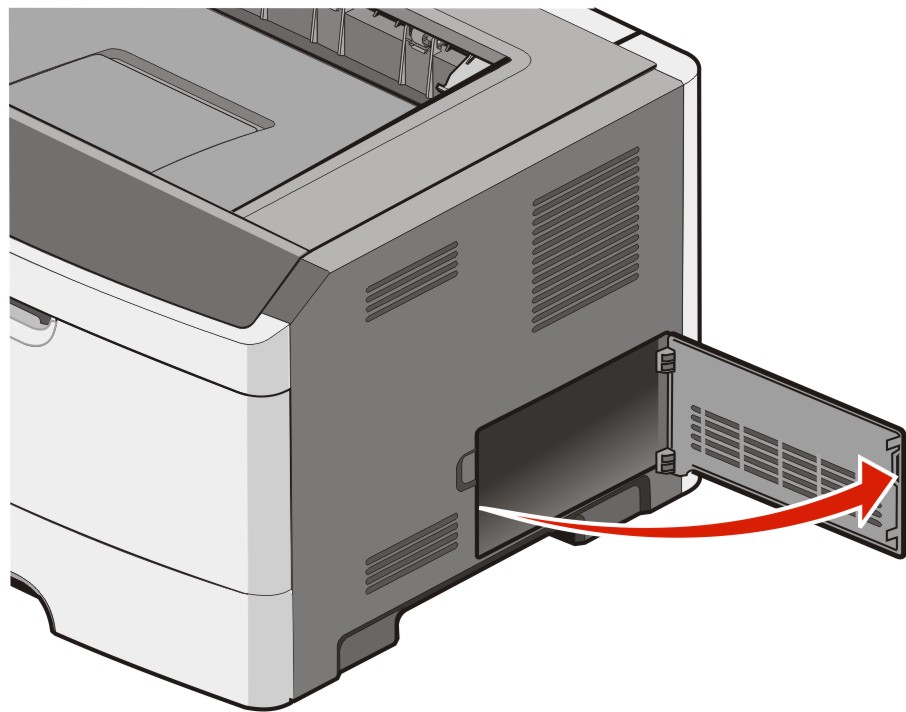
Use the following illustration to locate the appropriate connector.
| Warning—Potential Damage: System board electronic components are easily damaged by static electricity. Touch something metal on the printer before touching any system board electronic components or connectors. |
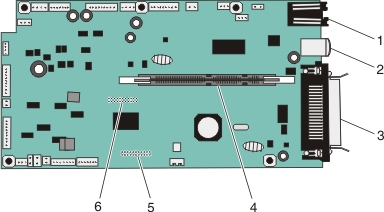
1 | Ethernet connector |
2 | USB port |
3 | Parallel connector Note: Not available on all models. |
4 | Memory card connector |
5 | Optional card connector |
6 | Optional card connector |
| | CAUTION—SHOCK HAZARD: If you are accessing the system board or installing optional hardware or memory devices sometime after setting up the printer, then turn the printer off, and unplug the power cord from the wall outlet before continuing. If you have any other devices attached to the printer, then turn them off as well, and unplug any cables going into the printer. |
| Warning—Potential Damage: System board electronic components are easily damaged by static electricity. Touch a metal surface on the printer before touching any system board electronic components or connectors. |
An optional memory card can be purchased separately and attached to the system board. To install the memory card:
Turn the printer off.
Access the system board.
Unpack the memory card.
| Note: Avoid touching the connection points along the edge of the card. |
Align the memory card with its connector on the system board.
Push open the latches on both ends of the memory connector.
| Warning—Potential Damage: Memory cards are easily damaged by static electricity. Touch a grounded metal surface before you touch a memory card. |
| Note: Memory cards designed for other printers may not work with your printer. |
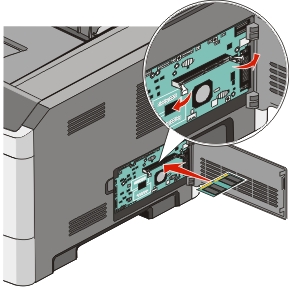
Push the memory card into the connector until the latches click into place.
It may require some force to fully seat the card.

Ensure that each latch fits over the notch on each end of the card.
Close the system board door.
Turn the printer back on.
Open the printers folder:
Click  , or click Start and then click Run.
In the Start Search or Run box, type .
Press Enter, or click OK.
The printers folder opens.
Right-click your printer icon.
Click Properties.
Click Install Options.
| Note: Memory cards designed for other printers may not work with your printer. |
Click Ask Printer.
Click OK.
Click OK, and then close the printers folder.
The system board has two connections for an optional flash memory or firmware card. Only one of each may be installed, but the connectors are interchangeable.
| | CAUTION—SHOCK HAZARD: If you are accessing the system board or installing optional hardware or memory devices sometime after setting up the printer, then turn the printer off, and unplug the power cord from the wall outlet before continuing. If you have other devices attached to the printer, then turn them off as well, and unplug any cables going into the printer. |
| Warning—Potential Damage: System board electronic components are easily damaged by static electricity. Touch something metal on the printer before touching any system board electronic components or connectors. |
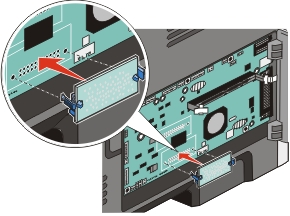
Open the system board door.
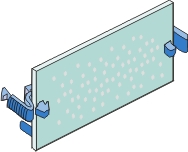
Unpack the card.
| Note: Avoid touching the connection points along the edge of the card. |
Holding the card by its sides, align the card with the connector on the system board.
Push the card firmly into place.
Notes:
Close the system board door.