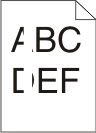
The information in the following topics may help you solve print quality problems. If these suggestions still do not correct the problem, then contact Customer Support. You may have a printer part that requires adjustment or replacement.
To help isolate print quality problems, print the print quality test pages, but first make sure the standard tray is loaded:
Turn the printer off.
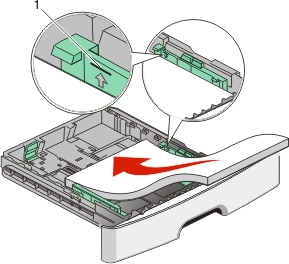
Load letter- or A4-size paper in the standard tray. Load the paper stack toward the back of the tray as shown with the recommended print side facedown. Notice the maximum fill line on the side of the tray to guide you. Do not overfill the tray.
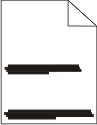
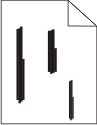
Print the print quality test pages:
Turn the printer off.
From the printer control panel, hold down and the right arrow button while turning the printer on.
Release the buttons when
appears.Press the arrow buttons until
appears, and then press .The print quality test pages print.
Press the arrow buttons until
appears, and then press .appears briefly, and then appears.
For Windows users: From Print Properties, select a different Toner Darkness setting before sending the job to print.
For Macintosh users: From the print options, Copies & Pages, or General pop-up menu, choose Printer Features, and then choose the setting needed from the Toner Darkness pop-up menu.
From the printer control panel Quality menu, select a different Toner Darkness setting before sending the job to print.
These are possible solutions. Try one or more of the following:
Replace the photoconductor kit.
For Windows users: From Print Properties, make sure the Paper Type setting matches the paper loaded in the tray.
For Macintosh users: From the Print dialog, make sure the Paper Type setting matches the paper loaded in the tray.
From the printer control panel Paper menu, make sure the Paper Type setting matches the paper loaded in the tray.
These are possible solutions. Try one or more of the following:
Move the width and length guides in the tray to the correct positions for the paper size loaded.
Make sure the Paper Size setting matches the paper loaded in the tray.
Before sending the job to print, specify the correct page size in Print Properties, the Print dialog, or the software program.
These are possible solutions. Try one or more of the following:
For Windows users: From Print Properties, make sure the Paper Type setting matches the paper loaded in the tray.
For Macintosh users: From the Print dialog, make sure the Paper Type setting matches the paper loaded in the tray.
From the printer control panel Paper menu, make sure the Paper Type setting matches the paper loaded in the tray.
Load paper from a fresh package.
Store paper in its original wrapper until you use it.
These are possible solutions. Try one or more of the following:
The Toner Darkness setting is too dark, the Brightness setting is too dark, or the Contrast setting is too high.
For Windows users: From Print Properties, change these settings.
For Macintosh users:
Choose File > Print.
Locate the drop-down box under the Orientation pictures, and then click the down button.
Click Printer Features.
Change the settings for Toner Darkness, Brightness, and Contrast.
From the printer control panel Quality menu, change these settings.
Load paper from a fresh package.
Store paper in its original wrapper until you use it.
Avoid textured paper with rough finishes.
For Windows users: From Print Properties, make sure the Media Type setting matches the paper loaded in the tray.
For Macintosh users: From the Print dialog, make sure the Paper Type setting matches the paper loaded in the tray.
From the printer control panel Paper menu, make sure the Paper Type setting matches the paper loaded in the tray.
Replace the toner cartridge.
These are possible solutions. Try one or more of the following:
The Toner Darkness setting is too light, the Brightness setting is too light, or the Contrast setting is too low.
From the printer control panel, change these settings from the Quality menu.
For Windows users, change these settings from Print Properties.
For Macintosh users, change these settings from the Print dialog and pop-up menus.
Load paper from a fresh package.
Store paper in its original wrapper until you use it.
Avoid textured paper with rough finishes.
Make sure the paper type setting matches the paper loaded in the tray:
From the printer control panel, check the Paper Type setting from the Paper menu.
Before sending the job to print, specify the correct type setting:
For Windows users, specify the type from Print Properties.
For Macintosh users, specify the type from the Print dialog.
When
appears, order a new print cartridge.Replace the print cartridge.
These are possible solutions. Try one or more of the following:
From Print Properties, the Print dialog, or the printer control panel, select another tray or feeder to feed the paper for the job.
Replace the toner cartridge.
Paper could be caught between the photoconductor kit and the fuser. Check the paper path around the fuser area.
CAUTION—HOT SURFACE: The fuser and the inside of the printer near the fuser may be hot. To reduce the risk of injury from a hot component, allow the surface to cool before removing paper from this area. |
Clear any paper you see.
Contact Customer Support.
These are possible solutions. Try one or more of the following:
From Print Properties, the Print dialog, or the printer control panel, select another tray or feeder to feed paper for the job.
Replace the toner cartridge.
Paper could be caught between the photoconductor kit and the fuser. Check the paper path around the fuser area.
Warning—Potential Damage: Do not touch the photoconductor on the underside of the photoconductor kit. Use the cartridge handle whenever you are holding the cartridge. |
CAUTION—HOT SURFACE: The fuser and the inside of the printer near the fuser may be hot. To reduce the risk of injury from a hot component, allow the surface to cool before removing paper from this area. |
Clear any paper you see.
Contact Customer Support.
These are possible solutions. Try one or more of the following:
If the fill pattern is incorrect, choose a different fill pattern from your software program.
Try a different type of paper.
For transparencies, use only ones recommended by the printer manufacturer.
Make sure the Paper Type setting matches what is loaded in the tray or feeder.
Make sure the Paper Texture setting is correct for the type of paper or specialty media loaded in the tray or feeder.
Remove the toner cartridge and shake it from side to side to redistribute the toner to extend the life of the cartridge, and then reinstall it.
Replace the used toner cartridge with a new one.