Understanding the printer messages
Cartridge, imaging unit mismatch [41.xy]
Check if both the toner cartridge and imaging unit are Lexmark-authorized MICR (magnetic ink character recognition) supplies or non-MICR supplies.
Change the toner cartridge or imaging unit so that both are Lexmark-authorized MICR supplies or non-MICR supplies.
Notes:
- For a list of supported supplies, see the “Ordering supplies” section of the User's Guide or go to www.lexmark.com.
- For more information on MICR, go to www.lexmark.com.
Cartridge low [88.xy]
You may need to order a replacement toner cartridge. If necessary, touch Continue on the scanner control panel to clear the message and continue printing.
Cartridge nearly low [88.xy]
If necessary, touch Continue on the scanner control panel to clear the message and continue printing.
Cartridge very low, [x] estimated pages remain [88.xy]
You may need to replace the toner cartridge very soon. For more information, see the “Replacing supplies” section of the User’s Guide.
If necessary, touch Continue on the scanner control panel to clear the message and continue printing.
Change [paper source] to [custom string] load [orientation]
Try one or more of the following:
Load the correct size and type of paper in the tray, specify the paper size and type in the Paper menu on the control panel, and then touch Finished changing paper.
Touch Use current [paper source] to use the available paper size and type in the tray.
Touch Reset active bin to reset the active bin for a linked set of bins.
Cancel the print job.
Change [paper source] to [custom type name] load [orientation]
Try one or more of the following:
Load the correct size and type of paper in the tray or feeder, specify the size and type of paper in the Paper menu on the control panel, and then touch Finished changing paper.
Touch Use current [paper source] to use the available size and type of paper in the current tray or feeder.
Touch Reset active bin to reset the active bin for a linked set of bins.
Cancel the print job.
Change [paper source] to [paper size] load [orientation]
Try one or more of the following:
Load the correct size and type of paper in the tray or feeder, specify the size and type of paper in the Paper menu on the control panel, and then touch Finished changing paper.
Touch Use current [paper source] to use the available size and type of paper in the current tray or feeder.
Touch Reset active bin to reset the active bin for a linked set of bins.
Cancel the print job.
Change [paper source] to [paper type] [paper size] load [orientation]
Try one or more of the following:
Load the correct size and type of paper in the tray or feeder, specify the paper size and type in the Paper menu on the control panel, and then touch Finished changing paper.
Touch Use current [paper source] to use the available paper size and type in the tray.
Touch Reset active bin to reset the active bin for a linked set of bins.
Cancel the print job.
Check tray [x] connection
Try one or more of the following:
Turn off the printer, and then turn it back on.
If the error occurs a second time, then:
Turn off the printer and the scanner.
Unplug the power cord from the electrical outlet.
Remove the indicated tray.
Reattach the tray.
Connect the power cord to a properly grounded electrical outlet.
Turn on the printer and the scanner.
If the error occurs again, then:
Turn off the printer.
Unplug the power cord from the electrical outlet.
Remove the tray.
Contact customer support.
From the scanner control panel, touch Continue to clear the message and resume the job.
Close door or insert cartridge
The toner cartridge is missing or not installed properly. Insert the cartridge, and then close all doors and covers.
Close finisher rear door
Close the rear door of the finisher.
Close flatbed cover and load originals if restarting job [2yy.xx]
Try one or more of the following:
Touch Scan from automatic feeder to continue scanning from the ADF immediately after the last successful scan job.
Touch Scan from flatbed to continue scanning from the scanner glass immediately after the last successful scan job.
Touch Finish job without further scanning to end the last successful scan job.
| Note: This does not cancel the scan job. All successfully scanned pages will be processed further for copying, faxing, or e-mailing. |
Touch Cancel job to clear the message and cancel the scan job.
Close rear door
Close the rear door of the printer.
Close top access cover
Close the printer top access cover to clear the message.
Complex page, some data may not have printed [39]
Try one or more of the following:
From the scanner control panel, touch Continue to ignore the message and continue printing.
Cancel current print job.
Install additional printer memory.
Configuration change, some held jobs were not restored [57]
Held jobs are invalidated because of the following possible changes in the scanner:
The scanner firmware has been updated.
The tray for the print job has been removed.
The print job is sent from a flash drive that is no longer attached to the USB port.
The scanner hard disk contains print jobs that were stored when the hard disk was installed in a different scanner model.
From the scanner control panel, touch Continue to clear the message.
Defective flash detected [51]
Try one or more of the following:
Replace the defective flash memory card.
From the scanner control panel, touch Continue to ignore the message and continue printing.
Cancel the current print job.
Disk full [62]
Try one or more of the following:
From the scanner control panel, touch Continue to clear the message and continue processing.
Delete fonts, macros, and other data stored on the scanner hard disk.
Install a scanner hard disk with larger capacity.
Disk full, scan job canceled
Try one or more of the following:
Touch Continue to clear the message and continue scanning.
Delete fonts, macros, and other data stored on the scanner hard disk.
Install a hard disk with higher capacity.
Disk must be formatted for use in this device
From the scanner control panel, touch Format disk to format the scanner hard disk and to clear the message.
| Note: Formatting deletes all the files stored on the scanner hard disk. |
Disk near full. Securely clearing disk space.
Try one or more of the following:
Touch Continue to clear the message and continue printing.
Delete fonts, macros, and other data stored on the scanner hard disk.
Install a hard disk with higher capacity.
Empty the hole punch box
Empty the hole punch box.
For instructions on emptying the hole punch box, touch More Information from the scanner control panel.
Reinsert the hole punch box into the finisher, and then touch Continue to clear the message.
Error reading USB drive. Remove USB.
An unsupported USB device is inserted. Remove the USB device, and then insert a supported one.
Error reading USB hub. Remove hub.
An unsupported USB hub has been inserted. Remove the USB hub, and then install a supported one.
Fax memory full
From the scanner control panel, touch Continue to clear the message.
Fax partition inoperative. Contact system administrator.
Try one or more of the following:
From the scanner control panel, touch Continue to clear the message.
Turn off the scanner, and then turn it back on. If the message appears again, then contact your system support person.
Fax server 'To Format' not set up. Contact system administrator.
Try one or more of the following:
From the scanner control panel, touch Continue to clear the message.
Complete the Fax Server setup. If the message appears again, then contact your system support person.
Fax Station Name not set up. Contact system administrator.
Try either of the following:
From the scanner control panel, touch Continue to clear the message.
Complete the Analog Fax setup. If the message appears again after completing the setup, then contact your system support person.
Fax Station Number not set up. Contact system administrator.
Try one or more of the following:
From the scanner control panel, touch Continue to clear the message.
Complete the Analog Fax setup. If the message appears again after completing the setup, then contact your system support person.
Imaging unit low [84.xy]
You may need to order a replacement imaging unit. If necessary, select Continue on the scanner control panel to clear the message and continue printing.
Imaging unit nearly low [84.xy]
If necessary, touch Continue on the scanner control panel to clear the message and continue printing.
Imaging unit very low, [x] estimated pages remain [84.xy]
You may need to replace the imaging unit very soon. For more information, see the “Replacing supplies” section of the User’s Guide.
If necessary, touch Continue on the scanner control panel to clear the message and continue printing.
Incompatible output bin [x] [59]
Try one or more of the following:
Remove the indicated bin.
From the scanner control panel, touch Continue to clear the message and continue printing without using the indicated bin.
Incompatible tray [x] [59]
Try one or more of the following:
Remove the indicated tray.
From the scanner control panel, touch Continue to clear the message and continue printing without using the indicated tray.
Incorrect paper size, open [paper source] [34]
Try one or more of the following:
Load the correct size and type of paper in the tray, and then specify the paper size and paper type in the Paper menu on the scanner control panel.
Make sure the correct paper size and type are specified in the Print Properties or in the Print dialog settings.
Check if the paper size is correctly set. For example, if MP Feeder Size is set to Universal, then make sure the paper is large enough for the data being printed.
Check the length and width guides and make sure the paper is loaded properly in the tray.
From the scanner control panel, touch Continue to clear the message and to print using a different tray.
Cancel the print job.
Insert hole punch box
Insert the hole punch box into the finisher, and then touch Continue to clear the message.
Insert staple cartridge
Try one or more of the following:
Insert Tray [x]
Try one or more of the following:
Install bin [x]
Try one or more of the following:
Install Tray [x]
Try one or more of the following:
Insufficient memory for Flash Memory Defragment operation [37]
Try one or more of the following:
From the scanner control panel, touch Continue to stop the defragmentation and continue printing.
Delete fonts, macros, and other data in the printer memory.
Install additional printer memory.
Insufficient memory to collate job [37]
Try one or more of the following:
From the scanner control panel, touch Continue to print the part of the job already stored and to begin collating the rest of the print job.
Cancel the current print job.
Insufficient memory to support Resource Save feature [35]
Install additional scanner memory or touch Continue to disable Resource Save, to clear the message, and to continue printing.
Insufficient memory, some Held Jobs were deleted [37]
From the scanner control panel, touch Continue to clear the message.
Insufficient memory, some held jobs will not be restored [37]
Try one or more of the following:
From the scanner control panel, touch Continue to clear the message.
Delete other held jobs to free up additional scanner memory.
Load [paper source] with [paper type] [paper size] [paper orientation]
Try one or more of the following:
Load the indicated tray or feeder with the correct size and type of paper.
To use the tray or feeder with the correct size and type of paper, touch Finished loading paper on the scanner control panel.
| Note: If the scanner finds a tray or feeder that has the correct size and type of paper, then it feeds from that tray or feeder. If the scanner cannot find a tray or feeder with the correct size and type of paper, then it prints from the default paper source. |
Cancel the current job.
Load [paper source] with [custom string] [paper orientation]
Try one or more of the following:
Load the indicated tray or feeder with the correct size and type of paper.
To use the tray or feeder with the correct paper size or type, touch Finished loading paper on the scanner control panel.
| Note: If the scanner finds a tray or feeder hat has the correct paper size and type, then it feeds from that tray or feeder. If the scanner cannot find a tray or feeder with the correct paper type and size, then it prints from the default paper source. |
Cancel the current job.
Load [paper source] with [custom type name] [paper orientation]
Try one or more of the following:
Load the tray or feeder with the correct size and type of paper.
To use the tray or feeder with the correct paper size or type, touch Finished loading paper on the scanner control panel.
| Note: If the scanner detects a tray or feeder that has the correct paper size and type, then it feeds from that tray or feeder. If the scanner cannot detect a tray or feeder that has the correct paper size and type, then it prints from the default paper source. |
Cancel the current job.
Load [paper source] with [paper size] [paper orientation]
Try one or more of the following:
Load the tray or feeder with the correct size of paper.
To use the tray or feeder with the correct size of paper, touch Finished loading paper on the scanner control panel.
| Note: If the scanner finds a tray or feeder that has the correct size of paper, then it feeds from that tray or feeder. If the scanner cannot find a tray or feeder with the correct size of paper, then it prints from the default paper source. |
Cancel the current job.
Load Manual Feeder with [custom string] [paper orientation]
Try one or more of the following:
Load the feeder with the correct size and type of paper.
From the scanner control panel, touch Prompt each page, paper loaded or Do not prompt, paper loaded to clear the message and continue printing.
From the scanner control panel, touch Automatically select paper to use the paper loaded in the tray.
Cancel the print job.
Load Manual Feeder with [paper type] [paper size] [paper orientation]
Try one or more of the following:
Load the feeder with the correct size and type of paper.
From the scanner control panel, touch Prompt each page, paper loaded or Do not prompt, paper loaded to clear the message and continue printing.
From the scanner control panel, touch Automatically select paper to use the paper loaded in the tray.
Cancel the print job.
Load Manual Feeder with [custom type name] [paper orientation]
Try one or more of the following:
Load the feeder with the correct size and type of paper.
From the scanner control panel, touch Prompt each page, paper loaded or Do not prompt, paper loaded to clear the message and continue printing.
From the scanner control panel, touch Automatically select paper to use the paper loaded in the tray.
Cancel the print job.
Load Manual Feeder with [paper size] [paper orientation]
Try one or more of the following:
Load the feeder with the correct size of paper.
From the scanner control panel, touch Prompt each page, paper loaded or Do not prompt, paper loaded to clear the message and continue printing.
From the scanner control panel, touch Automatically select paper to use the paper loaded in the tray.
Cancel the print job.
Load staples
Try one or more of the following:
Replace or insert the staple cartridge in the finisher.
For instructions on inserting or replacing a staple cartridge in the finisher, touch More information on the scanner control panel.
From the scanner control panel, touch Continue to clear the message and continue printing.
From the scanner control panel, touch Cancel job to cancel the print job.
Maintenance kit low [80.xy]
You may need to order a maintenance kit. For more information, visit the Lexmark Web site at http://support.lexmark.com or contact customer support, and then report the message. If necessary, touch Continue to clear the message and continue printing.
Maintenance kit nearly low [80.xy]
For more information, visit the Lexmark Web site at http://support.lexmark.com or contact customer support, and then report the message. If necessary, touch Continue to clear the message and continue printing.
Maintenance kit very low, [x] estimated pages remain [80.xy]
You may need to replace the maintenance kit very soon. For more information, visit the Lexmark Web site at http://support.lexmark.com or contact customer support, and then report the message. If necessary, touch Continue to clear the message and continue printing.
Memory full [38]
Try one or more of the following:
From the scanner control panel, touch Cancel job to clear the message.
Install additional scanner memory.
Memory full, cannot send faxes
From the scanner control panel, touch Continue to clear the message and cancel the fax job.
Try one or more of the following:
Reduce the fax resolution, and then resend the fax job.
Reduce the number of pages in the fax, and then resend the fax job.
Misfeed cleared, extra sheets in output bin [24y.xx]
Select Continue on the printer control panel to clear the message and continue printing.
| Note: To reduce misfeeds, make sure that media is fanned and loaded properly. |
No analog phone line connected to modem, fax is disabled.
Connect the printer to an analog phone line.
Network [x] software error [54]
Try one or more of the following:
From the scanner control panel, touch Continue to continue printing.
Turn off the printer and the scanner, then wait for about 10 seconds, and then turn them back on.
Update the network firmware in the scanner or print server. For more information, visit the Lexmark Web site at http://support.lexmark.com.
Non-Lexmark [supply type], see User’s Guide [33.xy]
| Note: The supply type can be a toner cartridge or the imaging unit. |
The printer has detected a non-Lexmark supply or part installed in the printer.
Your Lexmark printer is designed to function best with genuine Lexmark supplies and parts. Use of third-party supplies or parts may affect the performance, reliability, or life of the printer and its imaging components.
All life indicators are designed to function with Lexmark supplies and parts, and may deliver unpredictable results if third-party supplies or parts are used. Imaging component usage beyond the intended life may damage your Lexmark printer or associated components.
| Warning—Potential Damage: Use of third-party supplies or parts can affect warranty coverage. Damage caused by the use of third-party supplies or parts may not be covered by the warranty. |
To accept any and all of these risks, and to proceed with the use of non-genuine supplies or parts in your printer, touch and hold  and the # on the scanner control panel simultaneously for 15 seconds to clear the message and continue printing.
If you do not want to accept these risks, then remove the third-party supply or part from your printer, and then install a genuine Lexmark supply or part.
| Note: For the list of supported supplies, see the “Ordering supplies” section of the User's Guide or visit www.lexmark.com. |
Not enough free space in flash memory for resources [52]
Try one or more of the following:
From the scanner control panel, touch Continue to clear the message and continue printing.
Delete fonts, macros, and other data stored in the flash memory.
Install a flash memory card with larger capacity.
| Note: Downloaded fonts and macros not previously stored in the flash memory are deleted. |
Paper changes needed
Try one or more of the following:
Parallel port [x] disabled [56]
Try one or more of the following:
From the scanner control panel, touch Continue to clear the message.
Enable the parallel port. From the scanner control panel, navigate to:
Network/Ports > Parallel [x] > Parallel Buffer > Auto
| Note: The scanner discards any data received through the parallel port. |
Printer had to restart. Last job may be incomplete.
From the scanner control panel, touch Continue to clear the message and continue printing.
For more information, visit http://support.lexmark.com or contact customer support.
Reattach bin [x]
Try one or more of the following:
Turn off the printer and the scanner, and then turn them back on.
Reattach the indicated bin.
Turn off the printer and the scanner.
Unplug the power cord of the printer from the electrical outlet.
Remove the indicated bin.
Reattach the bin.
Connect the power cord of the printer to a properly grounded electrical outlet.
Turn on the printer and the scanner.
Remove the indicated bin:
Turn off the printer and the scanner.
Unplug the power cord of the printer from the electrical outlet.
Remove the indicated bin.
Contact customer support at http://support.lexmark.com or contact your service representative.
Connect the power cord of the printer to a properly grounded electrical outlet.
Turn on the printer and the scanner.
From the scanner control panel, touch Continue to clear the message and print without using the indicated bin.
Reattach bins [x] – [y]
Try one or more of the following:
Turn off the printer and the scanner, and then turn them back on.
Reattach the indicated bins:
Turn off the printer and the scanner.
Unplug the power cord of the printer from the electrical outlet.
Remove the indicated bins.
Reattach the bins.
Connect the power cord of the printer to a properly grounded electrical outlet.
Turn on the printer and the scanner.
Remove the indicated bins:
Turn off the printer and the scanner.
Unplug the power cord of the printer from the electrical outlet.
Remove the indicated bins.
Contact customer support at http://support.lexmark.com or contact your service representative.
Connect the power cord of the printer to a properly grounded electrical outlet.
Turn on the printer and the scanner.
From the scanner control panel, touch Continue to clear the message and print without using the indicated bins.
Reinstall missing or unresponsive cartridge [31.xy]
Try one or more of the following:
Check if the toner cartridge is missing. If missing, install the toner cartridge.
For information on installing the cartridge, see the “Replacing supplies” section of the User’s Guide.
If the toner cartridge is installed, then remove the unresponsive toner cartridge, and then reinstall it.
| Note: If the message appears after reinstalling the supply, then the cartridge is defective. Replace the toner cartridge. |
Reinstall missing or unresponsive fuser [31.xy]
Try one or more of the following:
Remove the unresponsive fuser, and then reinstall it.
| Note: If the message appears after reinstalling the supply, then the fuser is defective. Replace the fuser. |
Install the missing fuser.
For more information on installing the fuser, see the instruction sheet that came with the part.
Reinstall missing or unresponsive imaging unit [31.xy]
Try one or more of the following:
Check if the imaging unit is missing. If missing, install the imaging unit.
For information on installing the imaging unit, see the “Replacing supplies” section of the User’s Guide.
If the imaging unit is installed, then remove the unresponsive imaging unit, and then reinstall it.
| Note: If the message appears after reinstalling the supply, then the imaging unit is defective. Replace the imaging unit. |
Remove defective disk [61]
Remove and replace the defective printer hard disk.
Remove packaging material, [area name]
Remove any remaining packaging material from the specified location.
Remove paper from all bins
Remove the paper from all of the bins. The printer automatically senses paper removal and resumes printing.
If removing the paper does not clear the message, then touch Continue.
Remove paper from bin [x]
Remove the paper from the specified bin. The printer automatically senses paper removal and resumes printing.
If removing the paper does not clear the message, then touch Continue.
Remove paper from [linked set bin name]
Remove paper from the specified bin. The printer automatically detects paper removal and resumes printing.
If removing the paper does not clear the message, then touch Continue.
Remove paper from standard output bin
Remove the paper stack from the standard bin.
Replace all originals if restarting job.
Try one or more of the following:
Touch Cancel job to clear the message and cancel the scan job.
Touch Scan from automatic feeder to continue scanning from the ADF immediately after the last successful scan job.
Touch Scan from flatbed to continue scanning from the scanner immediately after the last successful scan job.
Touch Finish job without further scanning to end the last successful scan job.
Touch Restart job to restart the scan job with the same settings from the previous scan job.
Replace cartridge, 0 estimated pages remain [88.xy]
Replace the toner cartridge to clear the message and continue printing. For more information, see the instruction sheet that came with the supply or see the “Replacing supplies” section of the User’s Guide.
| Note: If you do not have a replacement cartridge, then see the “Ordering supplies” section of the User’s Guide or visit www.lexmark.com. |
Replace cartridge, printer region mismatch [42.xy]
Install a toner cartridge that matches the region number of the printer. x indicates the value of the printer region. y indicates the value of the cartridge region. x and y can have the following values:
List of printer and toner cartridge regions0 | Global |
1 | United States, Canada |
2 | European Economic Area (EEA), Switzerland |
3 | Asia Pacific, Australia, New Zealand |
4 | Latin America |
5 | Africa, Middle East, rest of Europe |
9 | Invalid |
Notes:
- The x and y values are the .xy of the error code shown on the scanner control panel.
- The x and y values must match for printing to continue.
Replace imaging unit, 0 estimated pages remain [84.xy]
Replace the imaging unit to clear the message and continue printing. For more information, see the instruction sheet that came with the supply or see the “Replacing supplies” section of the User’s Guide.
| Note: If you do not have a replacement imaging unit, then see the “Ordering supplies” section of the User’s Guide or visit www.lexmark.com. |
Replace jammed originals if restarting job.
Try one or more of the following:
Touch Cancel job to clear the message and cancel the scan job.
Touch Scan from automatic feeder to continue scanning from the ADF immediately after the last successful scan job.
Touch Scan from flatbed to continue scanning from the scanner immediately after the last successful scan job.
Touch Finish job without further scanning to end the last successful scan job.
Touch Restart job to restart the scan job with the same settings from the previous scan job.
Replace last scanned page and jammed originals if restarting job.
Try one or more of the following:
Touch Cancel job to clear the message and cancel the scan job.
Touch Scan from automatic feeder to continue scanning from the ADF immediately after the last successful scan job.
Touch Scan from flatbed to continue scanning from the scanner immediately after the last successful scan job.
Touch Finish job without further scanning to end the last successful scan job.
Touch Restart job to restart the scan job with the same settings from the previous scan job.
Replace maintenance kit, 0 estimated pages remain [80.xy]
Contact customer support at http://support.lexmark.com or your service representative, and then report the message. The printer is scheduled for maintenance.
Replace missing fuser [31.xy]
Install the missing fuser. For more information, see the instruction sheet that came with the replacement part.
From the scanner control panel, touch Continue to clear the message.
Replace roller kit [81.xy]
Try one or more of the following:
Replace the roller kit. For more information, see the instruction sheet that came with the part.
From the scanner control panel, select Continue to clear the message and continue printing.
Replace separator pad
Try one or more of the following:
Replace the separator pad. For more information, see the instruction sheet that came with the supply.
From the scanner control panel, touch Ignore to clear the message.
Replace unsupported cartridge [32.xy]
Remove the toner cartridge, and then install a supported one to clear the message and continue printing. For more information, see the instruction sheet that came with the supply or see the “Replacing supplies” section of the User’s Guide.
| Note: If you do not have a replacement cartridge, then see the “Ordering supplies” section of the User’s Guide or visit www.lexmark.com. |
Replace unsupported fuser [32.xy]
Remove the fuser, and then install a supported one. For more information, see the instruction sheet that came with the part.
Replace unsupported imaging unit [32.xy]
Remove the imaging unit, and then install a supported one to clear the message and continue printing. For more information, see the instruction sheet that came with the supply or see the “Replacing supplies” section of the User’s Guide.
| Note: If you do not have a replacement imaging unit, then see the “Ordering supplies” section of the User’s Guide or visit www.lexmark.com. |
Replace wiper
Try one or more of the following:
Restore held jobs?
Try one or more of the following:
From the scanner control panel, touch Restore to restore all held jobs stored in the scanner hard disk.
From the scanner control panel, touch Do not restore if you do not want to restore any of the print jobs.
Scan document too long
The scan job exceeds the maximum number of pages. Touch Cancel job to clear the message and cancel the scan job.
Scanner automatic feeder cover open
Close the ADF cover.
Scanner disabled by admin [840.01]
Print without the scanner, or contact your system support person.
Scanner disabled. Contact system administrator if problem persists. [840.02]
Try one or more of the following:
Touch Continue with scanner disabled to return to the home screen, and then contact your system support person.
Touch Reboot and automatically enable scanner to cancel the job.
| Note: This attempts to enable the scanner. |
Scanner jam, open and close automatic feeder top cover [2yy.xx]
Remove the jammed paper from the ADF cover.
Scanner jam, remove all originals from the scanner [2yy.xx]
Remove the jammed paper from the scanner.
Scanner jam, remove jammed originals from the scanner [2yy.xx]
Remove the jammed paper from the scanner.
Scanner locked, release lock under scanner
Unlock the scan bar.
Touch Continue to clear the message and continue scanning.
Scanner maintenance required soon, use ADF Kit [80]
Contact customer support, and then report the message. The printer is scheduled for maintenance.
Serial option [x] error [54]
Try one or more of the following:
From the scanner control panel, touch Continue to continue printing.
Check that the serial cable is properly connected and is the correct one for the serial port.
Check that the serial interface parameters (protocol, baud, parity, and data bits) are set correctly on the scanner and on the computer.
Turn off the scanner, and then turn it back on.
Serial port [x] disabled [56]
Try one or more of the following:
From the scanner control panel, touch Continue to clear the message.
The scanner discards any data received through the specified serial port.
Make sure Serial Buffer is not set to Disabled.
From the scanner control panel, set Serial Buffer to Auto in the Serial [x] menu.
Some held jobs were not restored
From the scanner control panel, touch Continue to delete the indicated job.
| Note: Held jobs that are not restored remain in the scanner hard disk and are inaccessible. |
Standard network software error [54]
Try one or more of the following:
From the scanner control panel, touch Continue to continue printing.
Unplug the router, then wait for 30 seconds, and then plug it back again.
Turn off the scanner and printer, and then turn back on the printer and then the scanner.
Update the network firmware in the printer or print server. For more information, visit the Lexmark Web site at http://support.lexmark.com.
Standard USB port disabled [56]
Try one or more of the following:
From the scanner control panel, touch Continue to clear the message.
Enable the USB port. From the scanner control panel, navigate to:
Network/Ports > USB Buffer > Auto
The scanner discards any data received through the USB port.
Supply needed to complete job
Do either of the following:
The device is operating in Safe Mode. Some print options may be disabled or provide unexpected results.
Touch Continue on the control panel to clear the message and continue printing.
Too many bins attached [58]
Turn off the printer.
Unplug the power cord from the electrical outlet.
Remove the extra bins.
Connect the power cord to a properly grounded electrical outlet.
Turn the printer back on.
Too many disks installed [58]
Turn off the printer.
Unplug the power cord from the electrical outlet.
Remove the extra printer hard disks.
Connect the power cord to a properly grounded electrical outlet.
Turn the printer back on.
Too many flash options installed [58]
Turn off the printer.
Unplug the power cord from the electrical outlet.
Remove the extra flash memory.
Connect the power cord to a properly grounded electrical outlet.
Turn the printer back on.
Too many trays attached [58]
Turn off the printer.
Unplug the power cord from the electrical outlet.
Remove the extra trays.
Connect the power cord to a properly grounded electrical outlet.
Turn the printer back on.
Tray [x] paper size unsupported
Replace with a supported paper size.
Unformatted flash detected [53]
Try one or more of the following:
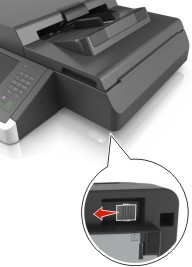
Unsupported camera mode, unplug camera and change mode
The camera mode does not support PictBridge.
Unplug the camera, change the mode and plug the camera back into the printer.
Unsupported disk
An unsupported disk has been inserted. Remove the unsupported disk, and then install a supported one.
Unsupported option in slot [x] [55]
Turn off the scanner.
Unplug the power cord from the electrical outlet.
Remove the unsupported option card from the scanner controller board, and then replace it with a supported card.
Connect the power cord to a properly grounded electrical outlet.
Turn on the scanner.
USB port [x] disabled [56]
From the scanner control panel, touch Continue to clear the message.
Notes:
- The scanner discards any data received through the USB port.
- Make sure the USB Buffer menu is not set to Disabled.
Weblink server not set up. Contact system administrator.
From the scanner control panel, touch Continue to clear the message.
| Note: If the message appears again, then contact your system support person. |