 . If Jam Recovery is set to On, the printer prints a new copy of the page that jammed. If Jam Recovery is set to Auto, the printer may or may not print a new copy of the page that jammed.
By carefully selecting paper and loading it properly, you can avoid most jams. If jams do occur, follow the steps outlined in this chapter.
To clear a jam message and resume printing, clear the entire paper path, and then press . If Jam Recovery is set to On, the printer prints a new copy of the page that jammed. If Jam Recovery is set to Auto, the printer may or may not print a new copy of the page that jammed.
The following hints can help you avoid jams:
Make sure the paper lies flat in the paper tray.
Do not remove the paper tray while the printer is printing.
Do not load the paper tray while the printer is printing. Load it prior to printing, or wait for a prompt to load it.
Do not load too much paper. Make sure the stack height does not exceed the indicated maximum height.
Make sure the guides in the paper tray or the manual feeder are properly positioned and are not pressing too tightly against the paper or envelopes.
Push the paper tray in firmly after loading paper.
Use only recommended paper or specialty media.
Do not load wrinkled, creased, damp, bent, or curled paper.
Flex, fan, and straighten paper before loading it.

Do not use paper that has been cut or trimmed by hand.
Do not mix paper sizes, weights, or types in the same stack.
Make sure all sizes and types are set correctly in the printer control panel menus.
Store paper per the manufacturer's recommendations.
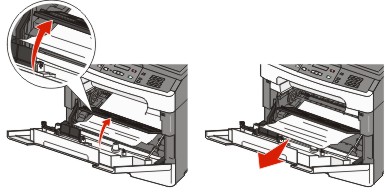
Remove the tray from the printer.

Remove the jam if you see it here.
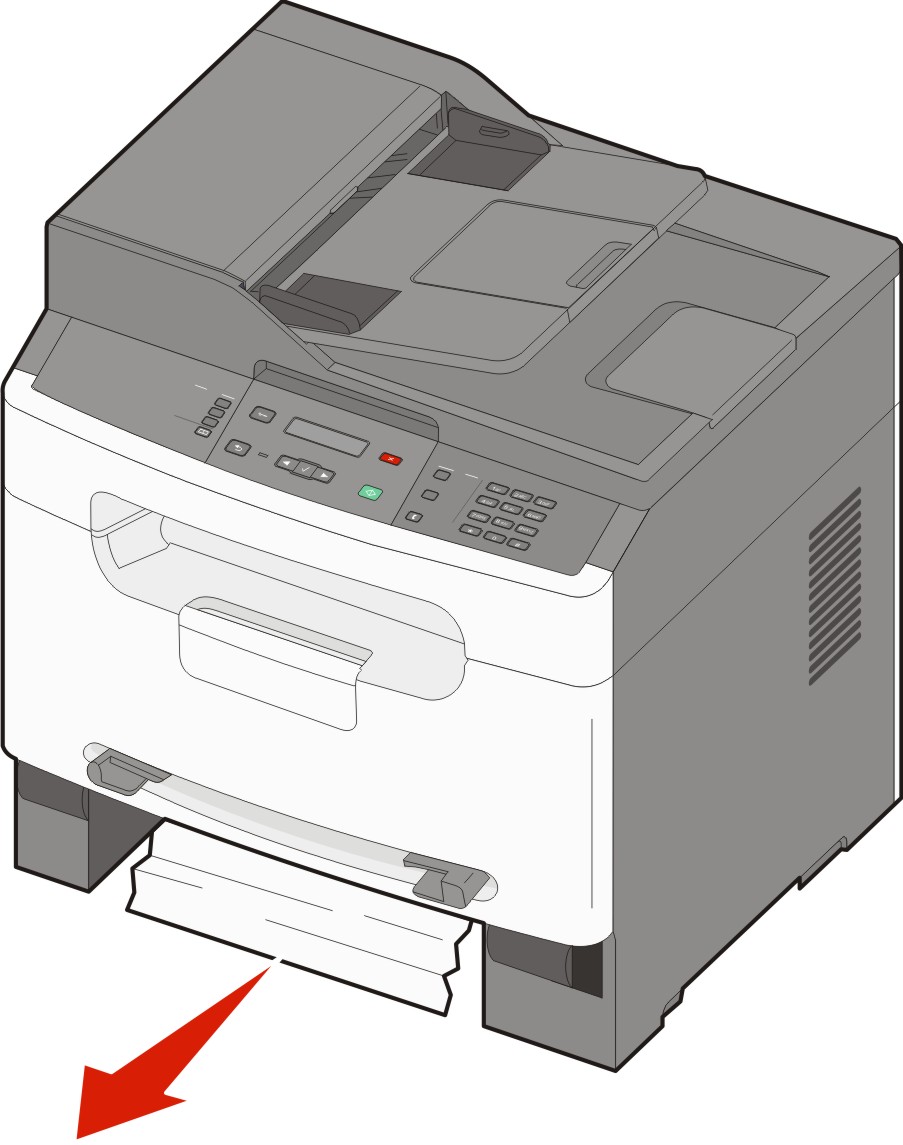
If you do not see it, see 201 paper jam.
Open the front door, and then remove the photoconductor kit and toner cartridge.

Lift the flap at the front of the printer, and remove any jammed sheets.

Align and insert the photoconductor kit and toner cartridge.
Close the front door.
Insert the tray.
Press .
 | CAUTION—HOT SURFACE: The inside of the printer might be hot. To reduce the risk of injury from a hot component, allow the surface to cool before touching. |
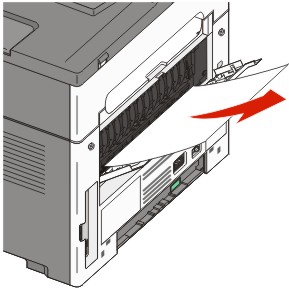
Open the front door, and then remove the photoconductor kit and toner cartridge.
Lift the flap at the front of the printer, and then remove any jammed sheets.
Open the rear door.
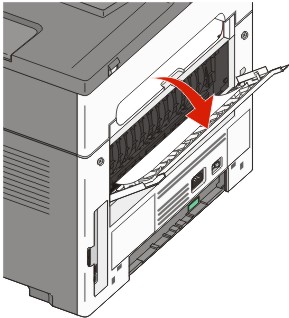
Remove the jam.
Close the rear door.
Align and insert the photoconductor kit and toner cartridge.
Close the front door.
Press .
A sheet of paper or specialty media failed to feed completely from the manual feeder. Part of it may be still visible. If it is visible, then gently pull the jammed sheet from the front of the manual feeder.

If the sheet is not visible, then complete the following steps:
Remove the photoconductor kit and toner cartridge.
Lift the flap at the front of the printer, and then remove any jammed sheets.
Align and insert the photoconductor kit and toner cartridge.
Press .

