. If Jam Recovery is set to On, then the printer prints a new copy of the page that jammed. If Jam Recovery is set to Auto, then the printer reprints the jammed page if enough printer memory is available.
To clear a jam message and resume printing, clear the entire paper path, and then press . If Jam Recovery is set to On, then the printer prints a new copy of the page that jammed. If Jam Recovery is set to Auto, then the printer reprints the jammed page if enough printer memory is available.
| Note: To resolve any message, all paper or specialty media must be cleared from the entire paper path. |
Open doors and covers, and remove trays to access jam locations. The following illustration and table indicate these locations. See Jam message numbers and how to access each jam for a list of jam numbers and instructions for how to access each jam.
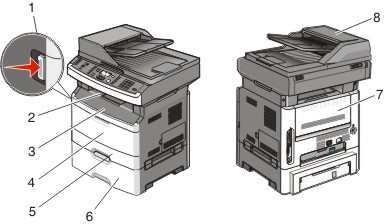
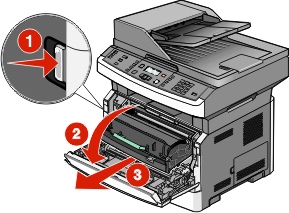
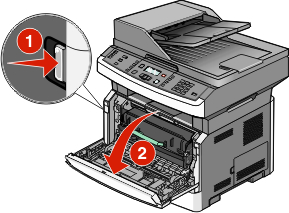
1 | Push the button to open the front door. Inside are the toner cartridge and photoconductor kit. |
2 | Standard exit bin |
3 | Front door |
4 | Multipurpose or manual feeder door Note: Some printer models have a multipurpose feeder and some have a manual feeder |
5 | Tray 1 |
6 | Optional 250- or 550-sheet tray (Tray 2) |
7 | Rear door |
8 | ADF |
 | CAUTION—HOT SURFACE: The fuser and the inside of the printer near the fuser may be hot. To reduce the risk of injury from a hot component, allow the surface to cool before removing paper from this area. |
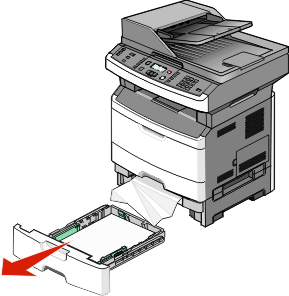
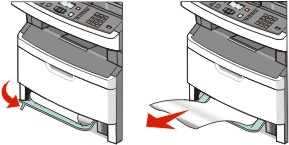
Pull the tray completely out.
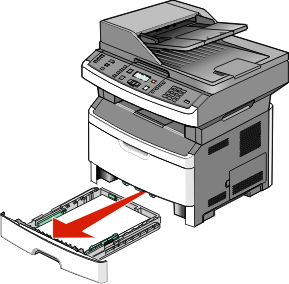
Remove the jam if you see it here.
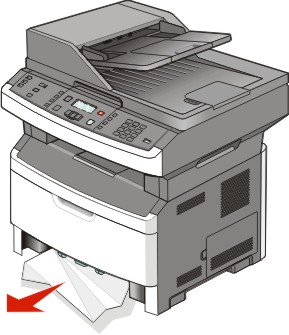
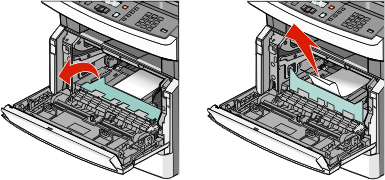
If you do not see the jam, open the front door, and then remove the photoconductor kit and toner cartridge.
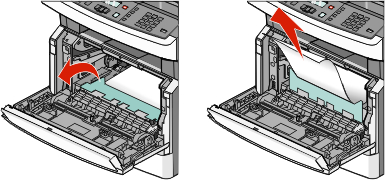
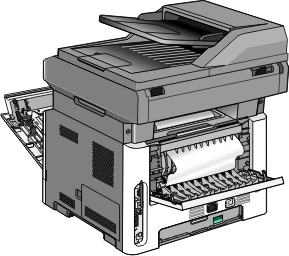
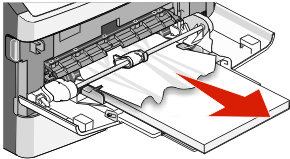
Lift the flap at the front of the printer, and then remove any jammed sheets.
Insert the photoconductor kit and toner cartridge.
Close the front door.
Press .
| | CAUTION—HOT SURFACE: The fuser and the inside of the printer near the fuser may be hot. To reduce the risk of injury from a hot component, allow the surface to cool before removing paper from this area. |
Open the front door, and then remove the photoconductor kit and toner cartridge.
Lift the flap in front of the printer, and then remove any jammed sheets.
If you do not see any jammed sheets, open the rear door.
Remove the jam.
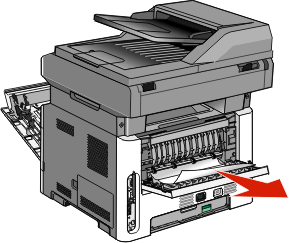
Close the rear door.
Insert the photoconductor kit and toner cartridge.
Close the front door.
Press .
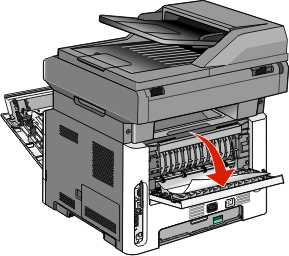
| | CAUTION—HOT SURFACE: The fuser and the inside of the printer near the fuser may be hot. To reduce the risk of injury from a hot component, allow the surface to cool before removing paper from this area. |
Open the front door.
Open the rear door.
Remove the jam.
Close the rear door.
Close the front door.
Press .
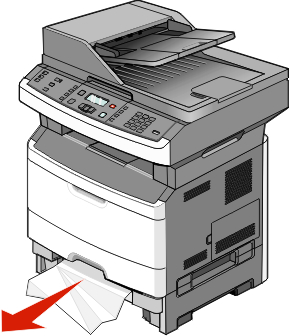
Remove the tray from the printer.
Locate the lever shown, and then pull it down to release and remove the jammed sheets.
Insert the tray.
Press .
If this does not clear the jam, complete the steps in 231 paper jam.
A single jam or multiple jams are in the duplex area of the printer. To locate and remove the jammed sheets, complete all the steps in:
A sheet of paper failed to feed from the multipurpose feeder. If it is visible, gently pull the jammed sheet out.
If the sheet is not visible, complete the following steps:
Open the front door, and then remove the photoconductor kit and toner cartridge.
Lift the flap at the front of the printer, and then remove any jams.
Reinsert the photoconductor kit and toner cartridge.
Close the front door.
Press .
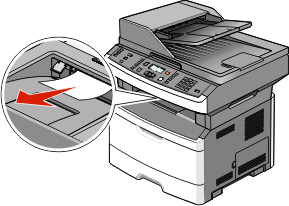
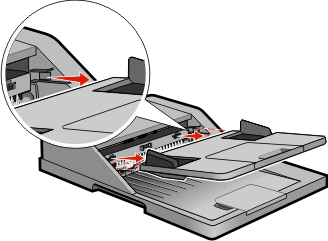
Remove all original documents from the ADF.
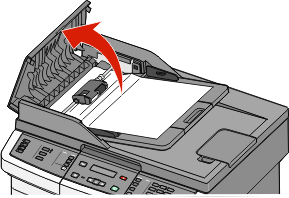
Open the ADF cover.
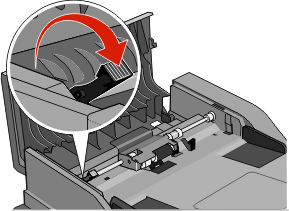
Unlock the separator roll.
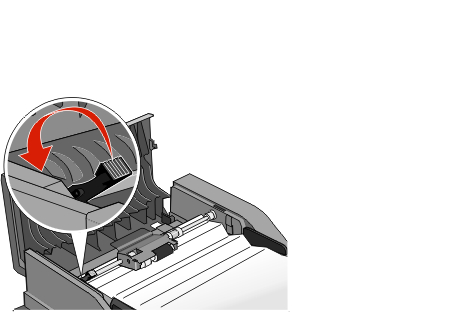
Remove the separator roll.
Remove the jammed paper.
Reinstall the separator roll.

Lock the separator roll.
Close the ADF cover.

Press .
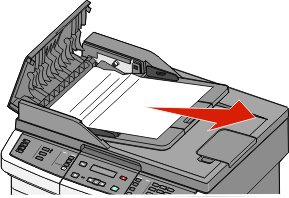
Open the scanner cover, and then remove any jammed pages.
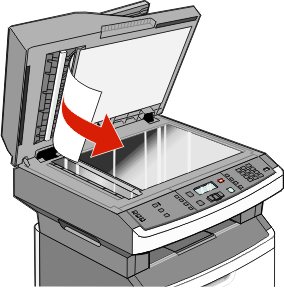
Press .
If you are making a two-sided copy in the ADF, and your original document jams, it may be necessary to perform the following steps to clear the jam:
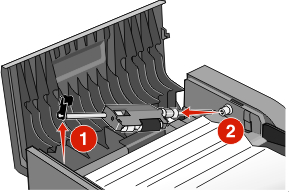
Remove the ADF tray.
Remove the jammed paper by pulling the lower edge of the sheet exiting the ADF.
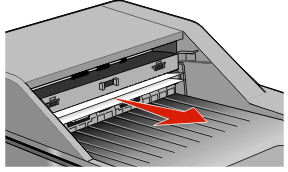
Reinstall the ADF tray.

Press .