Installing a 250- or 550-sheet drawer
The printer supports one optional drawer; you can install a 250- or 550-sheet drawer.
 | CAUTION—SHOCK HAZARD: If you are accessing the system board or installing optional hardware or memory devices sometime after setting up the printer, then turn the printer off, and unplug the power cord from the wall outlet before continuing. If you have any other devices attached to the printer, then turn them off as well, and unplug any cables going into the printer. |
Unpack the drawer, and then remove any packing material from the outside of the drawer.
Remove the tray from the support unit.
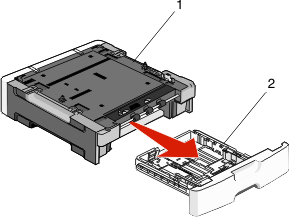
1
Support unit
2
Tray
Remove any packing material and tape from inside the tray.
Insert the tray into the support unit.
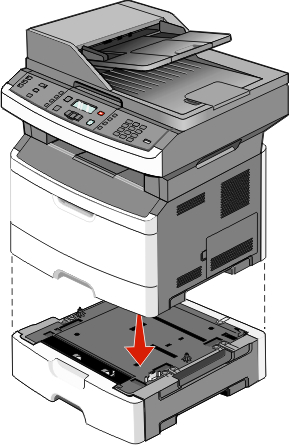
Place the drawer in the location chosen for the printer.
Align the printer with the drawer, and then lower the printer into place.