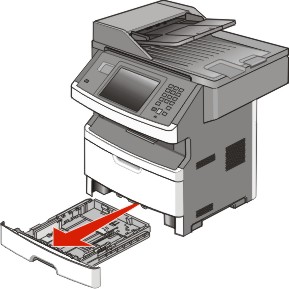
Pull the tray completely out.
| Note: Do not remove trays while a job prints or while appears on the display. Doing so may cause a jam. |
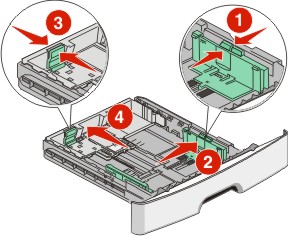
Squeeze and slide the guides to the correct position for the paper size you are loading.
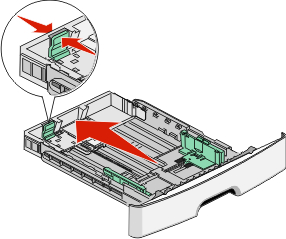
For long paper like A4 or legal, squeeze and slide the length guide backwards to accommodate the length of paper you are loading.
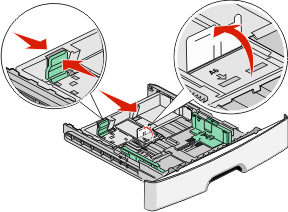
If you are loading A6-size paper:
Squeeze and slide the length guide toward the center of the tray to the A5 size position.
Raise the A6 backstop.
- The standard tray accommodates only 150 sheets of A6-size paper. Notice the maximum fill line on the A6 backstop which indicates the maximum height for loading A6-size paper. Do not try to overload the tray.
- A6-size paper cannot be loaded in the optional tray.
Notes:
| Note: Use the size indicators on the bottom of the tray to help position the guide. |
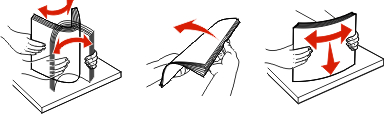
Flex a stack of paper back and forth to loosen the sheets, and then fan them. Do not fold or crease the paper. Straighten the edges on a level surface.
Load the paper stack toward the back of the tray as shown with the recommended print side facedown.
| Note: The maximum fill line on the width guide indicates the maximum height for loading paper. Do not load A6-size paper to the maximum fill line; the tray holds only 150 sheets of A6-size paper. |
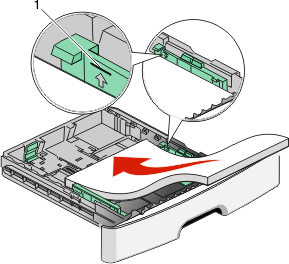
1 | Maximum fill line |
Load letterhead with the top edge of the sheet toward the front of the tray and the design facedown.

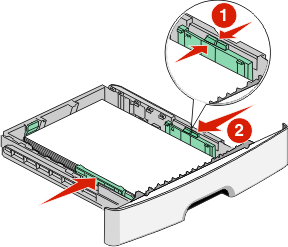
Squeeze and slide the guides to lightly touch the side of the stack.
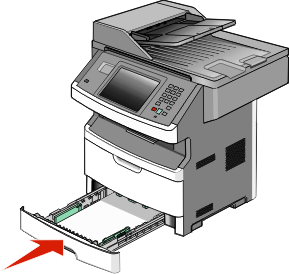
Insert the tray.
If the paper type you loaded differs from the type that was previously loaded in the tray, then change the Paper Size/Type setting on the Paper menu.