Turn the printer off.
Clean the scanner glass and backing material.
Hold down  and
and  while turning the printer on.
Release the buttons when the screen with the progress bar appears.
The printer performs a power-on sequence, and then the Configuration menu appears.
Touch the down arrow until appears.
Touch Scanner Manual Registration.
Touch Print Quick Test to print a registration page.
Choose the section of the scanner to align.
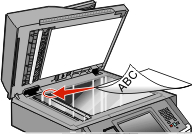
To align the scanner glass (flatbed):
Place the Quick Test page facedown on the scanner glass.
Touch Copy Quick Test.
The scanner prints a copy of the Quick Test page.
Touch Flatbed.
Use the copy of the Quick Test page to adjust the Left Margin and Top Margin settings.
Touch Submit.
Touch Copy Quick Test and compare the new copy to the original.
Repeat the flatbed alignment steps until the position on the page of the Quick Test copy closely matches the original.
To align the ADF:
Do one of the following:
To align the ADF front: place the Quick Test page faceup, short edge first into the ADF.
To align the ADF back: place the Quick Test page facedown, short edge first into the ADF.
Touch Copy Quick Test.
The scanner prints a copy of the Quick Test page.
Touch ADF Front or ADF Back.
Use the copy of the Quick Test page to adjust the Horizontal Adjust and Top Margin settings.
Touch Submit.
Touch Copy Quick Test and compare the new copy to the original.
Repeat the ADF alignment steps until the position on the page of the Quick Test copy closely matches the original.
Touch Back.
Touch Exit Configuration.