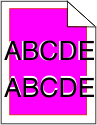
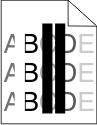
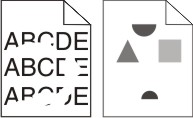
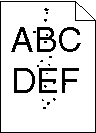
The information in the following topics may help you solve print quality problems. If these suggestions do not correct the problem, contact Customer Support. You may have a printer part that requires adjustment or replacement.
To help isolate print quality problems, print the print quality test pages:
Turn the printer off.
Load letter- or A4-size paper in the tray.
Hold down and
while turning the printer on.
Release the buttons when the screen with the progress bar appears.
The printer performs a power-on sequence, and then the Configuration menu appears.
Touch Print Quality Pages.
Touch Print Quality Pages again.
The print quality test pages print.
Touch Back.
Touch Exit Config Menu.
These are possible solutions. Try one or more of the following:
Remove the toner cartridge and make sure the packing material is properly removed. Reinstall the toner cartridge.
Remove the toner cartridge from the printer. Shake the cartridge back and forth several times, and then reinstall it.
Install a new toner cartridge.
Replace the defective or empty toner cartridge.
Call for service.
Color has shifted outside of the appropriate area or has been superimposed over another color area. These are possible solutions. Try one or more of the following:
From the printer control panel Quality menu, perform Color Adjust.
Remove and reinstall the photoconductor.
Turn the printer off.
Load letter- or A4-size paper in the tray.
Hold down and
while turning the printer on.
Release the buttons when the screen with the progress bar appears.
The printer performs a power-on sequence, and then the Configuration menu appears.
Touch the down arrow until
appears.Touch Color Alignment.
Touch Color Alignment again.
The color alignment pages print.
Touch the down arrow until
appears, and then touch Color Alignment.From the printed sheet, find the straightest of the 20 lines beside the letter A.
Touch the left or right arrow to select that number.
Repeat steps 9 and 10 to align sets B through L.
Touch Back.
Touch Exit Config Menu.
Note: If the issue is not resolved, then recalibrate again. If necessary, adjust the color alignment again. |
These are possible solutions. Try one or more of the following:
Move the width and length guides in the tray to the correct positions for the paper size loaded.
Make sure the paper size setting matches the paper loaded in the tray:
From the printer control panel, check the Paper Size setting from the Paper menu.
Before sending the job to print, specify the correct size setting:
For Windows users, specify the size from Print Properties.
For Macintosh users, specify the size from the Page Setup dialog.
These are possible solutions. Try one or more of the following:
Move the guides in the tray to the correct positions for the paper size loaded.
Make sure the paper size setting matches the paper loaded in the tray:
From the printer control panel, check the Paper Size setting from the Paper menu.
Before sending the job to print, specify the correct size setting:
For Windows users, specify the size from Print Properties.
For Macintosh users, specify the size from the Page Setup dialog.
![]() | ![]() |
These are possible solutions. Try one or more of the following:
Replace the defective toner cartridge.
Replace the defective photoconductor.
Replace the transfer module.
Clean the printhead lenses.
These are possible solutions. Try one or more of the following:
Make sure the paper type setting matches the paper loaded in the tray:
From the printer control panel, check the Paper Type setting from the Paper menu.
Before sending the job to print, specify the correct type setting:
For Windows users, specify the type from Print Properties.
For Macintosh users, specify the type from the Print dialog.
Load paper from a fresh package.
Store paper in its original wrapper until you use it.
These are possible solutions. Try one or more of the following:
Load paper from a fresh package.
Make sure the Paper Type and Paper Weight settings match the type of paper that you are using.
Avoid textured paper with rough finishes.
Replace the toner cartridge, the transfer module, or the fuser.
These are possible solutions. Try one or more of the following:
The Toner Darkness setting is too dark, the RGB Brightness setting is too dark, or the RGB Contrast setting is too high.
From the printer control panel, change these settings from the Quality menu.
For Windows users, change these settings from Print Properties.
For Macintosh users, change these settings from the Print dialog and pop-up menus.
Perform Color Adjust from the printer control panel Quality menu.
Replace the worn or defective toner cartridge.
These are possible solutions. Try one or more of the following:
The Toner Darkness setting is too light, the RGB Brightness setting is too light, or the RGB Contrast setting is too low.
From the printer control panel, change these settings from the Quality menu.
For Windows users, change these settings from Print Properties.
For Macintosh users, change these settings from the Print dialog and pop-up menus.
Perform Color Adjust from the printer control panel Quality menu.
Load paper from a new package.
Avoid textured paper with rough finishes.
Make sure the paper you load in the trays is not damp.
Make sure the Paper Type and Paper Weight settings match the type of paper that you are using.
Turn Color Saver off in the printer control panel Quality menu.
Remove the specified cartridge from the printer. Shake the cartridge back and forth several times, and then reinstall it.
Install a new toner cartridge.
Replace the worn or defective toner cartridge.
These are possible solutions. Try one or more of the following:
Replace a toner cartridge if the defects occur every:
33.0 mm (1.30 in.)
35.3 mm (1.39 in.)
Replace a photoconductor if the defects occur every:
28.3 mm (1.11 in.)
72.4 mm (2.85 in.)
Replace the fuser if the defects occur every:
47.4 mm (1.87 in.)
94.8 mm (3.73 in.)
113.0 mm (4.45 in.)
These are possible solutions. Try one or more of the following:
Select another tray or feeder to feed paper for the job:
From the printer control panel, select the Default Source from the Paper Menu.
For Windows users, select the paper source from Print Properties.
For Macintosh users, select the paper source from the Print dialog and pop-up menus.
Replace the defective toner cartridge.
Replace the transfer module.
These are possible solutions. Try one or more of the following:
Reinstall or replace the defective toner cartridge.
Replace the transfer module.
Replace the worn or defective photoconductor.
Replace the fuser.
Contact Customer Support.
These are possible solutions. Try one or more of the following:
Make sure the paper type setting matches the paper loaded in the tray.
Change the Paper Weight from Normal to Heavy. If necessary, change the Paper Texture from Normal to Rough in the printer control panel Paper menu.
Replace the fuser.
Try one or more of the following:
Use only transparencies recommended by the printer manufacturer.
Make sure the paper type setting matches the paper loaded in the tray:
From the printer control panel, check the Paper Type setting from the Paper menu.
Before sending the job to print, specify the correct type setting:
For Windows users, specify the type from Print Properties.
For Macintosh users, specify the type from the Print dialog.