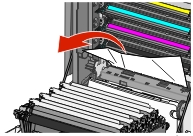
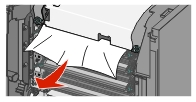
If the jammed paper is visible under the fuser, then firmly grasp the paper on each side, and then gently pull it out.
| Note: Make sure all paper fragments are removed. |
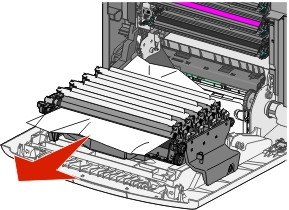
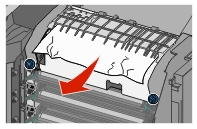
If the jammed paper paper is visible at the top paper guide in the fuser assembly, then firmly grasp the paper on each side, and then gently pull it out.
| Note: Make sure all paper fragments are removed. |
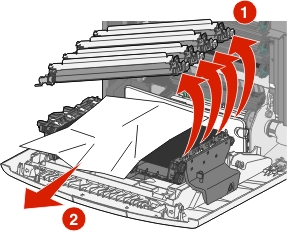
If the jammed paper is not visible, then remove the fuser unit:
| Warning—Potential Damage: Do not touch the roller at the center of the fuser unit. Doing so may damage the fuser. |
Turn the screws on the fuser counterclockwise to loosen them.
Using the handholds on each side, lift and pull the fuser out of the printer.
 | CAUTION—HOT SURFACE: The fuser might be hot. To reduce the risk of injury from a hot component, allow the surface to cool before touching it. |
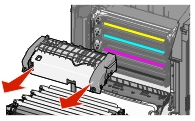
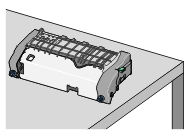
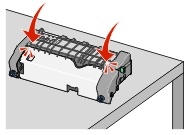
Place the fuser on a flat surface with the blue thumb screws facing you.
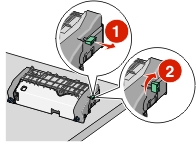
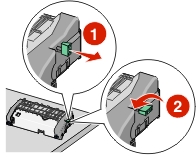
Pull and then rotate the green rectangular knob clockwise to unlock the top paper guide.
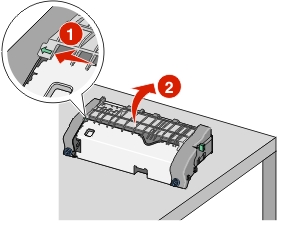
Press the green arrow tab to the left, and then lift the top paper guide.
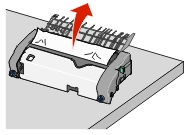
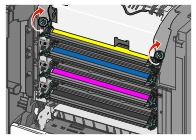
Firmly grasp the jammed paper on each side, and then gently pull it out.
| Note: Make sure all paper fragments are removed. |
Close the top paper guide. Make sure both sides of the paper guide are firmly seated.
Pull and then rotate the green rectangular knob counterclockwise to firmly secure the top paper guide.
Reinstall the fuser unit:
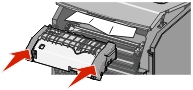
Align the fuser unit using the handholds on each side, and then place it back into the printer.
Turn the screws clockwise to fasten the fuser securely.