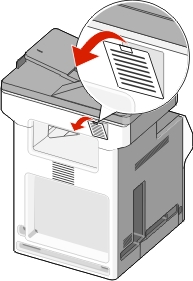
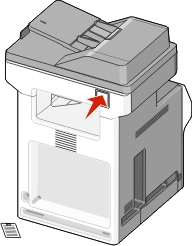
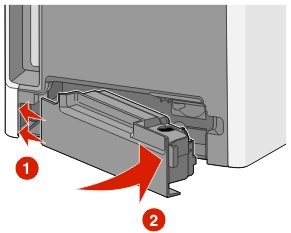
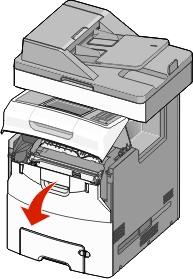
Open the printer top access cover, and then open the front door.
Warning—Potential Damage: To avoid overexposing the photoconductors, do not leave the front door open for more than 10 minutes. |
![]() | ![]() |
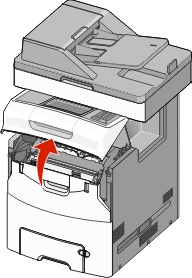
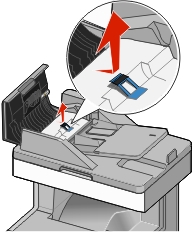
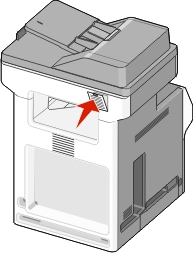
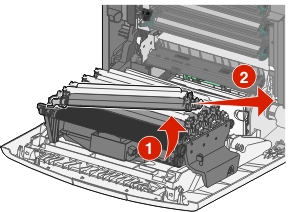
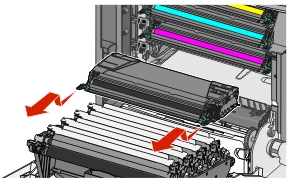
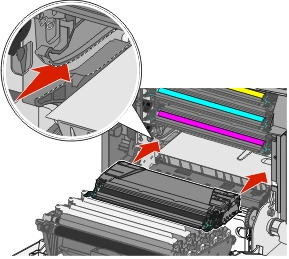
Pull the green tabs of the specified cartridge up and out to remove the cartridge from the printer.
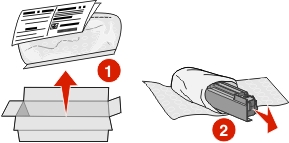
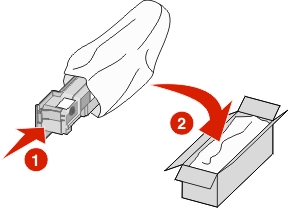
Unpack the replacement toner cartridge.
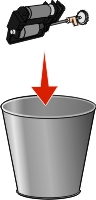
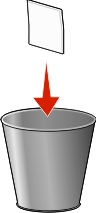
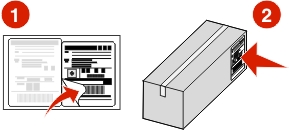
Place the old cartridge in the recycling bag.
Place the bag in the shipping box used for the replacement part.
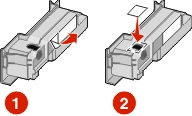
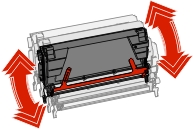
Shake the replacement cartridge front-to-back and side-to-side to redistribute the toner.
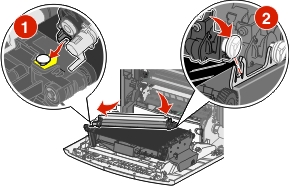
Remove the red packing strip from the cartridge.
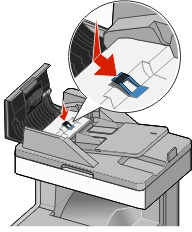
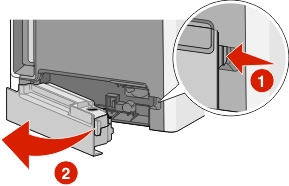
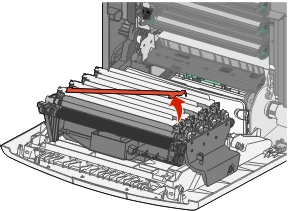
Insert the cartridge into the printer.
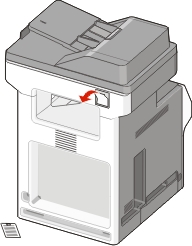
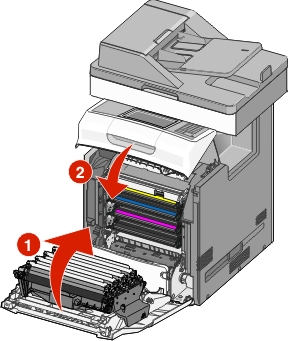
Close the front door, and then close the printer top access cover.
Note: When print becomes faded, order a new toner cartridge immediately. A message on the printer display specifies what color cartridge is low in toner. You can try to extend the life of the cartridges by pulling them out of the printer and shaking them to redistribute the toner. |
Note: The printer comes with a spare separator pad and air filter, located under the scanner. To access the spare parts, remove the slotted screw. |
![]() | ![]() |
Note: It is recommended that the ADF area and parts be cleaned periodically. |
Turn the printer off, and then open the ADF cover.
Replace the pick roller assembly, as shown.
![]() | ![]() |
Dispose of the old pick roller assembly.
With the ADF cover still open, pull up on the separator pad to remove it.
Replace the separator pad.
Dispose of the old separator pad.
With the ADF cover still open, pull straight up on the pick pad to remove it.
Replace the pick pad with a new one, and then discard the old pad.
![]() | ![]() |
Open the flap to access the sensor lens underneath, and then wipe the lens clean.
![]() | ![]() |
Close the flap, and then close the ADF cover.
Locate the air filter on the back of the printer, and then remove the cover.
Remove the old air filter, and then discard it.
![]() | ![]() |
Replace the air filter, and then replace the cover.
![]() | ![]() |
Turn the printer on.
Locate the waste toner bottle release button on the left side of the printer.
Press the release button to the left, and then pull the waste toner bottle out to remove it from the printer.
Unpack the replacement waste toner bottle.
Peel the seal from the side of the full waste toner bottle, and then place it over the hole to seal off the waste toner bottle.
Place the sealed waste toner bottle in the recycling bag.
Place the bag into the shipping box used for the replacement part.
Peel the recycling label off and place it on the shipping box.
Insert the new waste toner bottle into the printer.
Open the top access cover, and then open the front door.
![]() | ![]() |
Warning—Potential Damage: To avoid overexposing the photoconductors, do not leave the front door open for more than 10 minutes. |
Pull the specified photoconductor up, and then slide it to the right to remove it from the printer.
Unpack the replacement photoconductor.
Align and insert the left end of the photoconductor, and then press the right end into place.
Remove the red packing strip from the top of the photoconductor.
Close the front door, and then close the top access cover.